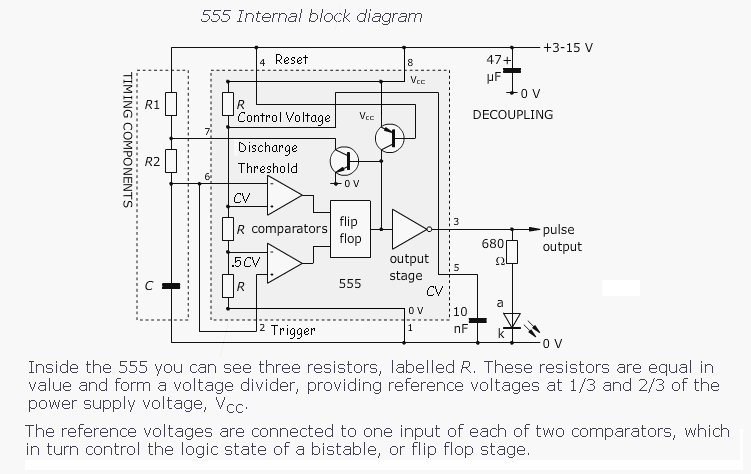
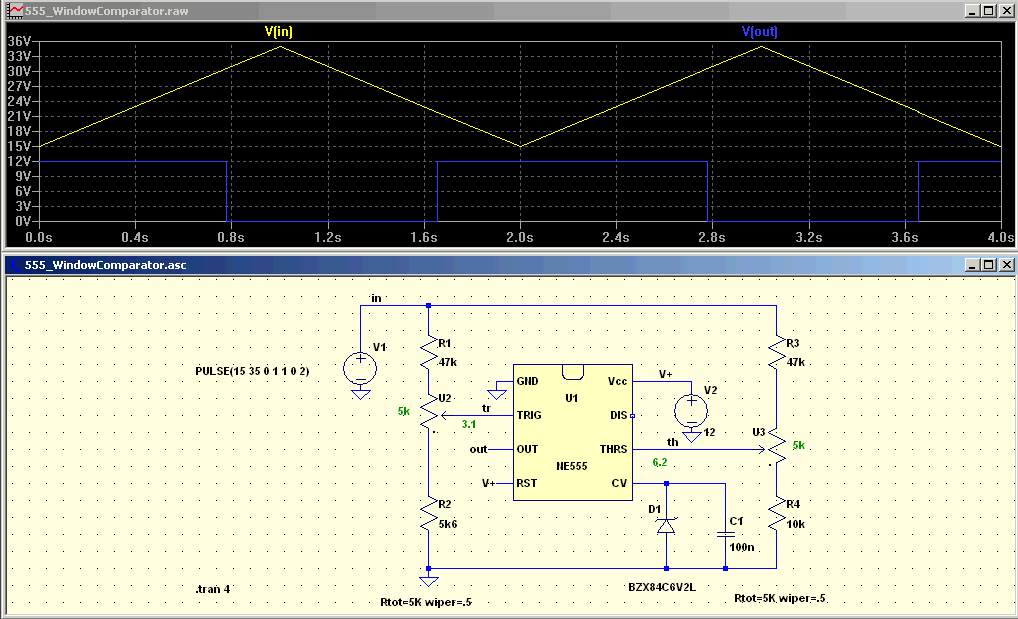
Constructing, Repairing and Charging Lithium battery packs
Posted: Sun Mar 02, 2014 9:47 am
When I bought my Rockwell Oscillating Tool, I got another set of batteries with the replacement tool:
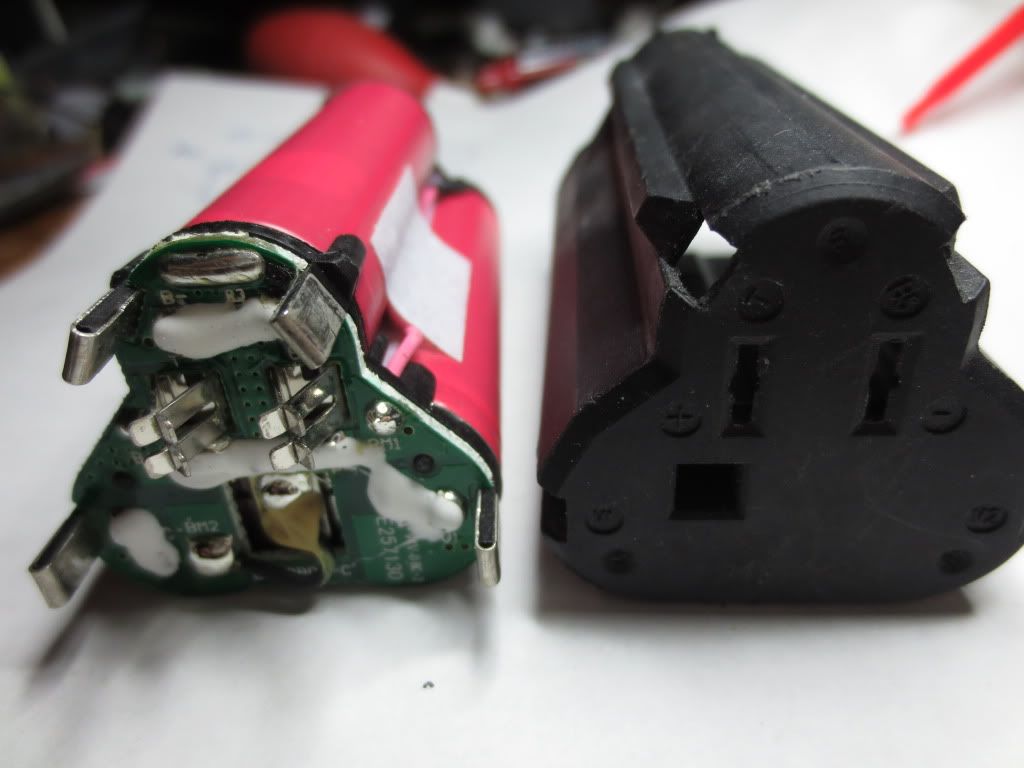
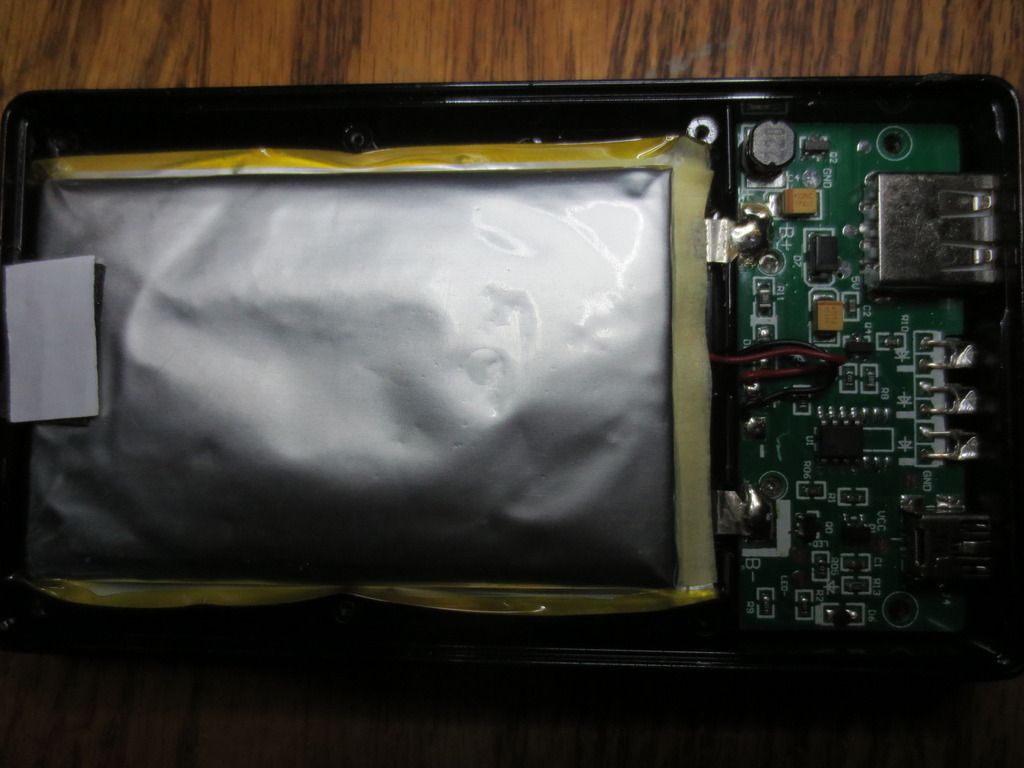
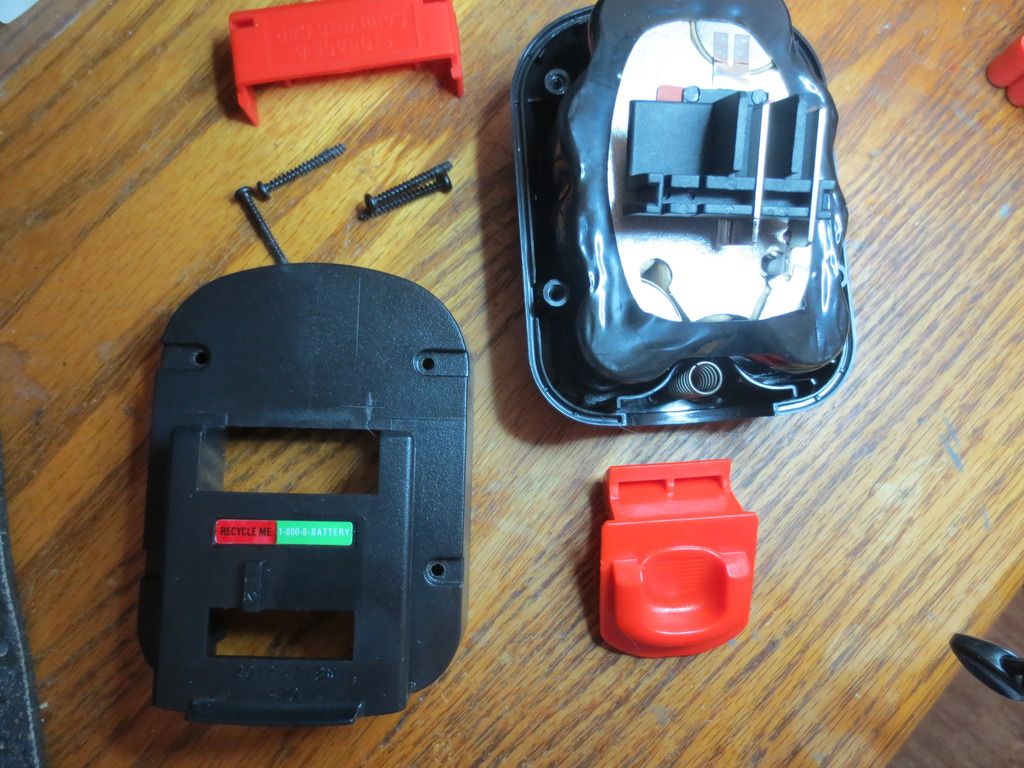
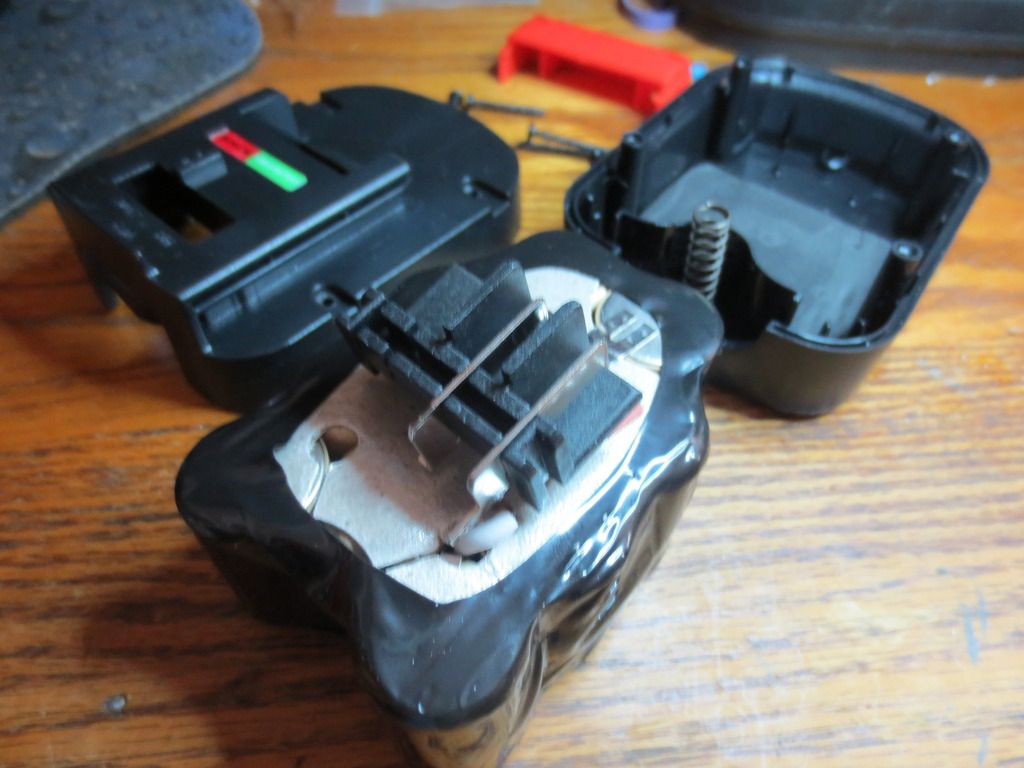
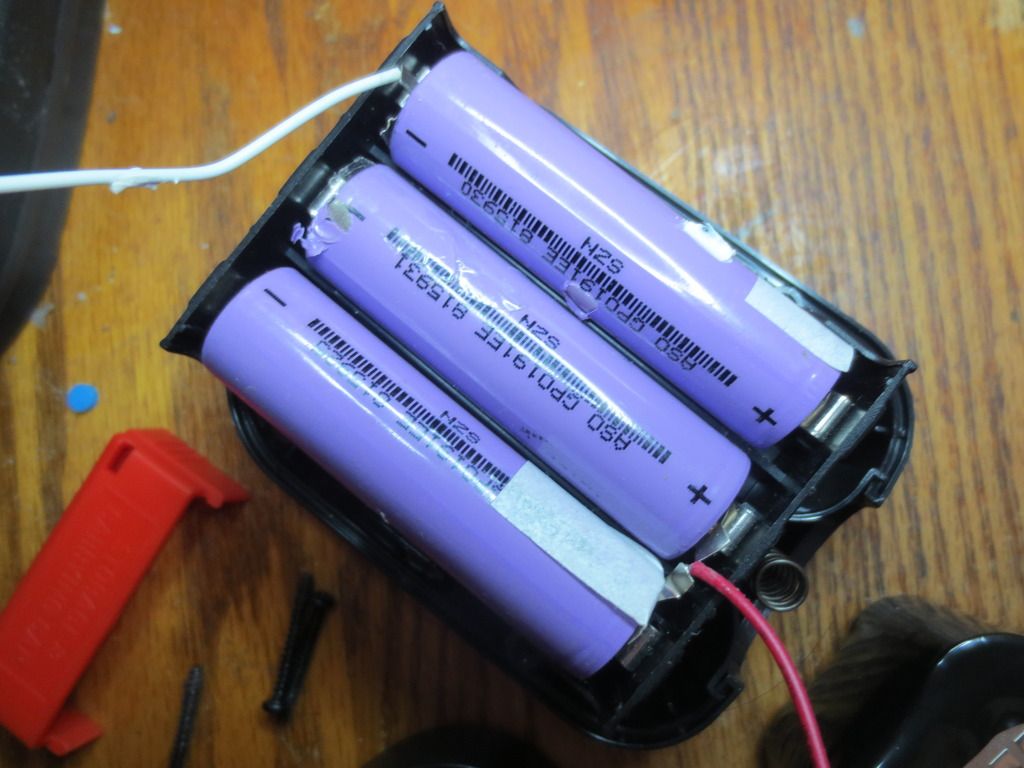
Both of the batteries in the replacement tool were already bad enough that they only lasted 15 minutes, so I
decided to take one of them apart to see how it was constructed.
The 11 volt 3 battery packs also came with an extra charger that uses side tabs to monitor each battery:
I mapped out which tabs were connected to each battery for reference later. I figure I can use the other charger
to charge batteries for something else. I have a 12 volt drill and hand vacuum that may need battery packs someday.
The tabs monitor the separate battery voltages during the charging process, yet allow the series battery
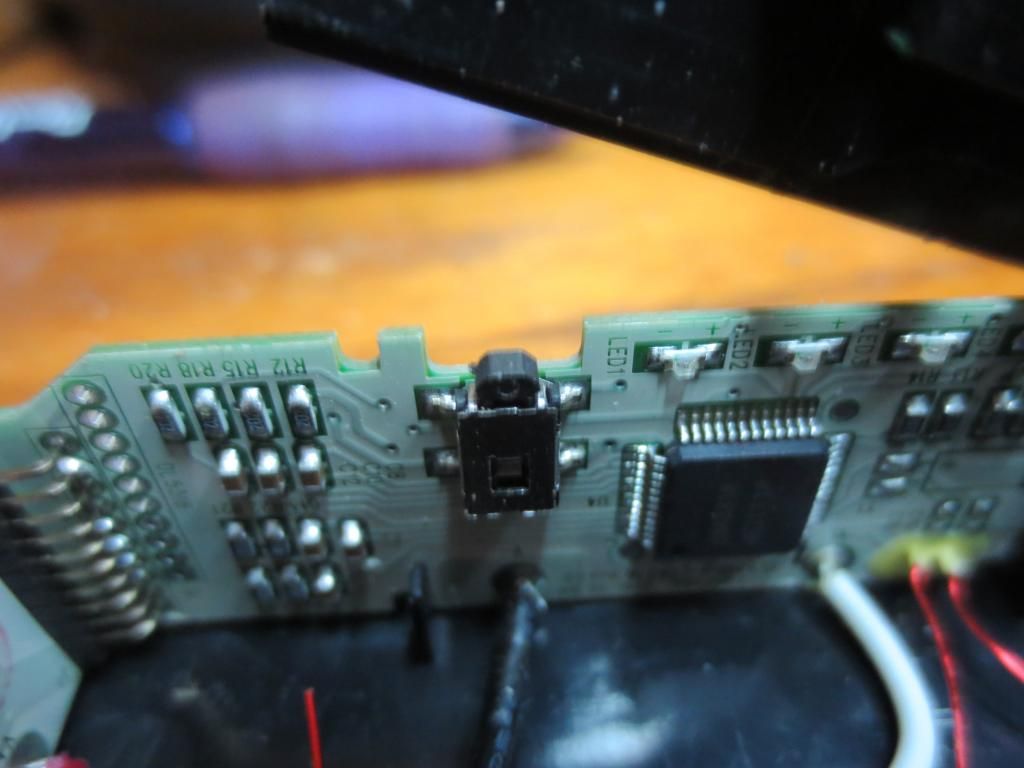
connection when the battery is actually in use. In this tool, the battery protection tool is also used to
determine when the battery needs charged and flashes the work light and shuts it off.
Here's the large Rockwell charger circuit. The raised board has the 4 colored wires that go to the battery
pack with2 larger wires going to plus and minus. Yellow is A and blue is B in my drawings:
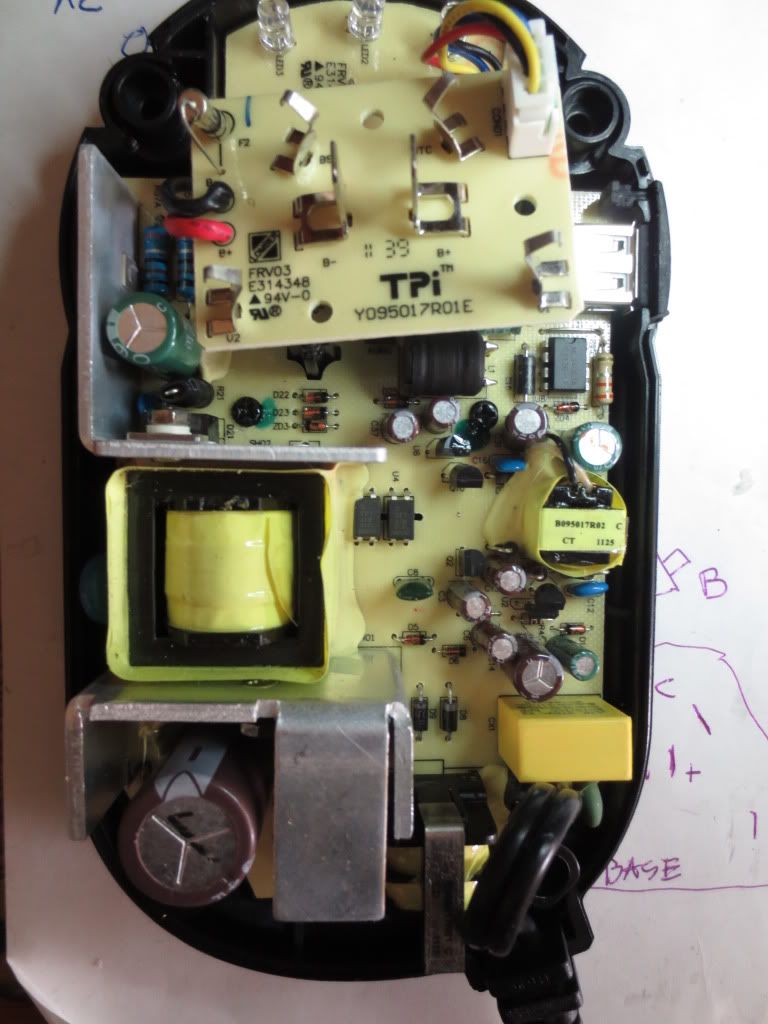
I can't imagine trying to add this big circuit to anything! The LED's on top tell the charging status of red
or green. It also includes a USB port for charging a cell phone on a work site. I'd need a 6 wire output
socket to use the unit to charge 3 battery packs as there are 2 main battery supply wires too.
A monitor circuit turns everything off. I'll have to investigate further to see if I need the main
battery cables with the unit
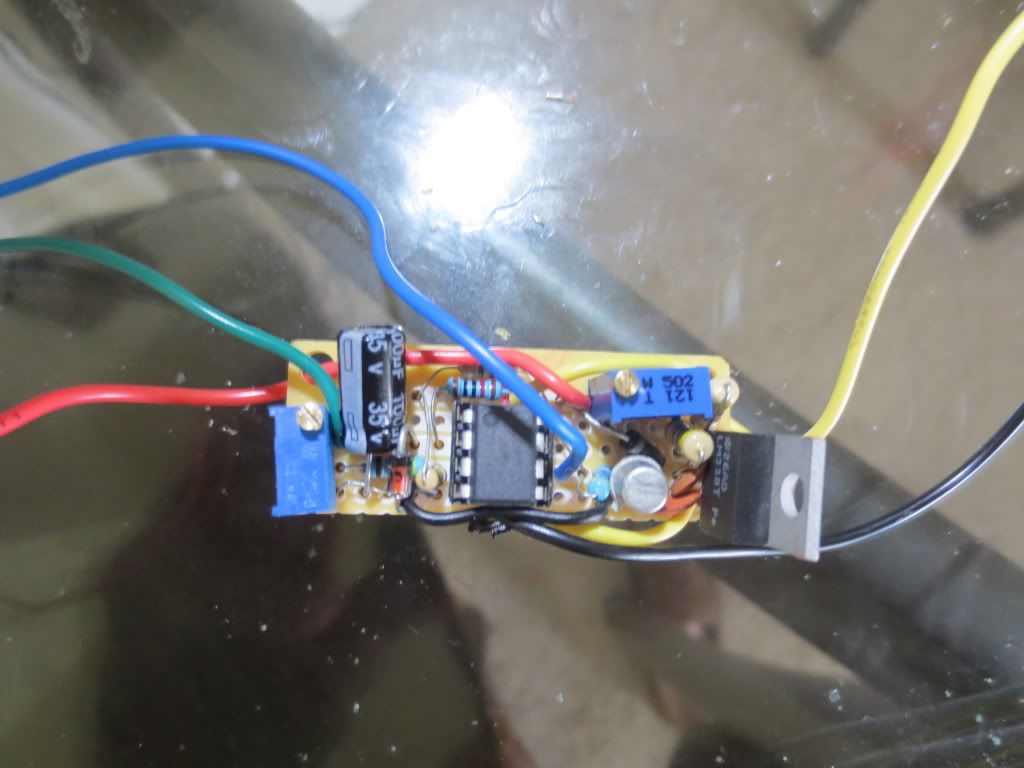
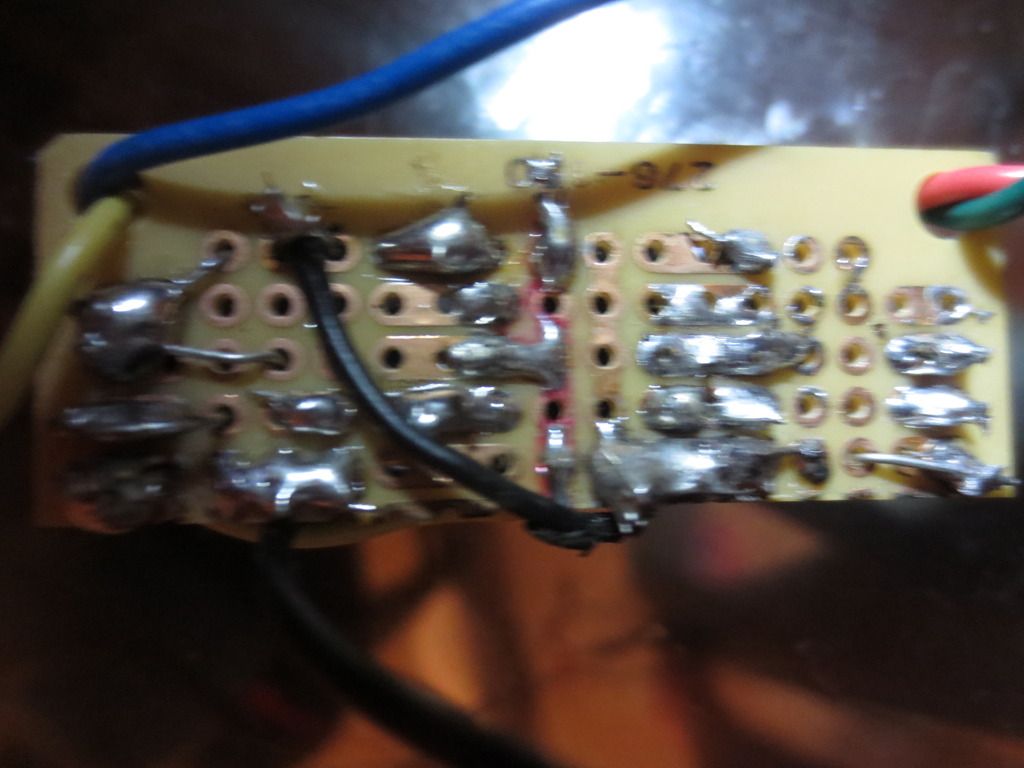
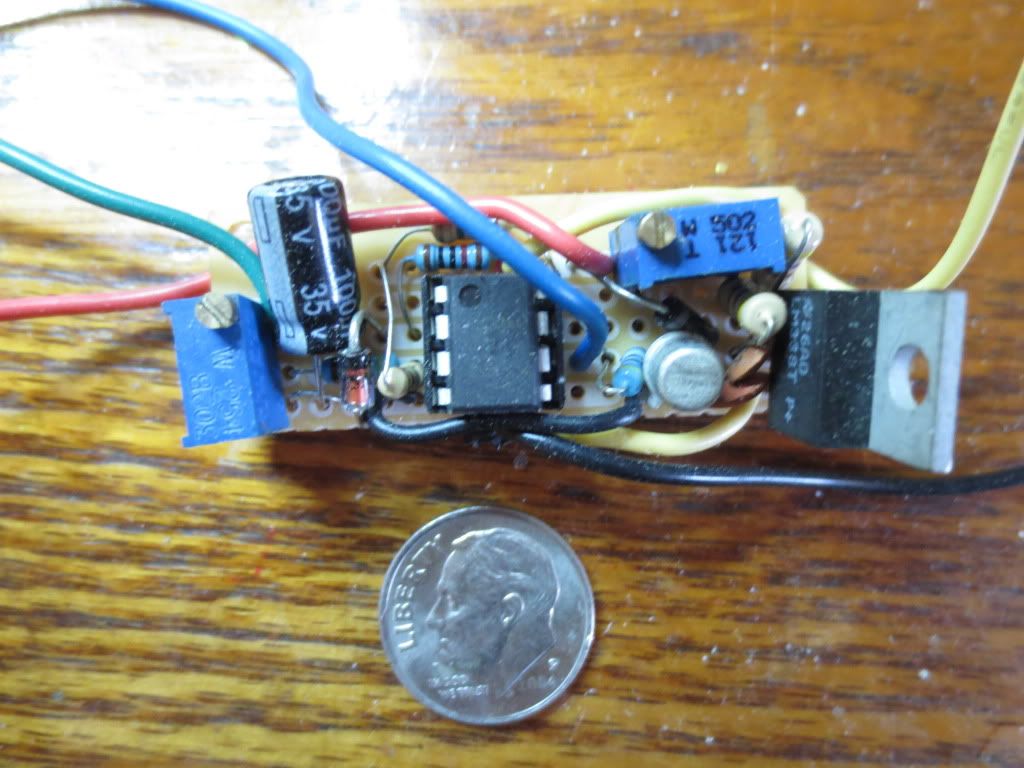
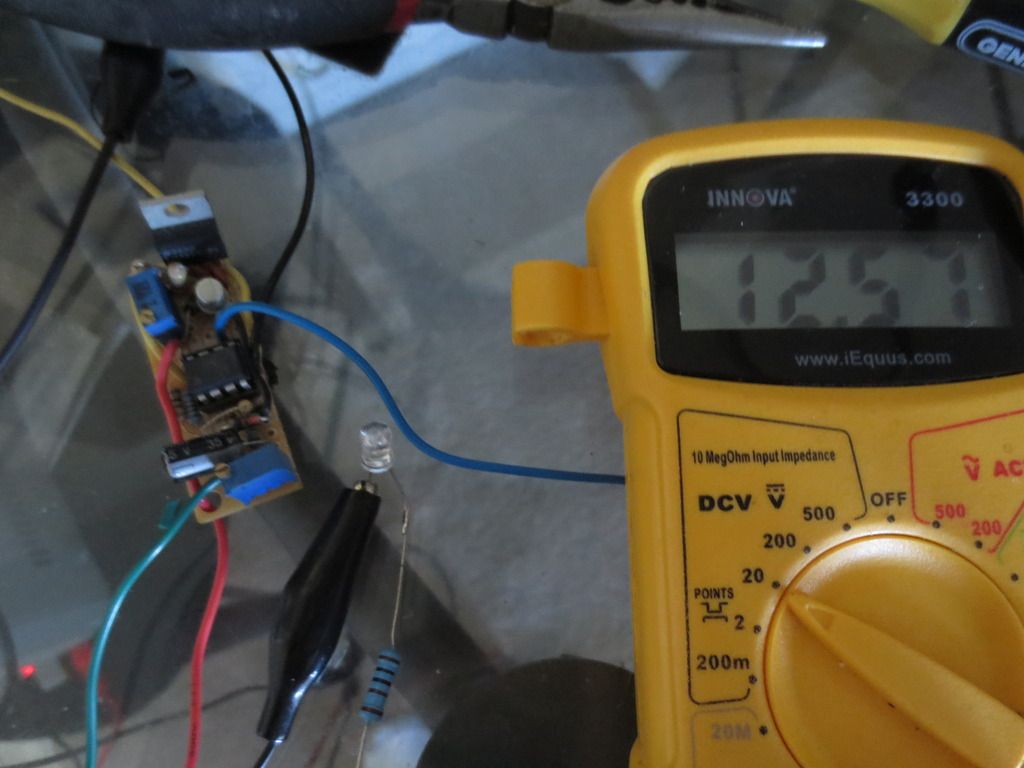
I was able to purchase a charging protection circuit that can also be used in the tool to protect the
batteries from excess discharge, shorts or overheating.
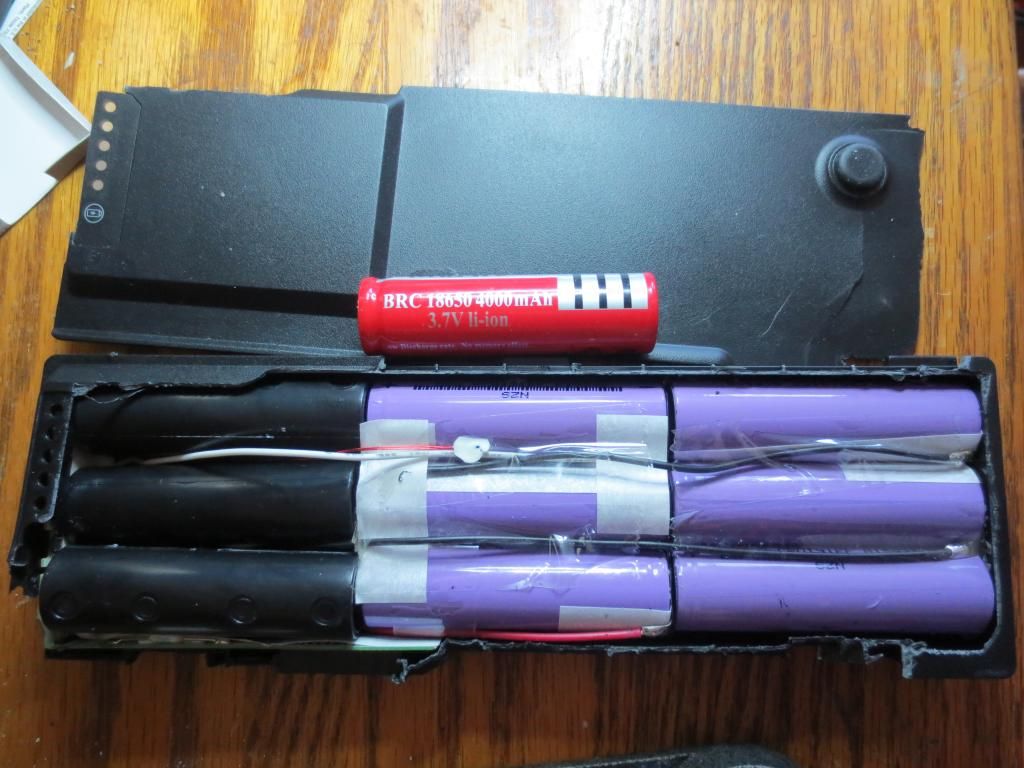
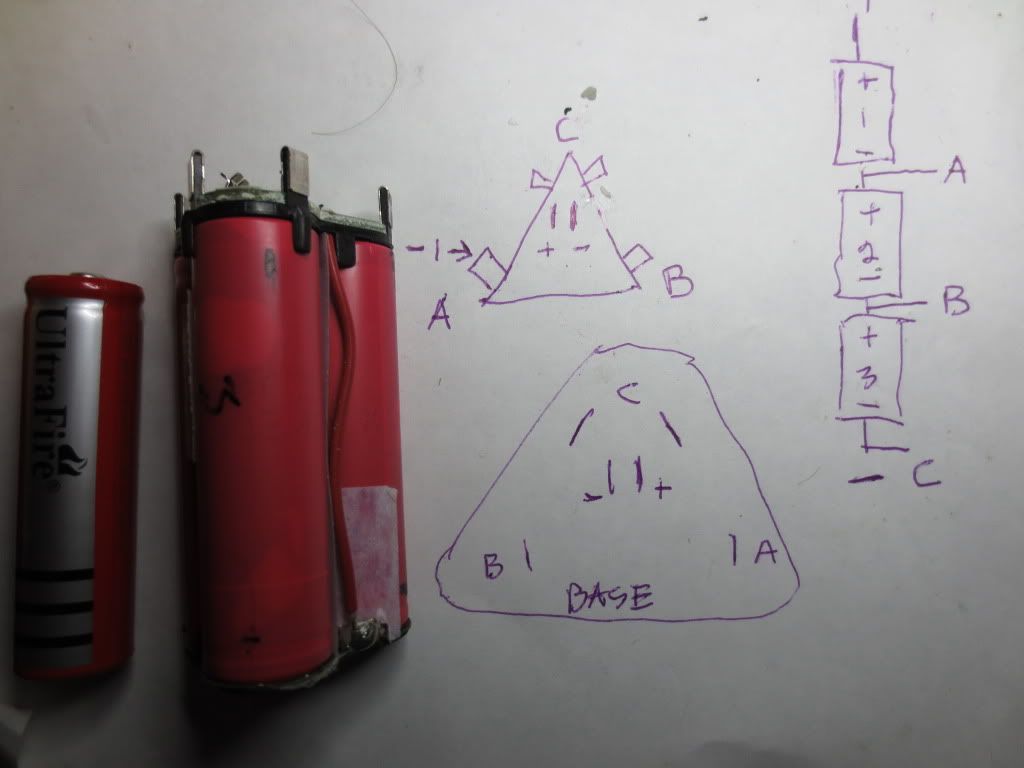
The triangular shape looks like it was made for Rockwell:
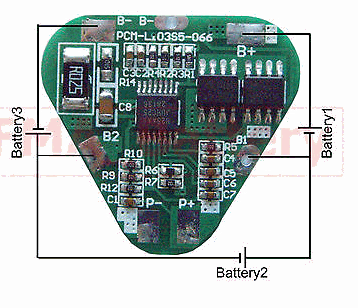
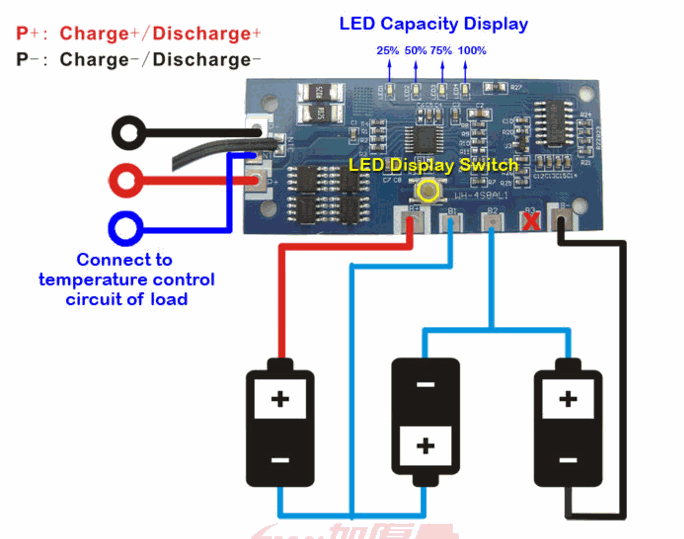
The P+ and P- pins are wired to the load and a maximum charging input voltage of 12.6 volts.
The circuit board is made specifically for triangular 3 piece 18650 battery packs. When the batteries
are charged, the circuit limits current, voltage and heat and charges each battery separately as needed.
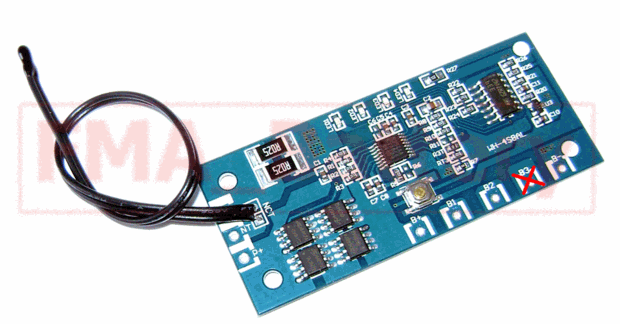
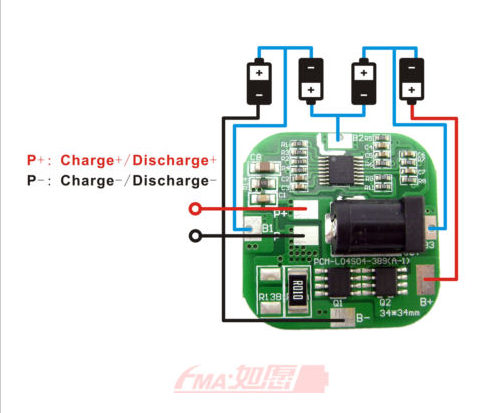
Here's a 4 battery charge and discharge Protection Circuit Module:
Current prices are about $7 on Ebay.
Warning! Do not try to charge Lithium series battery packs without this protection!
Fire or injury could result!
P+ and P- connections are to the load and the charging input so existing DC charger connections
to tools should be OK. Charging protectors allow any DC charging voltages up to 20 volts. Naturally
larger pack protectors allow higher voltage.
My B&D drill uses a 12 volt detachable battery pack, but the charging input is in the drill handle.
Since the tool cannot hold the protector circuit, I will put it in the pack to receive charging
voltage from the tool or a separate pack charger.
If a tool charger is AC, make sure that the charging input is rectified to DC before it gets to the battery protector!
Both of the batteries in the replacement tool were already bad enough that they only lasted 15 minutes, so I
decided to take one of them apart to see how it was constructed.
The 11 volt 3 battery packs also came with an extra charger that uses side tabs to monitor each battery:
I mapped out which tabs were connected to each battery for reference later. I figure I can use the other charger
to charge batteries for something else. I have a 12 volt drill and hand vacuum that may need battery packs someday.
The tabs monitor the separate battery voltages during the charging process, yet allow the series battery
connection when the battery is actually in use. In this tool, the battery protection tool is also used to
determine when the battery needs charged and flashes the work light and shuts it off.
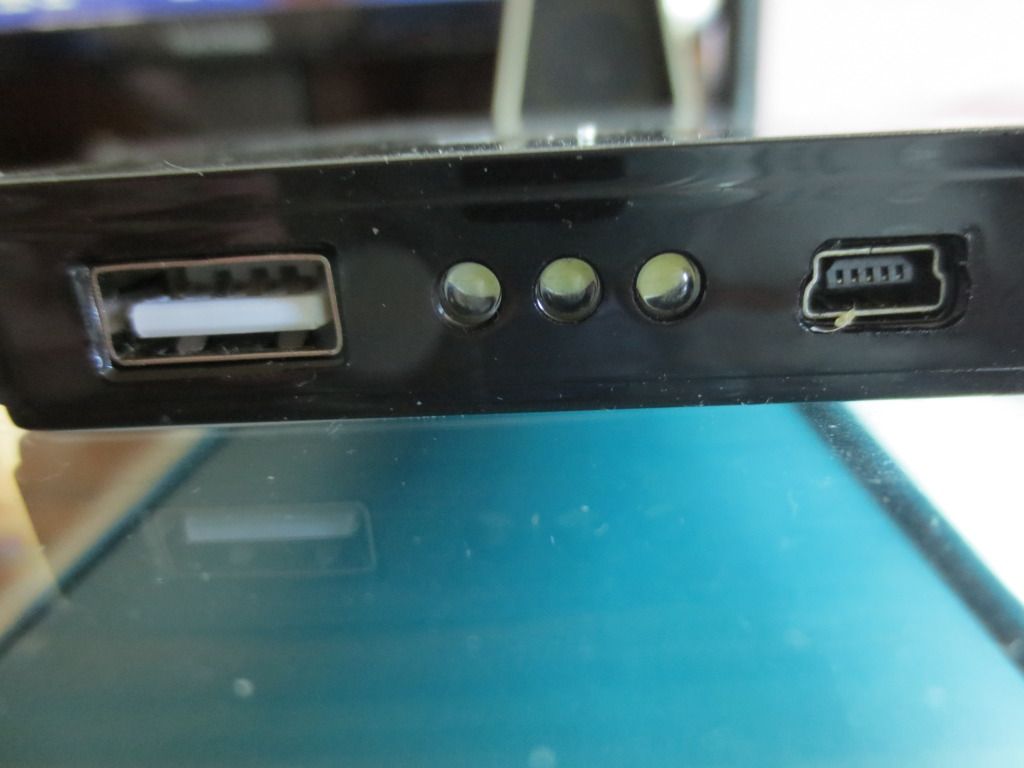
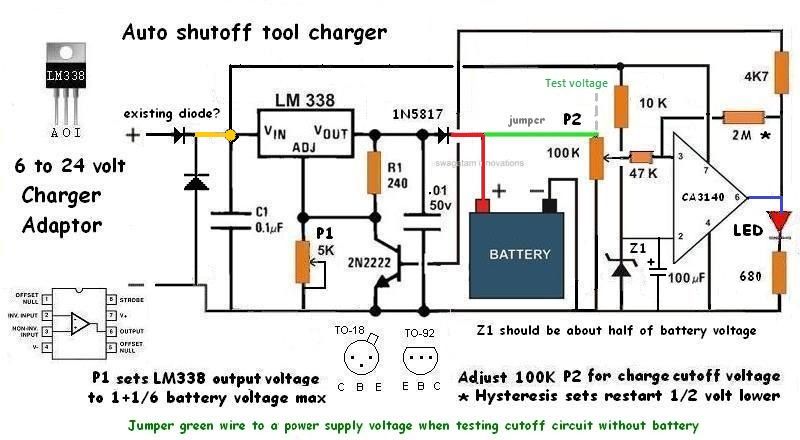
Here's the large Rockwell charger circuit. The raised board has the 4 colored wires that go to the battery
pack with2 larger wires going to plus and minus. Yellow is A and blue is B in my drawings:
I can't imagine trying to add this big circuit to anything! The LED's on top tell the charging status of red
or green. It also includes a USB port for charging a cell phone on a work site. I'd need a 6 wire output
socket to use the unit to charge 3 battery packs as there are 2 main battery supply wires too.
A monitor circuit turns everything off. I'll have to investigate further to see if I need the main
battery cables with the unit
I was able to purchase a charging protection circuit that can also be used in the tool to protect the
batteries from excess discharge, shorts or overheating.
The triangular shape looks like it was made for Rockwell:
The P+ and P- pins are wired to the load and a maximum charging input voltage of 12.6 volts.
The circuit board is made specifically for triangular 3 piece 18650 battery packs. When the batteries
are charged, the circuit limits current, voltage and heat and charges each battery separately as needed.
Here's a 4 battery charge and discharge Protection Circuit Module:
Current prices are about $7 on Ebay.
Warning! Do not try to charge Lithium series battery packs without this protection!
Fire or injury could result!
P+ and P- connections are to the load and the charging input so existing DC charger connections
to tools should be OK. Charging protectors allow any DC charging voltages up to 20 volts. Naturally
larger pack protectors allow higher voltage.
My B&D drill uses a 12 volt detachable battery pack, but the charging input is in the drill handle.
Since the tool cannot hold the protector circuit, I will put it in the pack to receive charging
voltage from the tool or a separate pack charger.
If a tool charger is AC, make sure that the charging input is rectified to DC before it gets to the battery protector!