By Qasir <ultimateab@hotmail.com>
Ever seen a cool 3d landscape and wondered how it's done? Well, I'm about to show you everything you need to make a spiffy heightmapped landscape.
There are several ways to represent a landscape in 3d. The first and most obvious way would be polygons; however, you would need a very high number of polys to make it look any good, which is out of the question (especially in qb).
Secondly, you could do it with voxels. Voxels are "Volumetric Pixels", basically a 3d version of a pixel. Voxels can look very nice, and allow for overhangs and other interesting stuff in your landscape. The downside to this is the extreme memory requirements, i.e. at least one byte per voxel. Again, due to our speed and memory limitations, this would be tough.
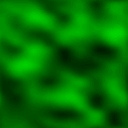
Last up we have heightmapping. What does this mean? Well, as the name suggests, it's a map of heights, hehe. Each element of the array tells us the height of that piece of land. There are many programs to generate these for you, but it's quite easy to do yourself by drawing a x*y block of random pixels and blurring them. Here is the heightmap I used for my "Final Frontier" demo:

I simply load that image into a 2d array with 128*128 elements, and then I get the heights like so:
y=hmap(x,z)
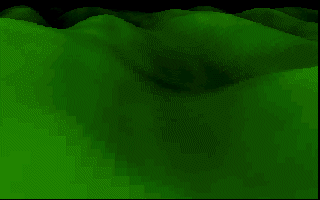
Here is this heightmap rendered in 3d:

So how do we go about rendering this? Well, there are once again several ways. I wont go into them all, so I'll just explain the method I used for my latest ones :)
This method allows us to rotate in one dimension (looking from side to side) but also gives pretty good speed.
Note: U and V are texture x and y co-ordinates...

LA and RA are the two halves of the players field of vision.
LA = ViewingAngle - 90degrees
RA = ViewingAngle + 90degrees
Using this diagram, we can work out the following formulae:
U1 = px + cos(LA) * z
V1 = pz + sin(LA) * z

U2 = px + cos(RA) * z
V2 = pz + sin(RA) * z
These are the U and V start and end points for each "strip" of the players field of vision.
Ok. Now we've just got to implement this. The easiest way to go about it is to make your renderer work with a system in which 90 degrees is equal to the x resolution of your screen. So, for SCREEN 13, our "circle" would consist of 1280 degrees. This way our fov = 320 pixels. Makes things just a tad easier.
For those of you out there who cant be bothered to figure out how to do this, here is how we build our SIN/COS tables.
FOR n = 0 TO 1280
r! = n * pi / 640
sint(n) = SIN(r!)
cost(n) = COS(r!)
NEXT
If you don't know the value of pi, I believe you can find it in the QB help...
Now we're ready to draw! What we need to do is draw all the "strips" of the players field of vision...however, due to the limits of our computers we can only draw to a certain distance. I tend to use 1024 as my maximum draw depth. Its easy to do this with a FOR/NEXT loop from 1 to maxdepth.
Now for every z, we calculate our u/v start and end coords using the formulae above and our sin and cos tables. Don't forget that 90 degrees of our circle is 160 in our engine! So how do we get the u and v for every individual pixel? We interpolate. This means we have to get from u1/v1 to u2/v2 in Xres steps. So, after we have our u and v co-ords we calculate the size of each step by dividing the distance between the start and end by xres.
For SCREEN 13:
stepu = (u2-u1) / 320
stepv = (v2-v1) / 320
Now we enter the X drawing loop. For every x, we need to do the following:
Kaboom! One sweet looking landscape, running like a charm. The only downside is that the heightmap tiles fairly frequently, as it is fairly small. There are a couple of ways to get around this...you could scale the start/end u and v co-ords to make them smaller, however if you scale them too much the landscape will become "blocky". But, if you do this it also allows you to render faster as we don't need to step through the z's so slowly.
The other solution would be to use procedural textures such as perlin noise. However, this isn't really suited to realtime applications as it is slow. It would look great in a non-realtime renderer though, as you get infinite detail, no size limits and the chances of it ever repeating are bloody unlikely.
Well, as far as I can see this article is over. I hope I didn't forget anything major, but if you have any trouble, or want to talk about anything coding related, you can always email me at ultimateab@hotmail.com or find me on EFnet.
Have fun!
-Qasir