
| Want to print? Use this version Back issues are in the Archive Go back to the main site Download a zip version |
REM 'Letter from the Editor |

By ZKman
"NO! Not that time, you sickos!" |
Como estas? It's that time of month again... NO! Not that time, you sickos! It's time for the new qb:tm. This month we're trying to put together a compilation worthy of last issue (which is my favorite, btw), and think we may have succeeded. First, White Shadow put together an article this month on Game Programming Tricks in Memory. Everything from the BLOAD screen load in to setting up QBV style offsets is included! Also, Petter Holmberg brings home the bacon again with Part 5 in the ever-growing series whose size is concerning multiple environmentalists ^_^. MA SNART provides a fix of last month's rotation code and improves upon the formula with a complete program!, while 19Day shows ya how to whip up s'more fly tunes with WinJammer for yer game again this month. |
Playsta 2, DarkDread and more! |
Meanwhiles, we gots another kickin' preview for you guys this month. Once the most famous of all qbasic programmers, and thought to have disappeared, the man himself, DarkDread, has hooked qb:tm up with a total insight into his latest "Story RPG", called Eternal Frost. Some of you may remember that this game was featured last month in the gallery, and hopefully some of you will be drooling in anticipation after this article. In utter un-qb coolishness this month, the specs for Playsta 2 have been released. With all effects turned on (inluding Bezier curves! Not even Voodoo3 does these!), it STILL can crank out 20million polys/second. Figuring that a game probably uses 50% of hardware on graphics, a game running at 40 fps will be able to have 250,000 (!) polygons per frame! Members of Square have said that "only 5 companies in the world can even afford to make games that take full advantage of PSX2". There has been concern about the price of such a system, and how Sony intends to crank out that many wafers at .18 micron, but, as you all remember, when the specs for original Nintendo were released, many people vehemently argued that "at current, an 8-bit machine of these specification can not be made at mass-market prices." So, all of you that think Sony can't do it, enjoy Sonic Adventure. I'm already savin' my $300 so I can play Final Fantasy 9...on a PSX2. Right, then. My editorial space has come to a close. Disagree with me? Hate my magazine? Write me, damnit! Ciao...Oh, yeah! Thanks to ChUcK for this new super-speedy web space. For those of ya that don't know, we can now be found at come.to/qbtm or qbtm.quickbasic.com. See ya' next month!
|

Compiled by ZKman
|
Qbt50 done for good...wait, strike that...
Needless to say, as the qb:tm news peoples were thinkin' up some kind of neato-keen title to announce the disparaging news, the qbt50 will remain open for at least another year! And why this turn of events? Many an email of begging reached Steve and, y'know, his mail server was complaini... umm, I mean that a large amount of mail was sent to Steve requesting the qbt50 remain open.
Based on the changes at the qbt50 in the last months, here's the
Qb:tm predictions for the future of qb...
(BREAKING NEWS! Just as we're going to press, I find out that the qbt50 is going to get a new look and start supporting other languages in addition to qb! Can I call 'em, or what?) | The future of the Top 50, NES Emu's, and svga |
|
More on Interplay's BASIC Interpreter
NES Emulation in Qbasic
But that's not all. Yet another emu has come from QBASIC. Called DRR-NES, this emu reportedly gets in the area of 15fps on a 233 and can crank out most of the NES functions. 15fps? Hey, that's good for qb! So there! Check out the Mario 3 goodness at drr.dragonfire.net
quickbasic.com move begins
Qlympics: Countdown continues
PMODE compiler?
The latest on the libs.
No more qb from 3d master Marko?
SVGALib schtuff
Oops! God willing, this issue will be error free. Fell free to berate me with all the things we did wrong at this address |
SFB2v1.04, MOTG Project, and tons more! |
Latest Game updates:
|
Our hombre Pasco sent us some info on his terrific trio of France '98, Vertical Scroller, and Groov 2. Here's what we can tell you: France 98 is having an overhaul in the way shooting passing is done. The characters now have full rotation, which should make the shooting less of watching the two colored lines, and more of grippin' and rippin'. Groov 2 has some dead fast rotation code. I've seen a test-wireframer, and I believe it was moving around 30,000 points a second. The texture-mapper is almost done (the entire game will be filled poly's, unlike Groov 1's wireframe 3d), and this product should move up the queue soon. Finally, Vertical Scroller is lookin' amazing. A few different AI's and some lovely graphics set it apart. Check out a new shot in the Gallery SFB2v1.04 came out recently, making rave reviews with me for a beefed-up AI and the removal of the cheap "kick out of the ring" Win. Add in better lookin' blood and some more particle effects, along with a secret character, and this is a must upgrade. Another update occured with Seav's "The Labyrinth". This "first person tile engine" (think Legend of Lith 2, but as smooth scrolling as Doom) went to v1.7 with the latest update, which added 5 groovy tilesets, and a better interface. We're looking forward to the version with the guns, though. ^_^ Unbelievable, but Mr. TheGame himself Tsugumo has returned to QB! He's workin' on a game called "TheifGame" which is essentially a mini-RPG about a Theif. Not only can you steal stuff from people's houses, but the spell effects for this one are utterly amazing! The fire spell causes two huge blasts of fire to literally erupt from the ground and splash the enemy in a 2d delight. Check out more on this game at Tsugumo's Lair This month in the shorts section: Work progresses on the Dark Ages 2 juggernaut. This month hasn't seen many major breakthroughs, but work on NPC's has been progressing smoothly. I personally can not wait for the much touted battle system to be in effect. A new engine demo has been released featuring moving NPC's. Get it at the the DA2 Page... Magik's Last of the Legends RPG has seen some new work, mainly in the area of map dev, being completed. Look for a demo of this title to be released soon... Dunric is workin' on an RPG called Twilight of the Valkyries. We're gonna keep our eye on this, as it has a fly looking battle engine in the works.... Finally, Project RT, the much touted game from Enhanced has seen some major breakthroughs. First, they've decided to make it into an "action strategy RPG" starring Cuby and Coby, the two crabs from Wetspot 2. The first level will be a bloody affair where you must kill all the monkeys on the level with only your pincers. Yeah!... Then again, this month is the "April" issue. What's so special about April 1st again? That's all the latest news for this month. Remember, if you have any news or rumours, send them along to Qbasic: The Magazine |
![]()

By ZKman

|
Here's what you had to say about last month. Be sure and send us more letters soon! Buy, Shop, Download, anything. Just tell me where to get it. A decompiler for basrun.exe compiled files. Juvenal Brenes Sorry, pardner. Despite your enthusiasm, decompiling an .exe is, as Tek has put it, much like trying to take a cow out of a hamburger. You might end up with the parts, but you won't be able to milk it, if ya know what I'm sayin'. |
![]()
|
I just thought I would comment on the February issue and a few of the other letters featured in it. First off, the assembly tutorial is really good, and I still think it should be compiled into a stand-alone tutorial. Now, there were some comments about libs in there, and you know I can't resist that
kind of argument, so here goes:
Second Point: What language are we programming in here? Hmm...QB. Right. What language are these libs being written in? Hmmm...ASM. Right. Now, if we program all our QB Code ourselves, and then use an ASM lib, then who coded all the QB part of it? Hmm...ourselves! Take a lib, a lib, and a lib, link them together, and run it. It's just a blank screen. Why? Because libs don't make programs, we do. Now I'm not saying that we shouldn't learn assembly because there are all these libs out there, but I also don't think we should HAVE to learn asm just to make a slightly faster qb program. It should be up to the individual. What is the individual doing? Well, I'm using libs for my programs, while at the same time learning asm, so by the end I'll still have a game and know enough asm that when I go on to do my next game, I cna use my own assembly. Then I would be a QB Programmer and an asm programmer. Schweet. 19Day
heya...
Next, I pretty much agree with you on libs. Although I have yet to use one on my progs, that super-fast asm is pretty enticing. If c people can use Allegro, why can't we use dqb? |
![]()
|
Hey! BlueChocobo here. I would like to make a suggestion. Are you ready? I think that you should send the mag out over email. You could use ListBOT or ONElist or something. Then we could read the mag without having to go to the website and print it out! Anyways, just a suggestion. PS: Beware of the Chocobos! BlueChocobo hmm...people send to send some version of this letter every month. Guess I'll explain why this won't happen. Firstly, the mag is...oh...say 300kb zipped. The free lists have a maximum of 10kb or 20kb per mailing. To send out big files would cost mucho dinero, which I don't gots. Secondly, we're hit-greedy, and you're gonna come to our website a lot or else no chocobo greens for you! |
![]()
|
In a recent QbasicMagazine, under the hot list (compiled by zkman), you mentioned an emulator written in qbasic, uNESsential. I'm one of the programmers (I recently joined the team, so my neame isn't on the credits yet) and I can answer the questions asked. It (uNESs... see last month's news -ed) was designed in SCREEN 12 (640x480x16) because the NES's resolution is 256x240. SCREEN 13 is 320x200, which is 40 pels too short. We wanted it to be truly written in 100% basic - no assembly or libraries. Therefore, we chose not to use tweaked 320x240 modes or other popular graphic libraries. The NES is only capable of displaying 16 colors (out of a 64color palette) at a time, so screen 12 works out perfectly. A VGA mode was required to properly emulate the 64 NES colors. We also wanted there to be room for onscreen palette tables and debug information. The next release may include (among other things) an interesting feature that speeds up the CPU time by two, as well as a major fix in opcode. Matthew Leverton Thanks for the clarification. Last month we also said that the colors didn't properly emulate with uNESs. The newest version, v.20, has perfect color |
![]()
|
qbasic: the magazine reserves the right to edit any letter recieved for purposes of clarity and space. But you already knew that.
|
 Here's the results of the Issue 7 survey from Qbasic: The Magazine! We need more people to Vote! So do it! Favourite Game | Last Month | Change 1. Wetspot 2 1 <> 2. Dark Ages (t) 2(t) <> 2. Mono. Shooter (t) 2(t) <> 4. MiniRPG3 -- -- Comments: SFB2 drops off the list for the first time in quite a while. MiniRPG3 rejoins the top, and Monospace continues to do well. Favourite Utility | Last Month | Change 1. DirectQB 1 <> 2. QMIDI 2 <> 3. SpriteShop (t) 3(t) <> 3. PP256 (t) 3(t) <> 5. SvgaLib -- -- Comments: For the first time in memory Dash didn't crack the Top 5. Can the XMS version (i.e. Dash2) save it? Best Upcoming | Last Month | Change 1. Dark Ages 2 1(t) <> 2. MOTG Project 3 U1 3. "Project RT" (t) 1(t) D2 3. TheifGame (t) -- -- Comments: Project RT drops a bit. Sorta strange. You guys weren't impressed by those shots last month? ^_^. MOTG does well, and bunches of titles fall just short of making the list. Vote today by emailing your votes for:
|
You need this stuff! |
Must Downloads returns for another showing. Nothing new made it to
the list this month. Mebbe next time. Everyone knows that
there are a god-awful amount of qb games out there, but what's worth downloading?
These, my friend. Here, you'll find a list of the best of the best in QB progs. See
something that should be here? Tell us and we'll check it out. You HAVE to have this
stuff!
|
|
Puz A puzzle game by The Brain where you must flip numbers in rectangular groups until you get them in order. Decievingly addictive!
Absolute Assembly
Dark Ages Groov Buggies Lianne...in the Dark Crown Monospace Shooter Wetspot & Wetspot 2 SFB2 PP256 DirectQB/DashX/Blast! QMIDI4.1 Pb3d |

|
Heyas. This month's Site of the Month is a very special one to me, because, it's disapearence led to the beginning of qb:tm. Back in the day, when PowerBasic was something that was coming soon, and svgaqb was godly, there was a fairly popular text-based Basic magazine called Basix Fanzine. After issue 7, though, it seemed to disapear and I was unable to find it. So, as a replacement, I began qb:tm. Welp, it turns out the Basix Fanzine did NOT vanish (although there hasn't been a new issue since last October...mebbe it "vanished" a second time!), as I found it recently at a site's links page. Although more focused on the newsgroup and powerBasic set (with a lotta math intensive articles chucked in), it's still a good read. And check out the "old" issues to see what the peak of qb tech was. | qb:tm's inspiration... |
![]()

By Petter Holmberg
This month: Hardware I/O |
Welcome to the fifth part of my assembly tutorial series! During the last months, we've gone through some rough material, but now you should know almost all the basics of assembly programming. We've looked at calculations, memory transfers and flow control. This is enough to make some really cool assembly routines. But there are other aspects of programming in assembler. In this part we will look at the possibilities to do a little more with the assembly language. You can certainly do more than manipulate numbers and the memory in asm, so that's what we're going to look at this time. And maybe we'll also pick up some extra info that we lost on the way here... |
Earlier parts of Petter Holmberg's assembly series can be found in the Archive. They are in issues 4 thru 7. |
Now you may want to get some information about the current position of the mouse cursor and the state of the mouse buttons. Subfunction 3 takes care of this for you:
MOV AX, 3 ; Access subfunction 3 of int 33h (get mouse status)
After this call, BX should tell you the current state of the mouse buttons. If bit 0 of BX is set, the left button is currently being pressed, bit 1 returns the state of the right button and bit 2 returns the state of the middle button if you have a three-button mouse. The current coordinates of the mouse cursor can be found in CX and DX. CX contains the horizontal coordinate and DX contains the vertical coordinate. Another interesting interrupt is interrupt 21h. This interrupt has tons of subfunctions installed by DOS. And don't worry Win95/98/NT users, you have them too! Int 21h has many DOS-assigned subfunctions. For example, you can change the default directory, open and read/write data in files and so on. But there are also a couple of functions that does some other neat things for you, such as printing a string of text on the screen. Let's try it out! Int 21h, subfunction 09h can be used to print a string on the screen. Here, you'll need to put the number 09h in the AH register, the segment address of the string in DS and the offset address of the string in DX. The string must be terminated with a $ sign, so if you want to print "Hello World!" on the screen, the string should be: Hello World!$. This example routine could print such a string on the screen for you.
MOV DX, [BP+08] ; Set DX to offset address of string
Another interesting interrupt is interrupt 10h. It contains subfunctions initialized by your BIOS. This is a great way of creating compability between different PC:s Even if two PC users have different BIOS manufacturers with hardware working in different ways, they can both access the same functions in the same ways, using the same interrupts. The difference lies in the actual machine language routines assigned to those interrupts, but the user doesn't need to worry about them. Int 10h contains many interesting subfunctions for accessing video services, such as the ones you use to change screen modes. Through int 10h you can access many more screen modes than you can do using the SCREEN keyword in QB, such as hi-res VESA modes! The ultimate resource when you need to look up information about interrupts is Ralph Brown's interrupt list. No assembly programmer should be without it! It tells you what the different interrupts and subfunctions do, what you should set the registers to when calling them and what data they return. You can download it from the resources section at the Enhanced Creations website, or from many other sites. Just search for it and you'll get thousands of hits! It's a big download, but it's worth it! I remember when I first discovered interrupts. It was so much fun, because I instantly got access to functions and I/O devices that aren't possible to access in QB. Interrupts give you a lot of power as a programmer, and they make life a whole lot easier for you if you program in assembler. I'll leave you to explore the world of interrupt functions yourselves now. It can be really fun! Int 10h, 21h and 33h are good starting points. I said before that it was possible to do much more with interrupts than this. Actually, you can do a lot more. It's possible to tamper with hardware interrupts as well, and if you want to, you can make your own interrupt functions and override existing interrupts with your own routines! The example program this month is a good example of advanced interrupt handling. I though we should write our own keyboard handler. As you may have noticed when working in QBASIC, the keyboard handling is great, unless you want to make an action game. It's impossible to detect multiple keypresses with INKEY$, something you often need in games. We can solve this problem with a little assembly code. The keyboard is controlled through int 09h, and it's a hardware interrupt that is called whenever a key is pressed or released. If we can override this interrupt routine with a keyboard routine that we write ourselves, we should be able to handle the keyboard input in a more game-oriented way. The first thing we need to know is how we can make int 09h run our assembly code instead of the one it's running right now. Well, believe it or not, there is an interrupt subfunction assigned to make just this change for you! This subfunction lies under interrupt 21h. It can change the memory address of the code that should be executed when you make a certain interrupt call. However, it would be nice to know the address of the old keyboard routine so we can give it the control back when we exit our program. There's a subfunction under int 21h for that too. But let's begin by writing the actual keyboard handler:
Keyboard code:
PUSH DS ; Push everything we're going to modify on the stack
This is how I've thought the keyboard handler should work: We'll create a QB integer array with 128 elements. Each one will work as a keyboard "flag". So if a certain element is 0, the key with that scancode is not being pressed at the moment, but if it turns to 1, that key is being pressed. All QB arrays has a default offset address of 0, so all the asm routine needs to know is the segment address of the array. But how can we pass this value to the keyboard handler from BASIC? This is not a routine we call with CALL ABSOLUTE. Well, there's a really smart solution to this, but we'll wait with this problem. All we do is to set BX to an immediate number for the moment:
MOV BX, 1234 ; DS = SEG keyboard flag array (currently not implemented)
Now comes the reading of the keyboard status. How do we do this? Through I/O ports of course! Exactly how this works is beyond my knowledge, I've only looked at other keyboard handlers to see how they do it. First we should read a byte from port 60h. We will also set AH to 0 for later use. If the value read from the port is bigger than 127, a key has been released. But first, we'll take care of keypresses:
IN AL, 60 ; Read a value from port 60h
Now it's time to take care of the keyboard array. If the jump to the Release label wasn't done, it means a key has been pressed and we should set an element of the keyboard array to 1. The array consists of two-byte integers, and the number currently in AL is between 0 and 127. So if we multiply AL by two, we should get the correct offset address in the array. We want to write a 1 to this offset address since a key was pressed, so that's what we'll do:
All right, that should take care of keypresses. Now it's time for releases. If a key is released, AL will contain a number between 128 and 255. If we subtract 128 from this, we get a number between 0 and 127 which is what we want. But we don't need to use a SUB here. All we need to do is to mask out the highest bit of AL, and we'll get the same result. We can do this by ANDing the number with 127. Then we'll do the same as we did with keypresses, except that we write a 0 to the array this time:
Release:
Now we're done with the array handling. All we need to do is to exit our interrupt handler and return to the code that was interrupted by it. Well, not really. The keyboard needs some more attention before we can leave it. We need to tell the keyboard that we recieved the information it sent us and that we want it to tell us of later keystrokes too. This is also a matter of I/O port programming that I don't really understand. So let's just do it without asking any questions :-)
Endkey:
All right, NOW we can exit the keyboard handler. All we need to do is to POP back the registers we used and then we use the Interrupt Return instruction, IRET, to end the routine:
POP BX ; Pop back all the registers we used
All right! Now we have a complete keyboard handler except for that problem with the array segment. For some strange reason, this keyboard handler won't run through Absolute Assembly, even though I've made it work before. Since I didn't have the time to fix this problem, I'm going to give you the BASIC code as it would have looked if it had been working. We'll also add the keyflag array to the program. Save this in a file called KEYDEMO.BAS:
' A demonstration of advanved interrupt handling in QB:
Now, take a look at the line of asm code that was supposed to set BX to the segment address of keydata%() but only set it to 1234h: newkey$ = newkey$ + CHR$(&HBB) + + CHR$(&H34) + CHR$(&H12) ' MOV BX, SEG keydata%(0) Look at the hexadecimal numbers: First comes a BBh, which is the machine language equivalent to MOV BX, immediate number. Then comes the numbers 34h and 12h. Didn't we just set BX to 1234h? There's an obvious pattern here! Here comes the trick: What if we changed the numbers a little here. If we put other numbers there, it wouldn't make any difference to the routine. What if we put the actual segment of the keyflag array there. It would work as good as any other number, but we would also get a working routine then. Of course we need to convert that number into a string, but that's really easy here. Just change the line to this: newkey$ = newkey$ + CHR$(&HBB) + MKI$(VARSEG(keydata%(0))) ' MOV BX, SEG keydata%(0) And that's it! Everything will work fine now. Ok, that was the actual keyboard handler. But we haven't installed it yet. We need one routine that can install it, and antother one that can remove it. Let's begin with the first one: The routine that initializes the keyboard handler will use two subfunctions of int 21h. The first one, subfunction 35h tells you the address of the current interrupt handler. If we set AH to 35h and AL to 9h (telling the subfunction that we want to get the address of int 9h, the keyboard handler) and call int 21h, it will return the current address of int 9h in ES:BX. All we need to do is to fetch these values and return them to two QB variables for storing. The other subfunction is subfunction 25h, which changes the address of the interrupt. (Actually, it's usually called the interrupt vector.) We only need to set AH to 25h, AL to 9h, DS:DX to the address of the newkey$ string and call int 21h. When this is done, our keyboard handler has taken over the control. I'm not going to describe every step in this routine like I've done before. There's nothing new in this routine, so I'll leave you to figure out how it works. It can be a good exercise for you to figure out exactly how this routine works. Regardless if you care or not, just add this code to the BAS file:
The three lines above the CALL absolute code may seem confusing, but here's the explanation: Before installing the new keyboard handler it's a good idea to save the state of the keyboard flags. Don't mix this up with the flag array that we created for our own keyboard handler. The keyboard flags I'm talking about right now are a couple of bits stored at a fixed position in the memory by the default keyboard handler. They tell you the state of some of the keys on your computer, such as the Num Lock, Caps Lock, Scroll Lock, Alt, Ctrl and Shift keys. If we don't save the state of these keys before we install our keyboard handler and we hold down, say, a shift key before the new keyboard handler is installed and release it while this keyboard handler is in control, the old keyboard handler will think it's still being held down when we remove the new keyboard handler. Wow, that DID sound confusing, didn't it? Well, don't mind about it. We just save the state of these flags before installing our keyboard handler so we can set it back to that state afterwards. Now all we have left is the routine that removes our keyboard handler and returns the control to the old one, and some additional BASIC code to test our keyboard handler with. We'll just make it a simple demo that constantly prints the state of every element in the array on the screen so we can see if our keyboard handler reacts on the pressing and releasing of different keys. It's also important that we end the loop when we see that the ESC key is being held down, or otherwise we'll get stuck in the demo program. With our new keyboard handler it's not possible to use Ctrl-Break to abort the program. Our keyboard handler has the full control over the keyboard, remember? The state of the ESC key is stored in keydata%(1), so all we need to do is to wait for it to become 1. The routine that removes the handler only needs to use in 21h, subfunction 25h to put the old interrupt address back. And finally, we must set those keyboard flags to the state that they were in before we installed our keyboard handler:
CLS
And that's it! This was an example of advanced assembly handling, but it wasn't too hard to understand, was it? There's much you can do with custom interrupt handlers. You can also make interrupt handlers that doesn't take over the control of the old one, but merely runs first and then passes over the control to the old interrupt handler. Some old computer viruses worked like this, but you should use them for nicer things :-) I think this is enough for now. I'm sure you already have ideas for what you want to use this newly aquired knowledge for. If you want to look more at I/O ports I suggest that you go and find some document about advanced soundcard- or video programming. Just don't blame me if you fry your monitor ;-) If you want to play with interrupts more, download Ralph Brown's interrupt list and start with something easy, like making mouse routines or using basic DOS interrupts. If you want to do something more advanced, try writing interrupt handlers for other things than the keyboard. One thing you can do is to make interrupt routines that are called automatically 18.2 times per second. This can be useful for many things. If you run into problems, (it's easy to do when programming these things) try hard to find them on your own. I've discovered that it's easy to start making the same, small mistake over and over again when you're writing asm code. If you find these annoying habits of yours by your own, you will usually never make them again. It's easy to forget simple things, such as that a certain register won't work in certain conditions, how the stack looks at the moment and that you accidently deletes some important number by overwriting it with another. The only thing you can do is to practise and practise until you get so used to assembly programming that you know where the potential traps are. I'm planning to write a part 6 of this tutorial series, but I still haven't figured out what it's going to be about. Probably a lot of things that I haven't discussed yet. So see you next time, and good luck with your coding!
|
![]()

By Zkman
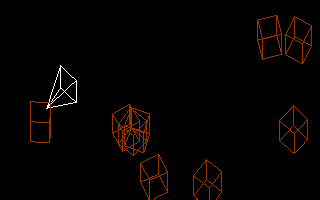
Boogle Boo. This month's gallery shot comes from the impressive Vertical Scroller demo by our main man Pasco, who is already cool cuz he's from the Land of the Kangaroos. Go grab the latest demo at Pasco's Page.

|
![]()

By MA SNART
|
(Editor's Note: This article is presented in the form of a commented program. You can download the full source and check it out for a full primer! This article includes the fully code and comments, too) Welcome back! In this installment I'm going to simply show you a way to have more then one "entity" on screen. To do this I'm just going to make some modifications [actualy a re-write :) ] of the previous example. Last time I showed you a basic example of rotation and translation that involved recreating the player's ship from ASTEROIDS. This time we are going to add some asteroids, and a variety of ways for the "player" to control what happens to them... | ASTEROIDS as a primer to 3d |
|
To begin, we are only going to use these three subs:
DECLARE SUB makemodels ()
Sub makemodels initiates the data array fields to the begining values. Sub drawframe performs all the transforms, projection and drawing to the screen. Sub moveent performs all the "physics" on the entities. We will also use these data types:
TYPE pntdat
Type pntdat is used by the entities to hold location and vector values we also used it last time in holding the "model" of the space ship.
TYPE ddddat
Type ddddat [for "3D data"] is used to hold a 3D point. this is only used by the 3D line models to hold the endpoints of each 3D line.
TYPE lndat
Type lndat [for "line data"] holds one 3D line. the "v1" and "v2" contain the endpoints while "c" contains the line color.
TYPE entdat
Type entdat [for "entity data"] contains all the information we will use for a single entity. "scale" [a floating point value] is used to "resize" the entity when transforming it's "object" [or model] to "world space" [a scale of < 1 but > 0 will make it smaller, while > 1 makes it larger] Location and vector hold the 2D [x and y] point used to describe where the entity is and where it is going. Angle indicates what direction the entity is faceing, and turnspd is used to make the entity turn. Thrust is used with the vector to get the entity moveing. DIM SHARED obj(2, 12) AS lndat Now then this array called obj [for "object"] is what will hold the 3D line models. The "2" indicates that we have two models and the "12" means that they each contain twelve 3D lines.
DIM SHARED ent(10) AS entdat
DIM SHARED player AS INTEGER
The ent array contains the entity values, and player is basicaly used as a "pointer" to the ent array. It indicated which entity the player is in control of [by doing this the "player" can control any one of the entities] player = 1 But we will start by setting entity number 1 under the player's control
SCREEN 7, 0, 1, 0
You may remember this from last time. We are going to use SCREEN 7 for this simply because it allows us to have "flickerless" animation. The Window command is used to help convert "world space" to "camera space" [we won't use this once we get to performing real 3D...I promise:)] makemodels Okay we start by setting up all the models and getting are start-up values. DO Now we are in the "main-loop". The basic idea is to [step 1] draw a frame. Then [step 2] get the player's input from the keyboard. Finaly [step 3] perform the neccessary calculations to each entity [including anything special that the player indicated to do in step 2] Repeat back to step 1 until time to quit... drawframe Here we perform step 2: SELECT CASE INKEY$ Player presses up...meaning thrust forward
CASE CHR$(0) + CHR$(72)
Press down...reverse thrust
CASE CHR$(0) + CHR$(80)
Turn left, then turn right
CASE CHR$(0) + CHR$(75)
CASE CHR$(0) + CHR$(77)
Player presses [SPACE BAR]...we stop the entities movement
CASE " "
Pressing this will shrink the model, the next will enlarge the model
CASE "-", "_"
CASE "+", "="
|
|
Ma Snart shows ya how to make this |
|
|
This will "toggle" player control to the next numericaly lower entity
CASE "[", "{"
And this will make the next numericaly higher entity fall under the player's control
CASE "]", "}"
The quit key...
CASE CHR$(27)
Then were on to step 3:
moveent
All done.... END In the program is the 3D line model data for both objects.. The player's "ship" is first, followed by the "asteroid" Each model has 12 3D lines; each DATA statement contains one line in this format: ' X1 , Y1 , Z1 , X2 , Y2 , Z2 , Color Remeber each 3D point is in reference to the center [or zero] of "object space". In THIS program:
'Player's "ship":
Ok. This is the first sub, drawframe. It will, as you probably supposed, draw the objects to the screen using SCREEN 7 stuff.
SUB drawframe
CLS
Start by clearing the frame FOR i = 1 TO 10 Here we start a FOR/NEXT loop to transform the "object space" to the "world space" for each entity.
ex = ent(i).location.x
Then put the entities values into temporary variables
sv! = SIN(ea * 3.141593 / 180)
Because the entity is facing the one angle we can calculate the SIN and COS before we rotate each point of the model. sc! = ent(i).scale Put the entity scale value into a temp variable
IF i = player THEN
This sets up which object we will transform based on the player value. FOR j = 1 TO 12 We will now transform each line of the object to "world space"
dx1 = obj(model, j).v1.x * cv! + obj(model, j).v1.y * sv!
dx2 = obj(model, j).v2.x * cv! + obj(model, j).v2.y * sv!
First we rotate each end-point of the objects line
dx1 = (dx1 * sc!) + ex
Then transform it by adding the vector created by the location of the entity in "world space". But before we did that we multipliyed the point by the entities scale value [this is what makes it different sizes]. And before doing that to the Y values we add the corisponding Z [this is what causes the 3/4 or isometric view to work, and could also be considered "projection"].
So a basic isometric "projection" formula would be:
LINE (dx1, dy1)-(dx2, dy2), obj(model, j).c then we draw the line [remember our transformation of "world space" to "camera space" is being handled by the WINDOW statement earlyer]
NEXT j
NEXT i
PCOPY 1, 0
All done...so we show what we did :) END SUB This next sub draws out the models based on the DATA
SUB makemodels
RANDOMIZE TIMER
Here we are going to put the 3D line models together by reading the values in from the DATA statements.
FOR i = 1 TO 2
READ obj(i, j).v1.x
READ obj(i, j).v2.x
READ obj(i, j).c
NEXT j
Now we set up the entities by picking random numbers for most of the fields.
FOR i = 1 TO 10
ent(i).scale = .5
I'll start by making each entity's object 1/2 size
ent(i).location.x = INT(RND * 320) - 160
And face them in a random direction at a random point
ent(i).turnspd = INT(RND * 16) - 8
And a random turning speed and thrust [remember a negative value means they are going forward]
NEXT i
END SUB
Almost done. SUB moveent Here we perform entity calculations. This is the segment of the engine where collision detection and other "physics" would be calculated on the entities.
FOR i = 1 TO 10
ent(i).location.x = ent(i).location.x + ent(i).vector.x
First we move each entity by the entities vector
ent(i).vector.x = ent(i).vector.x + (ent(i).thrust * SIN(ent(i).angle * 3.141593 / 180))
We then calculate the vector given the value of thrust.
Notice the formula seems new, but it isn't
Remember our Z-axis rotation formula from last time?
In this case or thrust vector's X = 0...and anything mutiplyed by 0 = 0 So we can optimize the formula by removing the need to multiply 0 by the SIN and COS of the angle [the result would be 0 anyway].
So our thrust vecter formula is:
ent(i).angle = ent(i).angle + ent(i).turnspd Here we change the angle by the amount of turnspd [if turnspd = 0 the angle remains the same]
IF ent(i).location.x > 160 THEN ent(i).location.x = ent(i).location.x - 320
IF ent(i).angle > 360 THEN ent(i).angle = ent(i).angle - 360
Here we are keeping our entity in the bounds of our "world space" and keeping the angle between 0 and 360.
IF ent(i).thrust > 0 THEN ent(i).thrust = ent(i).thrust - 1
Here we are returning thrust to 0. If thrust always stayed at some value other then 0 the entity would always be accelerateing [we don't want that!]
IF i = player THEN
Here if the entity is the same as the one pointed to by player. We are going to return turnspd to 0 [if 0 the entity isn't turning] this is done so that the player has control over where the entity is faceing [else the entity is constantly rotating if not equal to 0]
NEXT i
END SUB
That's all for this time. Run the program and have fun with it. Check back in April for more!
| Download the fully commented program! |
![]()

By WhiteShadow
Virtual Screens, memory addressing, and more! |
What is memory?
foo = 5 you're actually telling the computer to put 5 into the place in memory which has been 'given' ( or more technically, allocated ) to foo. |
|
How do I access them in QBASIC?
DEF SEG = Segment
There, that simple! Now, let me explain in more detail. DEG SEG sets the segment to use when you use commands such as POKE and PEEK. POKE writes the value of Value to the Offset specified, and PEEK reads the value at Offset into Value. At the end we call DEF SEG again ( this time without an = after it ) to return to the default QBASIC segment ( because if we didn't then QBASIC might start writing stuff into the wrong places in memory and your computer might crash - now we wouldn't want that to happen would we? ).
101 ways to trash your PC
How to find a safe place to write to
' Get the segment of foo
Now you can change to the segment using DEF SEG, and read and write to it using PEEK and POKE! Finding the offset of the string however, is a little different. Instead of using VARPTR(), use SADD(). Note: When finding the segment and offset of an array, always tell it to find the address of element 0 eg. VARSEG(foo(0)), VARPTR(foo(0))
Saving your memory to a file -
DEF SEG = Segment
Now why would you want to do this? Well for instance, you draw a sprite for your game and you GET it. However, drawing it and getting it every time you run the program makes for ugly and big code, so you save it to file and load it up at the start of the program instead! The important thing to remember is to create an array that is the size of the sprite to load it into ( remember what I said before - that you have to allocate the memory before you can use it ). Here's an example:
DIM Sprite%(51) ' The Array to store the sprite in
OK, you might have a few questions. First, you don't need to set the segment when you use BLOAD. Usually. Secondly, about the length of memory and the size of the array ( WARNING - this is complicated. Don't read unless you're ready for a challenge ). An integer in QBASIC takes up two bytes, OK? So, as our array is 51 integers long, it takes up 104 bytes in memory. In SCREEN 13 each pixel takes up one byte in memory, so we need 100 bytes ( 10 * 10 ) for that. But what's with the extra 4 bytes? Well that's the space that QB needs to store the sprite's width etc. ( You can visit QBASIC Help for info on getting your array exactly the right size for GET - or, if you use DirectQB, use DQBsize(x1, y1, x2, y2) and divide the result by 2! )
Writing directly to video memory
First thing to warn you about, is that you should only really do this in SCREEN 13 because in other modes it's much more complicated. This is one of the reasons why SCREEN 13 is so popular - because it's easy to use. OK, you need the segment of where the video memory is. It's at &HA000, so, DEF SEG = &HA000 Then you need the offset. Thankfully that's 0! Right then, now we just have to write to the memory. Some of you may have recognised a problem though. Memory goes in straight lines ( 1, 2, 3, 4 etc. ), but a SCREEN is two-dimensional! So, we have to work out how to convert 2D into 1D. This is actually easy. The SCREEN info is stored in bytes 0 - 319 for the first line, 320 - 639 for the second etc. The formula to work this out is ( prove this yourself if you want to ): Offset = (Y * 320) + X Now you have it! You can write quickly to video memory! Here's a few lines to help you out though...
DEF SEG = &HA000
Saving Pictures
DEF SEG = &HA000 BSAVE "picture1.bsv", 0, 64000 ... BLOAD "picture1.bsv" There! You've saved a picture, and then, very quickly loaded it up!
Video screens
DIM VScreen(32000) ' Create the virtual screen
It's not wise to use too many virtual screens though as they will take up too much memory.
Conclusion
|
|
![]()

By Zkman
Thanks to DarkDread
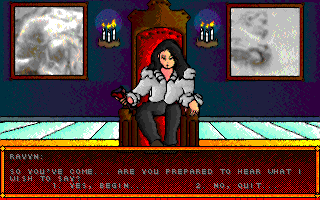
| He stunned the qb world with Legend of Lith, and Lianne ... in the Dark Crown. Although they seem less than golden in the age we now live in, those two games from DarkDread nevertheless have proved influences for many of qbasic's great titles. Now, after a great recession from the world of coding, the man is back, with a new RPG: Eternal Frost. And qb:tm is here to bring you the exclusive info. | The RPG from a QB Legend... |
|
A young vampire by the name of Ravyn is trying to deal with his humanity and understand who he is. Unfortunately, two strong vampires named Id and Ego have set into motion a chain of events, which, left untouched, would bring eternal winter, and Cheriore, eternal darkness. Por que? Because Id and Ego believe that doing so will turn them into gods. Unfortunately for them, Rosalyn, a third "strong" vampire, does not agree with Id and Ego, and she seeks a strong willed human to aid her. Unluckily for Ravyn, she is picked, and is turned into a vampire by Rosalyn. There's the backstory of the game. But this is basically like saying Final Fantasy 7's story is about some guy named Cloud being picked into a military group to save the world. There will be many more twists and turns during the game that you'll have to deal with. As not to spoil the experience, we won't reveal those here, but be aware that they are of the highest quality. I was also luckily enough to receive a pre-release demo, and the text quality is very high, and novel-like. It seems as if the story and character development are a concern, and not an afterthought, an idea many budding designers should take note of. |
Talk to me, baby! |
|
|
The gameplay is similar in many ways to prior Darkdread games. Using a first person perspective still, the game does not seem as "deja vu-ish" as walking around in previous DarkDread games. There is a wide variety of tilesets, and interesting people and shops for you to see. Also, with a world much bigger than Legend of Lith, an overhead view map can be used to select a location where you would like Ravyn to travel to. Two towns, Arren and Tidia, and the areas between them can be visited The spell system works different from LoL as well. To get a spell, you sometimes can find scrolls (some hidden shrewdly and some out in the open). If your character is of a high enough level, you can "read" the spell and you will be able to use it. Look for spells common to RPG's such as Heal, Fire, etc., but also look for some "super-powerful" spells to make an appearance to, featuring some new concepts.
|
The town of Arren |

|
|
The battle system, aside from the new spells, isn't very different. It still has a turn based
system, with features such as "fight", "cast", "run", etc.. Expect to meet many undead enemies
such as zombies, skeletons, and ghosts as you travel. The coolest new feature to the battles,
though, is a theme-based one: If you're in a fight with a human, you can drink it's blood to
gain HP! Yes! You can also expect to see our favourite arch-nemesis Id and Ego throughout the
game.
Although some parts might be slightly linear, the backstory, long playtime, scroll system spells, and NPC Interaction will make this a must download for a serious RPG player. Expect to see a demo in the coming months, and be sure that qb:tm will keep you up to date on DarkDread's latest project.
|
![]()

By 19Day
Part I of the MIDI series is in Issue 7 |
(If any of you find this tut useful, do me a favor and write me a 3D Studio Max R2 tutorial, I wanna make my own cutscenes and stuff for MazeRPG.) When I left you last time I had just finished explaining the basics of Midi creating, using WinJammer. Hopefully, you have been experimenting with Midi's and trying them out on your friends. If you want to send a sample my way, although, not for critique, I don't usually feel right telling someone thier peice of music isn't good, because it's all subjective, but if you want me to hear something or have a specific question, you can always ask a question of me through QB:TM or email me directly at 19day@geocities.com |
Download WinJammer! |
First of all, I use QMIDI 3, as QMIDI 4's stuff doesn't like my ultra new sound card, so all my instruction is involving version 3, which is basically the same as 4, with some small differences. First, you need to load the driver. The driver is what hooks every- thing up and it's name is SBMIDI, if you try to use QMIDI without this driver, your computer will do very naughty things. Now, for the extended functions like PAUSE and stuff, you have to load SBSIM after you load the driver. But since I don't particularly care about pausing, I don't load SBSIM, it just wastes memory. Now, what you have to do is make an array to hold the music, and then load the midi into that array and then play it, it's pretty well explained in the docs that come with QMIDI, a few things to note though: If you have a Wavetable-able card, load the SBMIDI driver with the /3 parameter, your midi's will sound much nicer. Use a batch file to load and unload the SBMIDI driver so your users don't get angry at you for crashing their computers. Your music may sound different in Qmidi than in windows, signifigantly different, as if it were using a different instrument. I suggest using different combo's to achieve the best effect in QMIDI, screw windows. Some things just don't make as loud a sound as you thought, so try increasing the volume of that track
Okay, back to WinJammer stuff.
Making effects is pretty damned hard to do, I suggest you avoid them, as you have to change most of your notes manually. WinJammer isn't very good for thigns like that, but just straight music it can do well. If you want to change the sounds of your notes, like the velocity and stuff, place the note, and then double click on it. You'll see a new window called Note Event. Basically Midi works by events, everything it does is an Event in the midi file, and it just works out what each event means. The top entry is Time, that's just where the note starts in the musical peice. The Channel indicates, you guessed it, the channel the midi is on. Key is the note played, and changing this is one of the few ways you can get sharps and flats, and the other way is stupid, so use this way. (Note: Wrong again, I am stupid today, I never really experimented with this thing. YES, you can get sharps and flats real easy, at the bottom of the sidebar, there is a wierd square will trailing lines, and below it, a pound (#) sign, clicking of the # lets you place a note like that, although it doesn't seem to differenciate between a sharp and a flat, it does then, provide DOUBLE the number of tones the track will allow, neat.) Velocity, this tells how must pressue there was on the note, and I can't find a good way to get this high and STAY high, WinJammer is stupid here, cause I find many patches are too soft, and I can't seem to change a whole bunch of notes' Velocities at once. (Yes you can, I stupid, keep reading to find out) Length, if you don't like being restricted to the note lengths given on the side bar, use this to change things around, make it slightly longer or shorter according to your needs. Shift following events, basically, this means if you move the note around, will everything after it move the same amount of space too, usually, yes. Now, if you want to change a few other things, but not Note events, you should use the button next to the synth keyboard button at the top, it looks like a small list (next to the tempo) This shows you the raw events in your midi, like controller changes and such. Click on the window to activate it and left click, then say insert (new event). There are quite a few options here.
Note On: You basic musical note.
Notice, in that entire set, there is no Channel Velocity, bastards! (Please keep reading, I'm a dumbass, look below, I was wrong)
There are quite a few useful things in the Track menu.
And finally, the Transpose it useful too, you can do chords. It takes all the notes and moves them up or down a certain number of semitones, experiment. Now, a little trick. I've found that quite a few of the patches are too soft to hear generally, and sometimes even in Qmidi, and we now know how to increase the Tracks overall velocity. But if you add a bunch of notes and stuff, you need to do it to them too, but the Transform does to to the entire track, so whaddya have to do is, see, transpose all the velocities to 0 by multiplying by 0, and then "finnaly adding or subtracting" the number you want, like 100, there ya go. Okay, enough WinJammer, but here's some of my favorite patches, I suggest you experiment with them, they are nice and seem to work well together:
If you doubt my ability (heh, _I_ doubt my ability ^_^;; ) then why not listen to what I have made, then decide for yourself, do I know what I'm talking about, or could you do better without my interference. If you want a listen, goto... http://members.xoom.com/19day/junk There, you will find about 14 midi's, all named SBH##.MID, you can see the increasing complexity and better sounding melodies, remember, I've only been doing this for 5 months, I'm learning too =P
Notable Games that used/are using MIDI:
Making a simple midi: So just plunk down a few notes, and then use Track -> Replicate to copy it. Copy it about 10 or 20 times, we can trim it later. Then make a new track, this will hold the melody. You usually have a few staves of beat, and then the melody rises from it, climaxes, and then dissolves again. So make a simple melody (the hardest part) with a good intro and exit. Then I usually make a "backup singers" track, where I put a repeating non-baseline track, just to provide some sound other than the melody and the baseline, you'll see that in my midi's alot.
Looping Midi's: The first point is short and simple: When you make your midi, begin it like you would a simple peice of music, usually not very complex, but the have the complexity increase as the song goes on, usually in sets of 4 segments. Then, have the music end abruptly, as it will be, in Qmidi, looping over and over, and if you build down the song and then have your baseline doing the same thing it did at the beginning, then when you hear it looped, that baseline or whatever low-complexity music you have going, it's length will double, because you hear it at the end, AND at the beginning again... As for Qmidi, I have vers. 1 and 3, I hear 4.x might fix this problem, but I'm not sure. But according to the information in the past Qmidi's, there was no real easy way to check for the length of a midi in seconds, and have it repeat when it was over. What I did was use the MIDITIME! function, and made a sub called CheckForMidiTime, that is put in my RPG's main loop. It goes into the sub that has the the second times for the midi's I plan to use, and it's just an if statement that decided on the number of seconds to be put into a temporary variable. Then it checks to see if MIDITIME! is higher than that variable. The reason I use a varaible as opposed of just doing the checking directly, is so I can add a new midi easily and hear it to see if QMIDI likes it, I just set the temporary var to 60 (1 min) before all the 1 line IF statements, so I can at least hear 1 minute of my new MIDI before making an IF statement for it.
|
![]()

|
Gracioso for readin the latest copy of qbasic's best e-zine. Check back in on April 17 for Issue #9. And why should you do that? Umm...because I said so! So there! Also, don't forget to register your QB company with the Visionaries Exchange. Till next time... END | We got next... |
