BASIC Gamer
Issue #2 ~ September 20th, 2011
"A FreeBASIC, QBasic and QB64 games magazine"
In This Issue
- Regular Columns
- Articles & Editorials
"A FreeBASIC, QBasic and QB64 games magazine"
Great. It's 1 o'clock after midnight, I have a terrible neck pain, and I have to get up early in the morning to go to work. But I am still here, preparing yet another issue of BASIC Gamer for the community, and I could go all night. Now, this is what I call love.
What to say? If I wasn't dead tired I would have a stiffy because this issue is awesome, and it's all thanks to you guys (and only guys *sigh*). It's been a wonderful month and a half, and thankfully, I had a lot to play and write about. 2 reviews, 1 interview, 1 tutorial, and 3 games in the gallery! Not the mention the usual news briefs filled with...news about games in development. What's more sexy than game dev creativity? Beside women. Nothing, I say. Nothing!
All this is making me excited about the next issue already. I have a lot of content prepared in my mind (2 reviews and 1 tutorial to be more specific), and hopefully few projects in development will get knocked down till then. In other words, issue #3 is a lock my friends. A lock! You can put your money on it.
Enjoy the new issue and keep making games…or else.

Yours truly,
~ Lachie Dazdarian (lachie13@yahoo.com)
News about the latest FB/QB64/QB games, game engines, game-dev libraries and site updates.
niz567 released an excellent FreeBASIC puzzle game in the vein of Boulderdash. Download the game here, or read my review on it.

Destructosoft releases a new version of Depths of Darkness, now featuring save option and sound effects and music. Download the game here.
Mihail_B releases a new version of his Pacman 2 game, now featuring network play. The relevant forum thread.

Jobert14 showcases his frantic Duke Nukem-style QB64 platform game. For a demo download visit the official forum thread. It already plays and looks really cool.

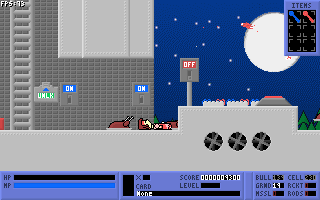
Cyperium releases a new version of his QB64 platform game Venture. Current demo features 40 levels, with 10 levels+town in each world. Download the demo here. Forum thread: http://www.qb64.net/forum/index.php?topic=4472.0

Unseen Machine announces two game projects, a Tower Defense game entitled Barricade (http://www.qb64.net/forum/index.php?topic=4348.0), and a ballon arcade game still in prototyping stage with working title Hot Air (http://www.qb64.net/forum/index.php?topic=4507.0)
A screenshot from Barricade:

Galleon releases an older demo of his QB64 Star Wars game showcasing a top-down 2D rotating engine. Even in this stage the demo is rather addictive and challening to play. For a download visit this forum thread.
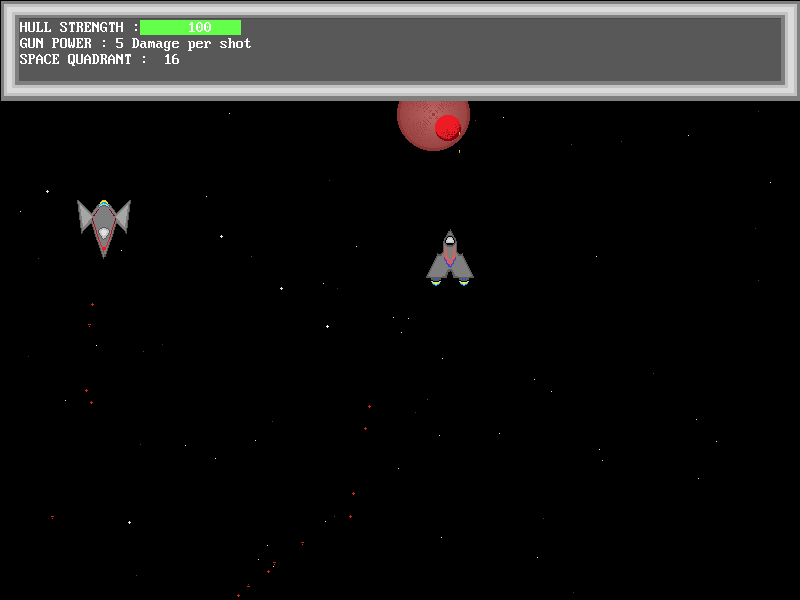
vrensul showcases a QB64 project, a top-down space shooter entitled Stardom. Visit the forum thread for the download. A screenshot:
Sketcz releases a beta buld of his new QB64 game - Trampoline Gunmen III - Triple Strike. The previous releases were QBasic games. For a download go here.
izidor announces a platform game project. Visit the website: http://izidorsqbsite.phatcode.net/projects.html
KDAG announces the release of a cool dungeon crawler entitled The Dungeoneer. A screenshot:

More info in the gallery section.
Mysoft and Dr_D are working on a Stunts remake in FreeBASIC, but are keeping a rather low profile about it for now. A screenshot:

Zamaster released a demo of a fun and whacky looking space shooter based around...cakes! Download and more info in this forum thread. A screenshot:

Dr_D is working on a very cool 3D mini-golf game in FreeBASIC. Tested it personally, and it promises a lot. A video of the gameplay: http://www.youtube.com/watch?v=TZIWh54lgDM&feature=channel_video_title. A screenshot:

Landeel showcases his new commercial FreeBASIC game in development. For screenshots and more info visit this forum thread. The game is also featured in the gallery section.
chung updates his free air / marine combat flight simulator, as well as his 3D tanks canon battle game.

oog's Train Simulator continues to develop and new features continue to be added. Download: http://proog.de/joomla/index.php/dl/viewcategory/4. The forum thread: http://www.freebasic.net/forum/viewtopic.php?t=18185. A project to keep an eye on.
STxAxTIC released another version of his QB64 3D engine now featuring semi-intelligent wireframe plotting. For download and more info visit this forum thread: http://www.qb64.net/forum/index.php?topic=4043.0

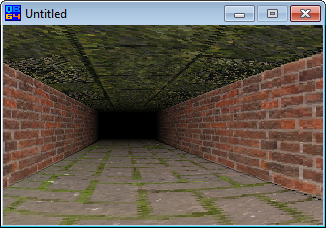
Idizor announced another QB64 raycaster on his website entitled Sewers. For more info visit the website.

Jobert14 released his own Descent like 3D engine. For a download visit this forum thread.


Terry Ritchie finally finishes the documentation for his Sprite Library. For download and more info visit this forum thread.
angros47 showcases his new FreeBASIC 3D RTS engine created using OpenB3D. For download visit this forum thread.

Unseen Machine announces OpenGL edition of his GDK QB64 lib. The relevant forum thread.
Unseen Machine continues to develop his GDK (Game Developer's Kit) library. For latest updates check this forum thread. Also, check the custom font printing routine recently developed for the lib: http://www.qb64.net/forum/index.php?topic=4495.0
creek23 releases another version of his FreeBASIC scriptable game engine after a shorter break. For the latest download visit the following link: http://konsolscript.org/web/downloads/
Cman announces the release of a game maker programmed in FreeBASIC and supporting HTML5. The official website.
A new version of FreeBASIC has been released on August 7th. For details and downloads click here.
Download the new version of QB64 (released 10th September) here (Windows) and here (Linux).
FreeBASIC Games Directory updates after quite a while with 7 new games and now counts 169 entries! Be sure to download the new entries and comment them. Website: http://games.freebasic.net/
Check out the new design of the official FreeBASIC website: http://www.freebasic.net/
Douglas Crawshaw showcases few projects on his website: http://dcrawshawjr.bravehost.com/
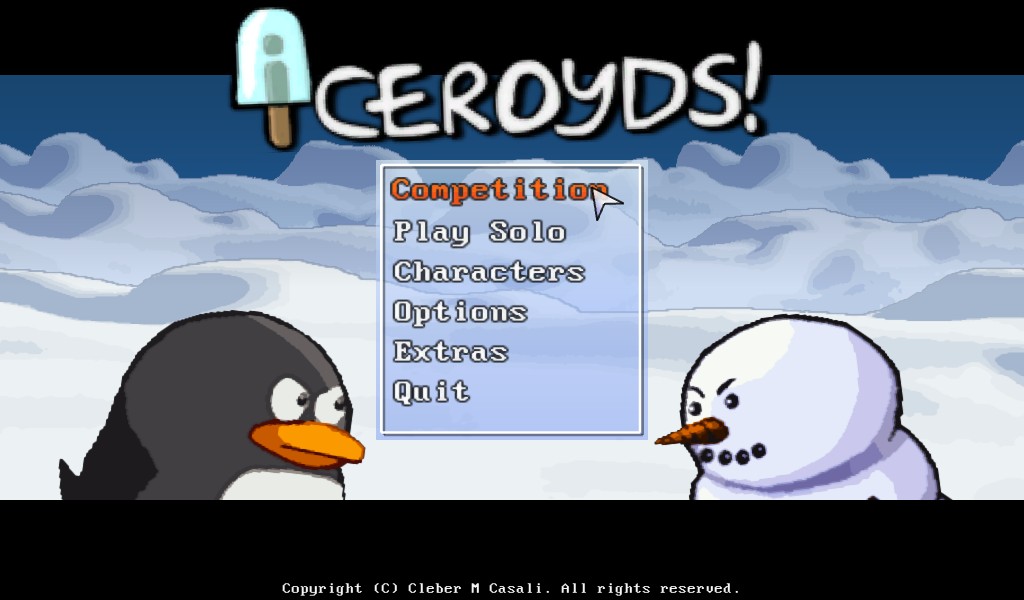
Description:
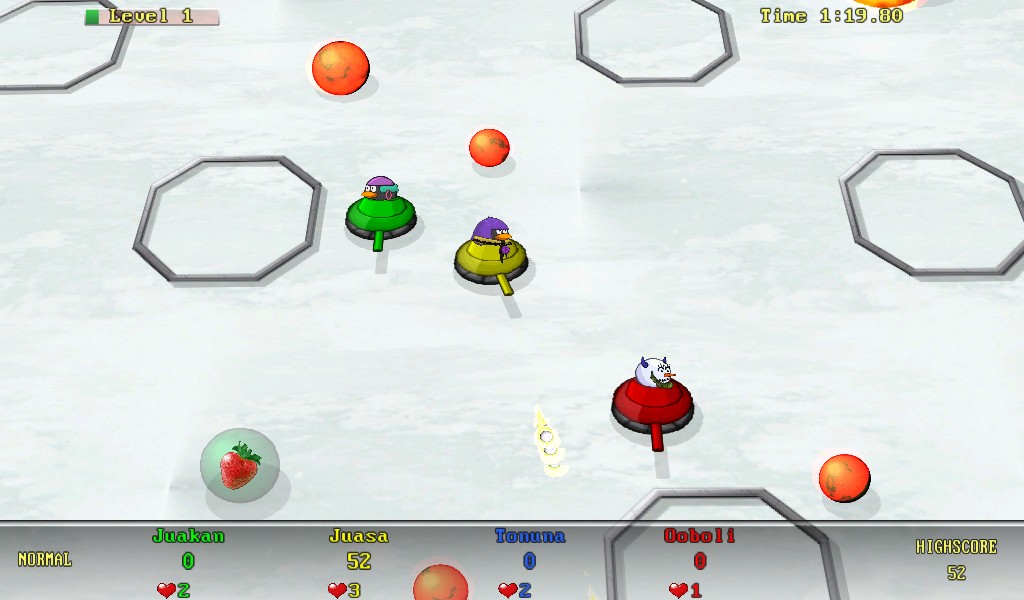
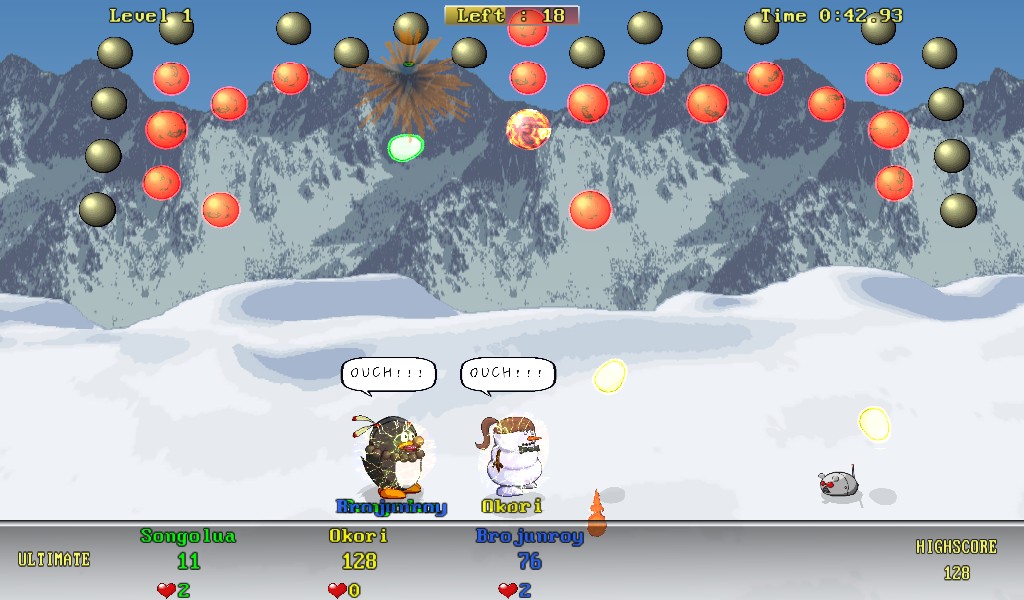
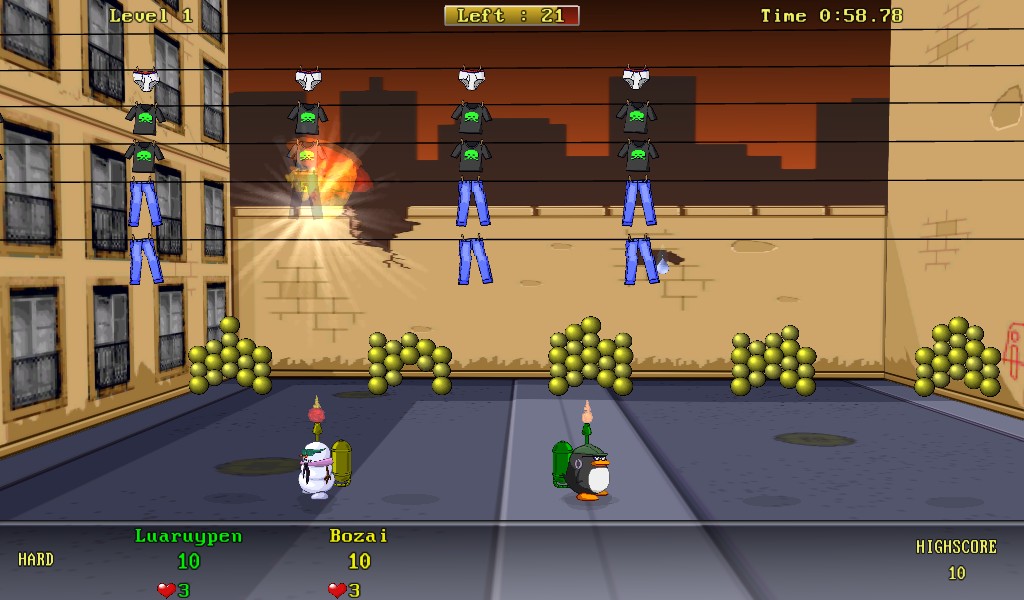
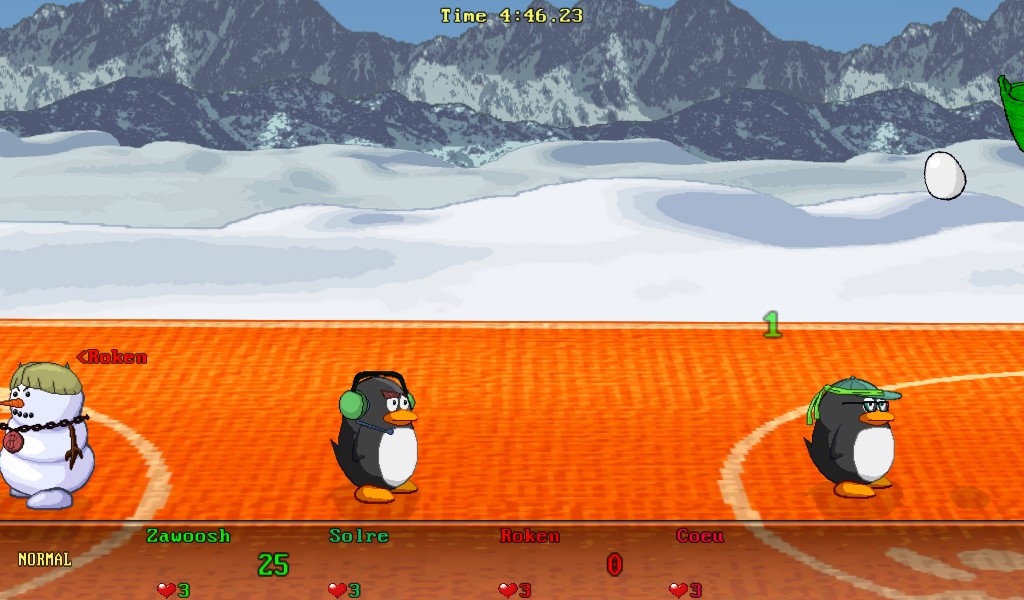
Iceroyds! is a sportive competition game, sort of like California Games or Decathlon. But the "sports" in Iceroyds! are references to classic arcade or console games, with enhanced gameplay elements, and a little bit of humor. As of now, there are 5 different sports. Up to 4 players simultaneous, or up to 8 players non-simultaneous can play in a single PC. Iceroyds! can be played with keyboard, joystick(s), mouse or touchscreen. 4 joysticks/joypads are highly recommended for 4 simultaneous players. It will be released soon for Windows and Linux x86 PCs.
Development:
The development of Iceroyds! took about two years, being one year to develop the engine (I call it OSGL, Old School Games Library), and another year to develop the game itself.
Everything was done by a single person (me), in my free time. The story begins in 2008, when I was working on my Double Dragon fangame, made with DarkBASIC Pro.
DarkBASIC Pro uses Direct3D for rendering, even for 2D. The problem is, it's not very Wine/Linux friendly. As I had changed my default OS to Linux for many years, I wanted something that would work just like DBPRO in Linux, for my next project.
FreeBASIC was a good choice, because of the BASIC syntax I'm already familiar with, but it didn't have all game creation power DBPRO has. So I needed to create my own framework, at first just to mimic DBPRO's 2D functionality (but it has now surpassed it in many aspects). I have read a book about OpenGL, and wrote my first few programs using the OpenGL API.
So in 2009 I have started very slowly writing a few simple subs to render stuff using OpenGL, and called it OSGL.
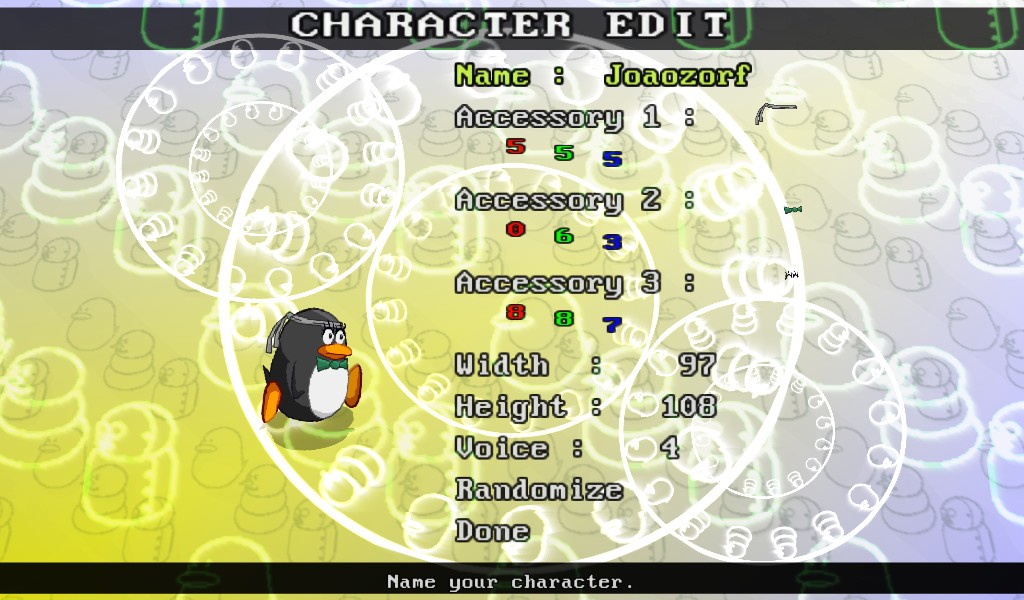
In 2010 I have added way more powerful rendering functions, particles, 3d quads, sound and music capabilities (as a wrapper to SDL_mixer), and many other advanced features specific for game development, like string and database manipulation, 2d maps, media packages, bitmap fonts (inspired by NeHe). With "OSGL" fully functional, I needed something to test its capabilities, and fix bugs, so I have drawn a penguin and made a simple pong game with it. The smooth OpenGL rendering with blending, transparency, glow, rotation and particles looked really amazing. The result was so good, I wanted more. Then I have added a small basketball game. Then a shooter... And I have finally realized I could take this concept, and make a cool competition game of it. As it's a competition, I needed an enemy for the penguin, so I have drawn a snow man. A snow man from space... An ICEROYD!
Once completed, Landeel plans to sell the game for US$ 9.98, but he will also provide a demo version for the community.
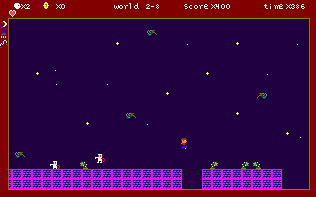
Card Captor Sakura is QB64 2D shooter-platform game in development inspired by Cardcaptor Sakura anime series. The game plays very much in the vein of Duke Nukem I, with fast paced gameplay and cramping with details and features. Screenshots:


More info here: http://www.qb64.net/forum/index.php?topic=4238.0
The Dungeoneer is a FreeBASIC dungeon crawler in development.


The Dungeoneer is a random dungeon generating RPG, packed with treasure, potions, spells, traps and monsters. As the only graduating student of the Caladorn and Golocks School of Dungeoneering, your final exam is to adventure through this large maze like dungeon in search of hidden gate keys that will lead you to the dungeons powerful bosses and eventually the way out. Enjoy the simplicity of this fast paced addicting dungeon crawler. Battles are in real time so have your food, spells, and potions ready!
Beta testing is underway, Release Date 11/11/11
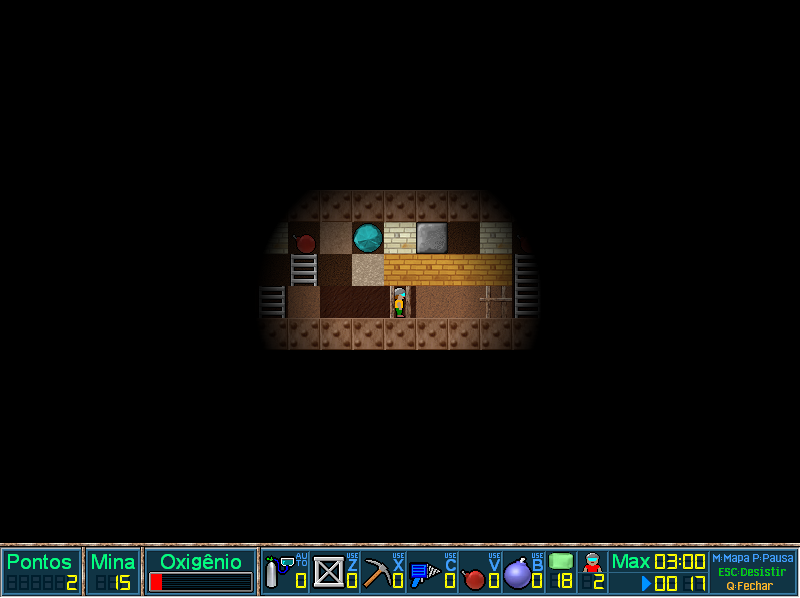
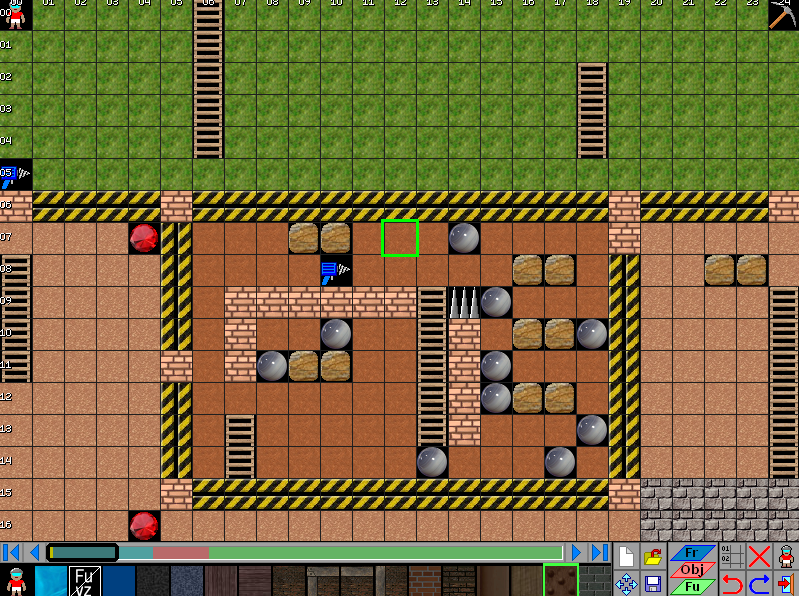
niz567 suprised us all very pleasently with his debut game, a wonderful and very polished puzzler entitled FreeBASIC Miner. More than enough to award niz with the developer of the issue title!

Every now and then appears a developer with a game seemingly out of nowhere, shaking us out of our own apathy and dullness, procrastination and stench of never-ending projects, and illustrates so clearly how it can still be done. How with humble resources, a little bit of necessary polish, a simple tile-based 2D engine, seemingly unoriginal gameplay, you can create something beastly fun and addictive. As well as original. You don't need extraordinary resources and/or revolutionary game engine, never-seen-before game concept, depth and content that takes 10 years to develop and implement, to create a game "you can stand by any time a day, any year, who ever you happen to be or think you are".
niz showed us with FreeBASIC Miner that such game can be small and humble, but still contain that special quality. Thank you niz.
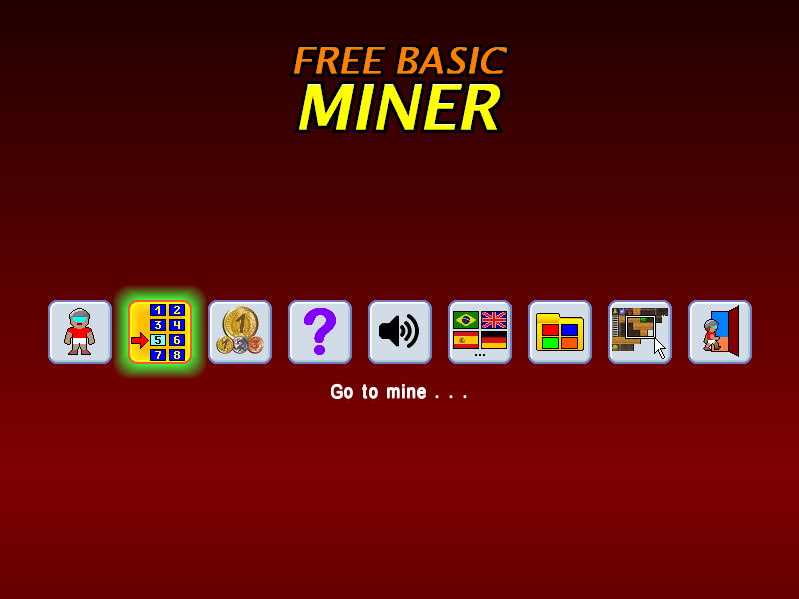
From the start FreeBasic Miner makes a good impression with a very slick and well polished main menu (mouse and keyboard controllable), featuring animated color transition (the color is randomized) in the background and plenty of options, each represented with a pretty icon that changes as you hover over it (and makes a sound of different pitch). A wet dream for a presentation-sucker like me. Definitely a good intro, but that is never a guarantee of a good game. Luckily, the very game continues in this manner.
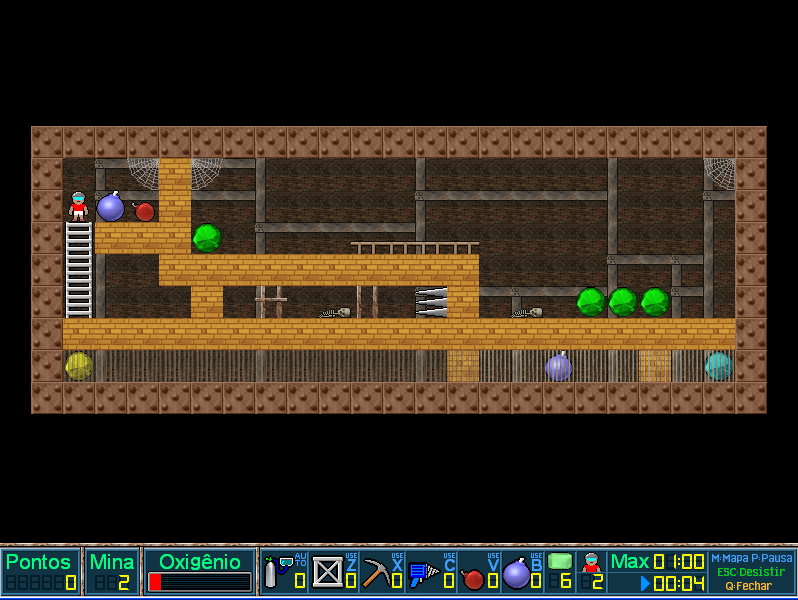
FreeBasic Miner is a puzzle game in the vein of BoulderDash and Mole Mole, but manages to add a whole new level of depth to the classic concept by introducing tools the player can use, from bombs to drills and pickaxes, as well as features like flooded areas you can explore for a longer time only if you have a swimsuit. Digging and pushing objects remains the basis of the gameplay, but pretty much all the gameplay elements are equally present and beautifully intertwined in the 31 mines (levels) the game features. Most mines are single screen, but a great deal of them span over several screens and the camera scrolls through them.
The objective in each mine is to collect all the gems in it, and to accomplish that the player needs to dig, push, drill and destroy blocks in proper order. Doesn't sound like something particularly interesting or original, but each level is a wonderful and extremely challenging puzzle-miniature that will truly make you stop and wonder about the solution, and sometimes even awe how the gameplay elements beautifully work together in producing these puzzles. And I guarantee that on several places you will doubt that a specific mine is solvable, until you realize an alternative approach to the level you simply failed to observe. Almost all levels have time-limit, and while in most cases this is a minor problem, this feature adds yet another level of challenge to a great deal of mines and forces you to find the quickest solution while playing the level, and not by observing and planning which you can't afford.
The game comes with 31 mine, and while there is some padding with "dark" mines (levels where you can only see your close surrounding) which usually repeat a previous lit one with minor changes, the sum of all offers plenty of well designed challenge that will keep you busy for days, if not few weeks.
The player can, of course, die in each level on various ways (but all seem to end with an explosion), so the game offers another challenge by introducing scoring. The game awards points for each finished level and gives extra bonus points for faster completion times, so beside solving the puzzles another challenge can be trying to finish the highest possible number of mines in least amount of time, using limited number of lives, all with a goal to enter the highscore table.
The graphics are above average, consisted of 32X32 tiles, and while not impressive, they get the job done and a little bit more than that. The addition of a foreground layer in the engine is a thing to note. Perhaps the main character is somewhat impersonal looking (and seems to have a deep tendency to go with a blast) and the walking animation could look less jerky, in my opinion this does not diminished the experience of playing the game as the gameplay truly conquers over all other game aspects. But like I said earlier, the work on the graphics is above average and commendable.
FreeBasic Miner doesn't come with music, and despite personally not missing it much, it would be a beneficial addition to the whole package. The game does however feature very good, suitable and non-intrusive sound effects. They way they should be in this type of games.
On the top of all that, the game comes with a well-designed and intuitive level editor, so you can even create your own mines. Sadly, any serious activity from users in this manner would require more promotion from the developer and a website in my opinion.
The biggest objection I have with this game is perhaps the final mine, which in my opinion works against itself. It's simply too difficult. Unrewardingly difficult, or in other words stacks too many puzzles one on the top of each other, where one mistakes on a specific puzzle ruins all the work in the level you did to that point. It does, however, illustrates how the game concept offers room for even more challenging and "suicide-difficult" levels for hard-core players, but I feel the game concept shines the most in single-screen or slightly larger levels where you can keep track of your actions from start to finish and predict how the actions in one segment of the level will effect another segment.
The game does leave room for improvement, naturally. I mean, the graphics could always be better, but if the developer is personally not talented, how many of us are ready or in opportunity to hire professional pixel artist for a freeware project? FreeBasic Miner is so close to reaching its full potential, that despite its humble intentions, the score feels fully deserved. And I have no doubt this game would even fare well commercially on iPod/iPhone market, in the midst of all better produced game, solely on the strength of its gameplay.
I do hope the developer will continue dabbling with game design because this game proves talent. Maybe some adventure game in the same engine combined with FreeBasic Miner type of sections. But I'm daydreaming now.
Just download the game. No excuses!


The Quest For Opa Opa is one of the first original FreeBASIC games released, if not the first, and even without its other qualities, it should be mentioned and remembered just because of that. It's wonderful to read the game's readme file and remember all the people who were with us in the FB beginnings, before the official freebasic forum, to note who remained and who phased out. A great time capsule.
The game was developed by na_th_an and aetherFox, both no longer in our community, but their contribution is remembered and appreciated.
The Quest For Opa Opa established FreeBASIC as a potential compiler for game development (among other things) back in the days, and set a path for other game releases. It was a valuable and excellent intro into the first 3 highly productive years of game development in FreeBASIC.
The Quest For Opa Opa belongs in the interactive fiction (IF) genre. It's basically a text-based game where you interact with the environment using textual commands. Most of interactive fiction are adventure games, but The Quest For Opa, Opa introduces role-playing elements in the gameplay, where you can meet and battle enemies in turn-based battles, besides solving puzzles. A very good mix and I'm not sure how often used in other IF.

It was imagined as a first game in a series which never happened, so it's rather short and limited in content and depth, but still provides enough scenes and puzzles to be considered a complete game.
The game is set in a fantasy-like world where you play a hero with rather humble beginnings, a lumberjack trying to leave his hometown and begin a great adventure. Sadly, the first chapter is pretty much limited to these starts, but features sufficient cool places to explore and quirky characters to talk with to make it an interesting episode.

The strongest side of this game are its ambient sounds driven tracks that really succeed in pulling you inside the game's world and give each different area the necessary atmosphere and flavour. The game also features an absolutely brilliant battle track by aetherFox. Superb guitar riffs. Both developers dabbled with music semi-professionally and it shows.
The writing quality alone in the game is very good, what is crucial for all IF, but unfortunately includes somewhat asinine approach to the setting, introducing anachronisms, modern language, and poorly tasted jokes, which damages the coherence of the story and pushes the game on the edge of being a joke. This is the biggest flaw of The Quest For Opa Opa, and a very poor misjudgement of the developers.

Ignoring all that, the game does feature challenging puzzles, turn-based battles (with perhaps a bit too steep challenge curve), and overall results in well-rounded and awarding mini-game experience.
A must play for all interested in FreeBASIC history, as well as those attempting to develop IF, as it illustrates how even a small IF game requires a lot of well though-out scene descriptions.
Thinking about The Quest For Opa Opa outside its FreeBASIC context, it's simply a solid mini IF game with role-playing elements, and is worth being checked out, if not played through.
I'm happy to feature an interview I did recently with Jattenalle, the author of awesome Gods and Idols project, which he was happy to do for BASIC Gamer.
Gods and Idols is a 4X persistent online multiplayer real-time strategy game, featuring an awesome 3D engine, and is probably the most interesting and promising FreeBASIC game in development.


But let's get to know the author and read his thoughts on the project.
E: Hello Jattenalle, and thank you for agreeing to do this interview for
BASIC Gamer.
J: Hello, thanks for having me.
E: Allow me to start this interview with a question about your
programming beginnings, the path that led you to QBasic and then
finally FreeBASIC. How did you start, how did you ended up with
programming in FreeBASIC, and what other programming languages you
use?
J: A former friend of mine introduced me to QBASIC back in the 90's. At the time Windows 95 hadn't even come out and most computers were running DOS. QBASIC was a nice way to quickly get graphics going which is the reason I stuck with it. When mainstream "high-end" graphics came around I was already stuck in QBASIC and couldn't stand C and its variants. When FreeBASIC came I was already in love with the quirky BASIC syntax and I've stuck with it ever since. Over the years I have learned, and worked with, several languages. FreeBASIC is great but C++ and PHP brought food to my table for many years.
E: What was the first notable stuff you did in FreeBASIC, and what ideas
ruminated in your mind when exploring FreeBASIC capabilities for the
first time?
J: I've been using FreeBASIC since before it even had a name, I was in the credits list along with a bunch of other guys back in the day, SJ Zero comes to mind. I did some things back then that gained some attention, some memory management library and a data packer/database library. This was before the standard C library was introduced, and something as simple as copying a piece of memory from one place to another was a pain in the ass.
E: How did Gods and Idols come about? What was its origin, and what plans
did you have in the beginning?
J: I was playing Civilization IV and was thinking how nice it would be to have a persistent multiplayer experience where people could drop in/out at any time. The idea grew over the course of several weeks, I talked a lot about it with my friend Taylor and eventually it dawned on me that I could do this. At this point in time I was still a hardcore 2D software-mode guy but I quickly realized that 2D just wasn't going to cut it. In early 2007 I took my first steps into 3D, OpenGL, with the help of Marzec and Eponasoft.
E: How would you describe Gods and Idols in few sentences?
J: Gods and Idols is a realtime, persistent, online, strategy game where each player takes the role of a deity or god. It is the player's job to build up worlds for his followers and defend them against other players and dangers of the universe. At each players disposal are powerful spells and powers, not to mention the followers themselves who are capable of constructing interstellar crafts to rain destruction down on their enemies.
E: When was the first live version of Gods and Idols released and how
much your goals with Gods and Idols changed with time?
J: The first version was released in late 2007, but the first gameplay elements didn't appear until March of 2008. The goals have remained pretty much the same throughout the years, it helps that they started out fairly wide "Gods fighting for dominance in a crumbling universe", over time details have been added but the core is the same. For example 1.x only had rudimentary concepts of fleets/troops/ships while 2.x has much more in-depth systems in place for fleet control and so on.
E: What 3rd party libraries are you using to compile Gods and Idols?
J: I'm using OpenGL for graphics, OpenAL for audio, Awesomium for the interface and standard FBC 0.23 for compiling.
E: Can you tell us a bit about the game engine?
J: The Gods and Idols engine is a 3D engine designed to take advantage of modern PCs and their graphics capabilities. Personally I've always hated games that show you something epic but prevents you from going there, invisible walls, infinite distance and so on. That's why I very early in Gods and Idols' development decided to have no fake objects, everything you see in Gods and Idols, you can go to. The current version holds just over 102'000 Stars, each capable of having up to 5 planets, but tests have been done with 100 million stars without any problems at all and you can seamlessly move from galaxies down to individual asteroids.
E: And what other tools are you using to create the game resources?
J: I no longer create the assets for the game, but when I did it was a lot of time spent in 3D Studio Max and Photoshop. Nowadays I contract out asset creation to various people who are a lot more talented than me.
E: In what stage of development is Gods and Idols now, and what are you
plans/goals for the future versions? Do you plan eventually to release
a stable complete version and later only release expansions, or do you
imagine Gods and Idols as a constant work in progress, playable but
always being improved, rebuilt?
J: Version 1.x was shut down in April of 2011 after having been up pretty much uninterrupted since 2008, so right now Gods and Idols is in kind of a "between jobs" phase. The plan is to have the next version, 2.x, out as soon as possible, but there's no definite release date. It's an ongoing project and I plan to keep improving it as long as there's people playing it. The moment an MMO stagnates is the moment it dies.
E: How do you plan to release the final version? As freeware or with some
commercial license? Do you plan to sell game items?
J: Gods and Idols will always be free to download and free to play. There is an optional shop available that allows players to purchase Essence for money, however Essence can be gained just fine by simply playing the game. There are no restrictions for the "free" players, and the paying ones do not get massive bonuses either. There are no plans to ever release the server-side of the game, but the client source code is released every now and then, though I would not recommend anyone learn from it. My code is a mess.
E: How did you assemble the team that is helping you build this game? Can
you tell us a little about these people and their talents?
J: Every now and then we post notices on the website about how we're looking for new people, either to join the team full-time or for limited contract work. The team can all be found in the About page on the official website, I would tell you more about them but I'm not sure how much they'd want me to share, if anything. Some of them can be found taking part on the forum or the chat however and people are welcome to ask them questions there.
E: What do you wish to accomplish with Gods and Idols?
J: A game that I will enjoy playing and taking part in, already waking up in the morning and going on the chat to be greeted by dozens of eager fans is amazing! I really hope to keep the fans happy for a long time to come.
E: Do you have some other game design projects in the works/planned? Do
they involve development with FreeBASIC?
J: No, Gods and Idols is my future and it will always remain FreeBASIC.
E: Beside game design, what other stuff you like to do in your life?
J: I recently got myself a pup, Taima, a Siberian Huskey/Samoyed cross and she's taking up a lot of my time along with my two cats, Ragnar and Schrödinger. I also enjoy doing freelance webdesign and massive network solutions consulting.
I thank Jattenalle once more for his time and providing us a deeper insight into Gods and Idols history and development.
All interested more in this project visit the game's official website for download, screenshots, development log and videos, forum, and more.
The objective of this series of lessons is to help newbies who know very little of BASIC to learn the basics of programming in FreeBASIC necessary to create any 2D computer game. Some elementary BASIC knowledge would help a lot, though I believe that people who don't know BASIC at all should comprehend these lessons too. I'm using here the word (well, it's an acronym) "BASIC" and not FreeBASIC, because if you know the basics of QuickBASIC, Visual BASIC or any other variant of BASIC, these lessons should be easy to comprehend.
I'm starting this series because I feel that tutorials of this kind were always something what our community was lacking, even before FreeBASIC. I've corresponded during my programming lifetime with quite few programming newbies, and they all had almost identical problems when trying to program a game. So I think I'm able to detect what beginners need quite well and on what way the stuff needs to be explained to them. I also remember my beginnings and the problems I had with using separated routines that were never meant to be combined and used to create a game. The breaking point for me was the moment when I discovered RelLib (a QuickBASIC graphics library by R.E.Lope) and the scrolling engine that was created with it. That scrolling engine motivated me to explore its mechanics and expand on it (with some help from R.E.Lope). In one single moment I acquired the ability to program most of the stuff (necessary to complete a game) by myself. It's like driving a bike. The moment when you acquire the actual skill lasts for one second.
So that's my goal with this series. To learn you enough so you would be self-sufficient in 90% of cases in 2D game design. And the best way to learn new things is to see them applied. Many tutorials fail in this by being too generic. You will always need help from more expert programmers, but the point is that after these series you won't need it on every step. Have in mind that this depends on the type of game you are developing and the graphics library / tools you are using.
I am definitely not going to make you a good programmer or show you how to become one with these tutorials. Forget about it. I will only teach you enough to make a 2D game. The rest is up to you. You might ask me then why you shouldn't pick a game making software instead picking FreeBASIC and reading these tutorials. Well, because learing to program leaves you so much more space to build and expand on your basic knowledge and in the end makes you much more flexible when it comes to solving game design problems.
The example programs and mini-games we'll create will be coded in GFXlib (the FreeBASIC's built-in graphics library). Lynn's Legacy, ArKade, Mighty Line and Poxie were coded in it (among many others), and I think those games are good references. But don't worry. Switching from one graphics library to another is relatively easy when you know how to code in at least one.
This tutorial will not deal with raycasting engines (3D programming) or something "advanced" like that. If you want that but are a beginner, you NEED the following lessons FIRST.
Since we are going to code in FreeBASIC you need to get FreeBASIC first (if you don't have it yet) from http://www.freebasic.net (the examples were compiled with version 0.23), and one of the FreeBASIC IDEs available. I recommend FBIDE or FBEdit.
We'll start with some elementary stuff. The first program we'll code will not feature external graphics, because loading graphics from external files (usually BMP images) is always a dirty business and will confuse you at this point. Trust me on this. Be patient.
The program we'll create will allow you to move a circle around the screen. A very simple program, but through making it we'll learn important facts and a lot of elementary statements and methods necessary to create any game with GFXlib.
As we are using GFXlib you need to be aware of the gfxlib.txt file(GFXlib's documentation) placed in the /FreeBASIC/docs directory. That's our Bible and very useful with these lessons since I will not explain every parameter of every statement used in the example programs (most likely). FreeBASIC manual is your friend: FBWiki. Read it first before asking how something is done.
Open a new program in FBIDE. First thing we'll do is set the graphic mode. What's setting a graphic mode? Choosing the program's graphic resolution and color depth in bits (8-bit, 16-bit, ...). For example, 8-bit color depth is the standard 256 colors mode (8 bits per pixel). The graphic mode is set with the SCREEN statement like this:
SCREEN 18,8,2,0
18 means 640*480 graphic resolution, 8 means 8-bit graphics, 2 means two work pages, and 0 means window mode (input 1 for full screen mode). Minimum of 2 work pages is recommended for any graphics dependant program. These things will become clearer a little bit later. For more details about the SCREEN statement refer to GFXlib's documentation or FreeBASIC Wiki (a more "advanced" version of the SCREEN statement is SCREENRES).
The next thing we'll do is set a loop that plays until the user pushes the letter Q on the keyboard. Loops are foundation of any program, not just a computer game. Coding a program on a way it would stop/halt every now and then and wait for the user to type something in is a BAD and WRONG way to program anything you want for other people to play. We'll use loops as places where the program waits for the user to do something (clicks with mouse or pushes a key) and where the program executes some routine according to user's action. It will also be used as a place where objects not controlled by the player (enemies) are managed/moved. Loops are a must have.
If you are aware of all these things, you can skip to the end of this section and download the completed example (with comments). If there is something in it you don't understand, then get back here.
We can set a loop on more ways (with WHILE:WEND statements, using the GOTO statement - Noooo!), but the best way is to use DO...LOOP. This type of loop simply repeats a block of statements in it until the condition is met. You set the condition(s) after LOOP with UNTIL. Check the following code:
SCREEN 18,8,2,0 ' Sets the graphic mode
DO
' We'll put our statemens here later
LOOP UNTIL INKEY$ = "Q" or INKEY$ = "q"
If you compile this code and run it, you'll get a small black empty 640*480 window which you can turn off by pushing the letter Q (you might need to hold it). The program simply loops until you press "Q or "q". I used both upper and lower case "Q" symbol in case Caps Lock is turned on on your keyboard. INKEY$ is a statement that returns the last key pushed on the keyboard. I will explain later why it shouldn't be used with games and what's a better substitute.
To draw a circle we'll use the CIRCLE statement (refer to GFXlib's documentation). Check the following code:
SCREEN 18,8,2,0 ' Sets the graphic mode

DO

CIRCLE (150, 90), 10, 15

LOOP UNTIL INKEY$ = "Q" or INKEY$ = "q"
The last code draws a small circle on coordinates 150, 90 with a radius of 10 and color 15 (plain white) in a loop, which you can check if you compile the code. So how to move that circle? We need to connect its coordinates with VARIABLES. For this we'll use two variables named circlex and circley. Check the following code:
DIM SHARED AS SINGLE circlex, circley

SCREEN 13,8,2,0 ' Sets the graphic mode

circlex = 150 ' Initial circle position
circley = 90

DO

CIRCLE (circlex, circlex), 10, 15

LOOP UNTIL INKEY$ = "Q" or INKEY$ = "q"
This makes no change in the result of our program, but it's a step to what we want to accomplish. You can change the amounts to which circlex and circley equal to change the circle's initial position, but that's not what we really want. In order to move the circle we need to connect circlex and circley variables with keyboard statements.
We declared first two variables in our program. Since FreeBASIC ver.0.17 all variables in FreeBASIC programs MUST be declared, although if you use –lang qb command line during compiling you can compile using old QBasic compatibility dialect (I don’t recommend it as it will keep you deprived of possible advances and extensions which default FB compatibility mode already provides and will provide in the future). For more info on this check the appropriate page of the FreeBASIC wiki - Using the command line. Variables are declared (dimensioned) on this way:
DIM variable_name [AS type_of_variable]
Or...
DIM [AS type_of_variable] variable1, variable2, variable3, ...
The data inside [ ] is optional and the brackets are not used. Types of variables available in FreeBASIC are BYTE, SHORT, INTEGER, STRING, SINGLE, DOUBLE and few others, but I don't find details about them important on this level. What you need to know now is that you should declare variables or arrays AS INTEGER when they hold graphics data (memory buffers holding graphics, but a better alternative in FB is ANY PTR and I'll demonstrate later why) or when they represent data which doesn't need decimal precision (number of lives, points, etc.). Variables that need decimal precision are declared AS SINGLE or DOUBLE. Those are usually variables used in games which rely on physics formulae like arcade car driving games or jump 'n run games (gravity effect). Simply, the difference between the speed of two pixels per cycle and the speed of one pixel per cycle is most often too large, and in those limits you can't emulate effects like fluid movement on the most satisfactory way. Also, behind DIM you put SHARED which makes that the specific variable readable in the entire program (all subroutines). Don't use SHARED only with variables declared inside subroutines. If you are going to declare ARRAYS inside a subroutine, I advise you to replace DIM with REDIM. Strings are used to hold text data. Like YourName = "Dodo", but you need to declare YourName AS STRING first.
Certain programmers shun global variables (declared with SHARED) and consider them a bad programming habbit. I strongly disagree with their sentiment, but you should just be aware that many don't agree with strong usage of shared variables. In my own opinion and years of experience, using SHARED variables is rarely if ever a cause of bugs or crashes. On the contrary, strong usage of pointers and object oriented programming is.
Now I will introduce a new statement instead of INKEY$ which can detect multiple keypresses and is much more responsive (perfect response) than INKEY$. The flaw of INKEY$, as well as being very non-responsive (which you probably were able to detect when trying to shut down the previously compiled examples), is that it can detect only one keypress at any given moment which renders it completely unusable in games.
The substitute we'll use is MULTIKEY (a GFXlib statement) which features only one parameter, and that's the DOS scancode of the key you want to query. You might be lost now. DOS scancode is nothing but a code referred by the computer to a certain keyboard key. If you check Appendix A of the GFXlib's documentation, you will see what each code stands for. For example, MULTIKEY(&h1C) queries if you pushed ENTER. GFXlib allows you to replace these scancodes with "easy to read" constants like it's explained in Appendix A. To use GFXlib you need to include its .bi file (fbgfx.bi) into your source. What's a .bi file? Well, it can be any kind of module you would attach to your source code and which can feature various subroutines (if you don't know what a subroutine is, we'll get on that later) and declarations used in your main module. The code you need to add are these two lines as it follows:
#include "fbgfx.bi"
Using FB
It's best to put these two lines somewhere on the beginning of your program (before or after the sub declarations). You don't need to set a path to fbgfx.bi since it's placed in the /FreeBASIC/inc directory. You only need to set a path to a .bi file if it's not in that directory or not in the directory where the source code is. Using FB tells the program that we will be accessing GFXlib symbols without namespace, meaning, without having to put 'FB.' in front of every GFXlib symbol. Refer to FreeBASIC Wiki on USING.
Now the fun starts.
We will add a new variable named circlespeed which flags (sets) how many pixels the circle will move in one cycle (loop). The movement will be done with the arrows key. Every time the user pushes a certain arrow key we will tell the program to change either circlex or circley (depends on the pushed key) by the amount of circlespeed. Check the following code:
#include "fbgfx.bi"
Using FB

DIM SHARED AS SINGLE circlex, circley, circlespeed

SCREEN 18,8,2,0 ' Sets the graphic mode

circlex = 150   ' Initial circle position
circley = 90
circlespeed = 1 ' Circle's speed => 1 pixel per loop

DO

CIRCLE (circlex, circley), 10, 15

' According to pushed key we change the circle's coordinates.
IF MULTIKEY(SC_RIGHT) THEN circlex = circlex + circlespeed
IF MULTIKEY(SC_LEFT) THEN circlex = circlex - circlespeed
IF MULTIKEY(SC_DOWN) THEN circley = circley + circlespeed
IF MULTIKEY(SC_UP) THEN circley = circley - circlespeed

LOOP UNTIL MULTIKEY(SC_Q) OR MULTIKEY(SC_ESCAPE)
As you see we also changed the condition after UNTIL since we are using MULTIKEY now. Now you can exit the program by pressing ESCAPE too (I added one more condition).
If you compile the last version of the code, two things we don't want to happen will happen. The program will run so fast you won't even notice the movement of the circle, and the circle will "smear" the screen (the circles drawn on different coordinates in previous cycles will remain on the screen). To avoid smearing you need to have the CLS statement (clears the screen) in the loop so that in every new cycle the old circle from the previous cycle is erased before the new is drawn.
To reduce the speed of the program the quickest fix is the SLEEP command. What it does? It waits until the specified amount of time has elapsed (in milliseconds) or a key is pressed. To escape the key press option use SLEEP milliseconds, 1. This statement is also an efficient solution for the 100 % CPU usage problem. You see, if you don't use that statement any kind of FreeBASIC program with a loop (even the simplest one) will hold up all the computer cycles and make all the other Windows tasks you might be running to crawl. It also makes difficult for you to operate with other tasks while that kind of FreeBASIC program is running. Err...this is not a huge problem and a fair amount of programmers that have released FreeBASIC games so far did not bother to fix it.
Copy and paste the following code and compile it:
#include "fbgfx.bi"
Using FB

DIM SHARED AS SINGLE circlex, circley, circlespeed

SCREEN 18,8,2,0 ' Sets the graphic mode

circlex = 150   ' Initial circle position
circley = 90
circlespeed = 1 ' Circle's speed => 1 pixel per loop

DO

CLS
CIRCLE (circlex, circley), 10, 15

' According to pushed key we change the circle's coordinates.
IF MULTIKEY(SC_RIGHT) THEN circlex = circlex + circlespeed
IF MULTIKEY(SC_LEFT) THEN circlex = circlex - circlespeed
IF MULTIKEY(SC_DOWN) THEN circley = circley + circlespeed
IF MULTIKEY(SC_UP) THEN circley = circley - circlespeed

SLEEP 1, 1

LOOP UNTIL MULTIKEY(SC_Q) OR MULTIKEY(SC_ESCAPE)
Viola! Our circle is moving and "slow enough".
The last version of the code does not represent the desirable way of coding, but I had to simplify the code in order to make this lesson easy to understand. What we need to do next is declare our variables on the way they should be declared in any "serious" program, and show why we are having two work pages and what we can do with them.
The way variables are declared in the above code is not the most convenient in larger projects where we have huge amount of variables usually associated to several objects (an object can be the player, enemy or anything that is defined with MORE THAN ONE variable).
So first we'll define a user defined data type with the statement TYPE that can contain more variables/arrays (stay with me). We'll name this user data type ObjectType. The code:
TYPE ObjectType
     x AS SINGLE
     y AS SINGLE
     speed AS SINGLE
END TYPE
After this we declare our circle as an object:
DIM SHARED CircleM AS ObjectType
' We can't declare this variable with "Circle"
' since then FB can't differ it from
' the statement CIRCLE, thus "CircleM".
How is this method beneficial? It allows us to manage the program variables on a more efficient and cleaner way. Instead of (in this example) having to declare each circle's characteristic (it's position, speed, etc.) separately, we'll simply use a type:def that includes all these variables and associate a variable or an array to it (in this case that's CircleM). So now the circle's x position is flagged with CircleM.X, circle's y position with CircleM.Y and circle's speed with CircleM.speed. I hope you see now why this is better. One user defined type can be connected with more variables or arrays. In this example you can add another object with something like DIM SHARED EnemyCircle(8) AS ObjectType which would allow us to manage 8 "evil" circles with a specific set of routines (an AI of some sort) using the variables from the ObjectType type:def (x, y, speed), and these circles could "attack" the user's circle on some way. In the next lesson all this will become more clear. Have in mind that not ALL variables need to be declared using a type:def. This is only for "objects" in your game that are defined (characterized) with more variables (like a hero determined by health, money, score, strength, etc.).
After the change the final version of the code looks like this:
#include "fbgfx.bi"
Using FB

' Our user defined type.
TYPE ObjectType
     x AS SINGLE
     y AS SINGLE
     speed AS SINGLE
END TYPE

DIM SHARED CircleM AS ObjectType
' We can't declare this variable with "Circle"
' since then FB can't differ it from
' the statement CIRCLE, thus "CircleM".

SCREEN 18,8,2,0 ' Sets the graphic mode
SETMOUSE 0,0,0 ' Hides the mouse cursor

CircleM.x = 150   ' Initial circle's position
CircleM.y = 90
CircleM.speed = 1 ' Circle's speed => 1 pixel per loop

DO

CLS
CIRCLE (CircleM.x, CircleM.y), 10, 15

' According to pushed key we change the circle's coordinates.
IF MULTIKEY(SC_RIGHT) THEN CircleM.x = CircleM.x + CircleM.speed
IF MULTIKEY(SC_LEFT) THEN CircleM.x = CircleM.x - CircleM.speed
IF MULTIKEY(SC_DOWN) THEN CircleM.y = CircleM.y + CircleM.speed
IF MULTIKEY(SC_UP) THEN CircleM.y = CircleM.y - CircleM.speed

SLEEP 1, 1 ' Wait for 1 millisecond.

LOOP UNTIL MULTIKEY(SC_Q) OR MULTIKEY(SC_ESCAPE)
You will notice I added one more statement in the code. The SETMOUSE statement positions the system mouse cursor (first two parameters) and shows or hides it (third parameter; 0 hides it). You should input this statement with these parameters in every program AFTER the SCREEN statement (IMPORTANT!) by default, because even if your program is going to feature a mouse controllable interface, you will most likely draw your own cursor. Trust me on this. Uh, I using that line way too often.
Download the completed example with extra comments inside the source: move_circle.zip
Phew, we are done with the first example. Some of you might think I went into too many details, but I feel all this dance was needed to make the next examples and lessons a more enjoyable adventure.
Nevertheless, this example is far from what we want, right? So the next chapter will learn you how to load graphics from external files among other things.
In the next example we will be applying all the knowledge from the first example, so don't expect for this example to go into every statement again. I will explain every new statement and just brush off the old ones.
In this section we'll start to code our mini-game which won't be completed in this lesson. In this lesson we'll just create a program where a warrior runs around a green field (single screen).
First I'll show you what graphics we'll be using. We are going to work in 8-bit color depth mode, so the images that we are going to use need to be saved in that mode (256 colors mode). For warrior sprites I'll use the sprites of the main character from my first game Dark Quest.
As you see this image features 12 sprites of our warrior, each 40*40 pixels large. Two for each direction (walk animation) and one sprite for each direction when the warrior is swinging with his sword. Sword swinging won’t be implemented in the first lesson but will become necessary later.
Second image is the background image which you can check/download if you click here (640*480 pixels large, 8-bit BMP image).
Download both images and place them where you will place the source, or just download the completed example at the end of this section.
On the beginning of our program we should include fbgfx.bi, same as in the first example, and then set the same graphic mode. The code:
#include "fbgfx.bi"
Using FB

SCREEN 18,8,2,0 ' Sets the graphic mode
SETMOUSE 0,0,0  ' Hides the mouse cursor
Now we will declare two memory pointers that will point to memory buffers where our graphics will be stored (one for the sprites and one for the background).
The first pointer we'll name background1 and declare it with the following line:
DIM SHARED background1 AS ANY PTR
ANY PTR tells us that background1 will actually be a memory pointer. A pointer defined as an ANY PTR disables the compiler checking for the type of data it points to. It is useful as it can point to different types of data. We'll use pointers because we will allocate memory for our graphics using the IMAGECREATE statement. IMAGECREATE allocates the right amount of memory for a piece of graphics (sprite/image) if we input its height and width. Otherwise we would have to do it manually, meaning, calculate the needed amount of memory as the result of the sprite size, bit-depth and variable size. IMAGECREATE does this for use. As IMAGECREATE results with a pointer, we need to refer a pointer to it and not a variable. Don't worry if you don't know anything about pointers. You don't need to (to comprehend this tutorial).
The next pointer we'll declare will point to the memory buffer that holds the 12 warrior sprites. We will dimension this pointer as a single dimension array, each element in the array representing one sprite.
DIM SHARED WarriorSprite(12) AS ANY PTR
Both these lines should be put in the code before the SCREEN statement. That's the way you'll write every program. Subroutine declarations, then variable declarations, then extra subroutine declarations if needed, and then the real code. The beginning of our program should now look like this:
#include "fbgfx.bi"
Using FB

DIM SHARED background1 AS ANY PTR ' A pointer that points to a memory
                                  ' buffer holding the background graphics
DIM SHARED WarriorSprite(12) AS ANY PTR ' A pointer that points to a memory
                                        ' buffer holding the warrior sprites

SCREEN 18,8,2,0 ' Sets the graphic mode
SETMOUSE 0,0,0  ' Hides the mouse cursor
After the screen resolution, color depth and number of work pages are set, we will hide our work page before loading graphics onto it since we don't want for the user to see all of the program's graphics every time he or she starts our program. To accomplish that we'll use the SCREENSET statement. What it does? It sets the work page (first parameter) and the visible page (second parameter). In our case we will set page 1 as the work page and page 0 as the visible page. After using 'SCREENSET 1, 0' every time we draw or load something on the screen it will be loaded/drawn on the work page and won't be visible to the user until we use the statement SCREENCOPY or SCREENSET with different parameters (SCREENSET 1, 1). This allows us to load graphics onto the screen we don't want for the user to see and delete it before coping the content on the work page to the visible page. This page flipping is also useful in loops with "graphics demanding" programs to avoid flicker or some other unwanted occurrence. It is possible to acomplish this with only using SCREENLOCK before loading and SCREENUNLOCK when you want to show the updated screen, but I feel this gives more flexibility. A matter of preference.
BMP (bitmap) files are loaded in GFXlib with the statement BLOAD. BLOAD can also load BSAVEd images (images saved with the BSAVE statement). BMP images can be loaded directly into an array or onto the screen. When an image is loaded with BLOAD image's associated palette will be set as program's current palette. In 8-bit mode all your graphics should be in the same palette. In 16-bit and higher color depth modes you don't have to think about palettes. Check GFXlib's documentation for more details on these statements. For alternative image loading libraries, I can recommend FreeBASIC PNG library (version 3.2) which loads PNG images.
The first image we'll load is the background image, and we'll load it onto the screen first and then store (capture) that data into a memory buffer with the GET statement. I prefer that way over loading images directly into memory buffers as a result of habbit. Just have in mind that you can BLOAD directly into a memory buffer, as well as GET graphics directly from a memory buffer. Often people create a memory buffer than acts like the full screen, and then BLOAD to it, as well as GET from it. The background image is loaded and stored into memory with the following code:
SCREENSET 1, 0

background1 = IMAGECREATE (640, 480)

BLOAD "BACKGRND.bmp", 0
GET (0,0)-(638,479), background1
BACKGRND.bmp is the name of the image we are loading. If it's placed in some subdirectory (not where the compiled program is), you need to set a path to it. If, for example, it's placed in the subdirectory "Graphics" you need to replace BACKGRND.bmp with "Graphics/BACKGRND.bmp". DON'T USE HARD PATHS in you programs like "C:/FreeBASIC/myprograms/Bobo/BACKGRND.bmp", because that's some of the stupidest things you can do in game design. It forces the user to extract your program in a specific directory and have death wishes about you. Parameter 0 in the BLOAD statement means we want to load the image onto the screen. Like I previously noted, instead of 0 you can put an address (memory pointer) where to store the image. The GET statement in the previous code captures the graphics on the screen from the coordinates (0,0) to (639,479) and refers the background1 memory pointer to it. Note how we had to initiate our memory pointer with IMAGECREATE previously, sizing it with the appropriate image height and width.
The second image we'll load is the one with the warrior sprites after which we'll store them into the WarriorSprite array. There are 12 sprites and each one is 40*40 pixels large. The code that loads the second image as stores the sprites is as follows:
WarriorSprite(1) = IMAGECREATE (40, 40)
WarriorSprite(2) = IMAGECREATE (40, 40)
WarriorSprite(3) = IMAGECREATE (40, 40)
WarriorSprite(4) = IMAGECREATE (40, 40)
WarriorSprite(5) = IMAGECREATE (40, 40)
WarriorSprite(6) = IMAGECREATE (40, 40)
WarriorSprite(7) = IMAGECREATE (40, 40)
WarriorSprite(8) = IMAGECREATE (40, 40)
WarriorSprite(9) = IMAGECREATE (40, 40)
WarriorSprite(10) = IMAGECREATE (40, 40)
WarriorSprite(11) = IMAGECREATE (40, 40)
WarriorSprite(12) = IMAGECREATE (40, 40)

BLOAD "SPRITES.bmp", 0
GET (0,0)-(19,19),  WarriorSprite(1)
GET (24,0)-(43,19), WarriorSprite(2)
GET (48,0)-(67,19), WarriorSprite(3)
GET (72,0)-(91,19), WarriorSprite(4)
GET (96,0)-(115,19), WarriorSprite(5)
GET (120,0)-(139,19), WarriorSprite(6)
GET (144,0)-(163,19), WarriorSprite(7)
GET (168,0)-(187,19), WarriorSprite(8)
GET (192,0)-(211,19), WarriorSprite(9)
GET (216,0)-(235,19), WarriorSprite(10)
GET (240,0)-(259,19), WarriorSprite(11)
GET (264,0)-(283,19), WarriorSprite(12)
Boy, all that code to store mere 12 sprites! Each GET goes for one sprite and you see how we stored each one on a different position in the array. Now what if your game features hundreds of sprites and tiles? What to do then? Well, you can apply a form of automation in sprites/tiles capturing if you align (compile) sprites or tiles sequentially in the BMP image. Place them one after another with 0 or more pixels of space between them. You probably noticed a certain order in coordinates used in the twelve GET statements from the last code. That's because these 12 sprites are nicely arranged in the image in one line (from left to right) and with 8 pixels between every sprite. This allows us to load all of them with a single GET statement and a FOR loop. Like this (this replaces the last piece of code):
FOR imagepos AS INTEGER = 1 TO 12
	WarriorSprite(imagepos) = IMAGECREATE (40, 40)
	GET (0+(imagepos-1)*48,0)-(39+(imagepos-1)*48,39),  WarriorSprite(imagepos)
NEXT imagepos
If you don't understand how FOR loops work, I’ll explain it. A FOR loop simply executes the statement(s) between FOR and NEXT until the variable specified with FOR reaches the number behind TO. In our code in the first cycle (loop) variable imagepos equals 1, and the coordinates in the GET statement are (try to calculate them manually) (0,0) and (39,39). When imagepos equals 12 (last cycle) the coordinates are (528,0) and (566,39). So this FOR loop simply "goes through" all the sprites and stores them on the appropriate positions inside the WarriorSprite array. Oh, the wonders of FOR loops. Anyway, try to apply this knowledge when construction ways of loading large numbers of tiles and/or sprites from BMP images. Note how I used the same FOR loop to initiate the storages for all the sprites using IMAGECREATE.
The sprites are now saved on these positions:
WarriorSprite(1) - warrior moving down image #1
WarriorSprite(2) - warrior moving down image #2
WarriorSprite(2) - warrior moving up image #1
WarriorSprite(4) - warrior moving up image #2
WarriorSprite(5) - warrior moving left image #1
WarriorSprite(6) - warrior moving left image #2
WarriorSprite(7) - warrior moving right image #1
WarriorSprite(8) - warrior moving right image #2
WarriorSprite(9) - warrior swinging up
WarriorSprite(10) - warrior swinging down
WarriorSprite(11) - warrior swinging left
WarriorSprite(12) - warrior swinging right
The entire code so far should look like this:
#include "fbgfx.bi"
Using FB

SCREEN 18,8,2,0 ' Sets the graphic mode
SETMOUSE 0,0,0  ' Hides the mouse cursor

DIM SHARED background1 AS ANY PTR ' A pointer that points to a memory
                                  ' buffer holding the background graphics
DIM SHARED WarriorSprite(12) AS ANY PTR ' A pointer that points to a memory
                                        ' buffer holding the warrior sprites
' Let's hide the work page since we are
' going to load program graphics directly
' on the screen.
SCREENSET 1, 0

' Load the background image and store
' it into a memory buffer.
background1 = IMAGECREATE (640, 480)
BLOAD "BACKGRND.bmp", 0
GET (0,0)-(639,479), background1

CLS ' Clear our screen since we
    ' are loading a new image (not
    ' neccesary but wise).

' Load the sprites onto the screen and store them
' into an array.
BLOAD "SPRITES.bmp", 0
FOR imagepos AS INTEGER = 1 TO 12
	WarriorSprite(imagepos) = IMAGECREATE (40, 40)
	GET (0+(imagepos-1)*48,0)-(39+(imagepos-1)*48,39),  WarriorSprite(imagepos)
NEXT imagepos
We are finally done with loading graphics. Now we will declare additional variables needed in this example. I'll define a data type like in the previous example, but it will contain more variables. The following code should be placed before the pointers declarations.
TYPE ObjectType
X          AS SINGLE
Y          AS SINGLE
Speed      AS SINGLE
Frame      AS INTEGER
Direction  AS INTEGER
Move       AS INTEGER
Attack     AS INTEGER
Alive      AS INTEGER
END TYPE
The object that will be used to control the warrior is declared with:
DIM SHARED Player AS ObjectType
Frame variable will be used to flag the sprite that needs to be displayed (according to warrior's direction, if he is moving or not, etc.). Direction will be used to flag the warrior's direction, Move if he is moving or not, Attack if he is attacking or not (so we could flag the proper sprite), and Alive if he is alive or not (not used in this example but most often necessary).
Let's set a loop on the way it's done in the previous example, but also implement screen page swaping into it.
DO

screenlock ' Lock our screen (nothing will be
           ' displayed until we unlock the screen).
screenset workpage, workpage xor 1 ' Swap work pages.

CLS

' Our graphics code goes in here.

workpage xor = 1 ' Swap work pages.
screenunlock ' Unlock the page to display what has been drawn.

SLEEP 10, 1 ' Slow down the program and prevent 100 % CPU usage.

LOOP UNTIL MULTIKEY(SC_Q) OR MULTIKEY(SC_ESCAPE)
For the loop to work declare workpage AS SHARED and INTEGER together with other variable declarations.
We should now add a statement in the loop that will draw our warrior. To paste graphics onto the screen with GFXlib we use the PUT statement. It's very simple and functions like this:
PUT (x coordinate, y coordinate), array, Mode
Where array is the name of the array (or memory pointer which points to) where our image/sprite/tile is stored. Mode represents several methods of pasting graphics, but at this point you should be aware of two. PSET pastes all the image pixels, while TRANS skips pixels that are of background color (transparent background effect). In 16-bit and higher color depth modes transparent color is the color RGB 255,0,255 (pink; 255 should be the highest value in the palette editor you are using, but some drawing programs feature a different number as a maximum color value so have that in mind), while in 8-bit mode it's the color 0 (first in the palette). Our sprites must be pasted with TRANS or they would be pasted with a black square around them (consisted of color 0). By using MULTIKEY statements according to pushed arrow key we'll change warrior's position and flag the proper direction (with a number). According to direction we will paste the proper sprite. Here we go (entire code):
#include "fbgfx.bi"
Using FB

' Useful constants (makes your code easier to read and write).
const FALSE = 0
const TRUE = 1

SCREEN 18,8,2,0 ' Sets the graphic mode
SETMOUSE 0,0,0  ' Hides the mouse cursor

DIM SHARED background1 AS ANY PTR ' A pointer that points to a memory
                                  ' buffer holding the background graphics
DIM SHARED WarriorSprite(12) AS ANY PTR ' A pointer that points to a memory
					' buffer holding the warrior sprites
DIM SHARED workpage AS INTEGER

' Let's hide the work page since we are
' going to load program graphics directly
' on the screen.
SCREENSET 1, 0

' Load the background image and store
' it into a memory buffer.
background1 = IMAGECREATE (640, 480)
BLOAD "BACKGRND.bmp", 0
GET (0,0)-(639,479), background1

CLS ' Clear our screen since we
    ' are loading a new image (not
    ' neccesary but wise).

' Load the sprites onto the screen and store them
' into an array.
BLOAD "SPRITES.bmp", 0
FOR imagepos AS INTEGER = 1 TO 12
	WarriorSprite(imagepos) = IMAGECREATE (40, 40)
	GET (0+(imagepos-1)*48,0)-(39+(imagepos-1)*48,39),  WarriorSprite(imagepos)
NEXT imagepos

TYPE ObjectType
X          AS SINGLE
Y          AS SINGLE
Speed      AS SINGLE
Frame      AS INTEGER
Direction  AS INTEGER
Move       AS INTEGER
Attack     AS INTEGER
Alive      AS INTEGER
END TYPE

DIM SHARED Player AS ObjectType

' Warrior's (player's) initial
' position, speed (constant)
' and direction (1 = right)
Player.X = 150
Player.Y = 90
Player.Speed = 1
Player.Direction = 1

DO

' Player.Direction = 1 -> warrior moving right
' Player.Direction = 2 -> warrior moving left
' Player.Direction = 3 -> warrior moving down
' Player.Direction = 4 -> warrior moving up

Player.Move = FALSE ' By deafult the player is not
                    ' moving.

' According to pushed key move the
' player and flag the proper direction.
IF MULTIKEY(SC_RIGHT) THEN
    Player.X = Player.X + Player.Speed
    Player.Direction = 1
    Player.Move = TRUE
END IF
IF MULTIKEY(SC_LEFT) THEN
    Player.X = Player.X - Player.Speed
    Player.Direction = 2
    Player.Move = TRUE
END IF
IF MULTIKEY(SC_DOWN) THEN
    Player.Y = Player.Y + Player.Speed
    Player.Direction = 3
    Player.Move = TRUE
END IF
IF MULTIKEY(SC_UP) THEN
    Player.Y = Player.Y - Player.Speed
    Player.Direction = 4
    Player.Move = TRUE
END IF


screenlock ' Lock our screen (nothing will be
           ' displayed until we unlock the screen).
screenset workpage, workpage xor 1 ' Swap work pages.

' According to player's direction flag the
' proper sprite (check in the tutorial on which
' position each sprite is stored).
IF Player.Direction = 1 THEN Player.Frame = 7
IF Player.Direction = 2 THEN Player.Frame = 5
IF Player.Direction = 3 THEN Player.Frame = 1
IF Player.Direction = 4 THEN Player.Frame = 3

CLS ' Clear the screen.

' Paste the warrior on Player.X and Player.Y coordinates,
' using sprite number Player.Frame, and skip background color.
PUT (Player.X, Player.Y), WarriorSprite(Player.Frame), TRANS

workpage xor = 1 ' Swap work pages.
screenunlock ' Unlock the page to display what has been drawn.

SLEEP 10, 1 ' Slow down the program and prevent 100 % CPU usage.

LOOP UNTIL MULTIKEY(SC_Q) OR MULTIKEY(SC_ESCAPE)
Take a note of the two constants which I added in the code and which allow us to make our code easier to write and read. Instead of dealing with 0 and 1 as conditions with variables than should only be true or false, we declare in our code that FALSE will mean 0 and TRUE will mean 1. If you compile this code, you'll be able to move the warrior around a black screen (we'll add the background later), but his legs won't move. How to enable "walk" animation? Well, it's quite easy. You'll see how the Move variable comes in handy now. You should input this code right after CLS:
Frame1 = (Frame1 MOD 2) + 1
IF Player.Move = FALSE OR Frame1 = 0 THEN Frame1 = 1
Be sure to declare Frame1 (together with other variable declarations) with:
DIM SHARED AS INTEGER Frame1
The line Frame1 = (Frame1 MOD 2) + 1 is a substitute for:
Frame1 = Frame1 + 1
IF Frame1 > 2 THEN Frame1 = 1
MOD finds the remainder from a division operation. So Frame1 MOD 2 results with the remainder when we divide Frame1 with 2. If Frame1 is 1, divided by 2 it results with the remainder of 0.5, which is rounded on 1. If you add 1 to 1, you get 2. If Frame1 is 2, divided by 2 it results with the remainder of 0. If you add 0 to 1, you get 1. So with Frame1 = (Frame1 MOD 2) + 1 we loop from 1 to 2, adding one unit in each cycle.
All you need to know is that this formula changes variable Frame1 by 1 in each cycle from number 1 to the number specified after MOD. If you want for Frame1 to loop from 50 to 66 you need to input Frame1 = (Frame1 MOD 16) + 50, but that's not what we need. We need a variable that toggles from 1 to 2 in each cycle to enable walk animation. To make this work we need to change the 4 lines of code preceding CLS (where according to player's direction the proper sprite is flagged) to this:
IF Player.Direction = 1 THEN Player.Frame = 6 + Frame1
IF Player.Direction = 2 THEN Player.Frame = 4 + Frame1
IF Player.Direction = 3 THEN Player.Frame = 0 + Frame1
IF Player.Direction = 4 THEN Player.Frame = 2 + Frame1
So when Frame1 equals 1 and the player is moving right (Player.Direction = 1) Player.Frame equals 7, while when Frame1 equals 2 Player.Frame is 8. Check the lesson on the place where I specified on which position each sprite is stored in the WarriorSprite array. You'll see that "moving right" sprites are stored on positions 7 and 8. Now why we need that condition where the Player.Move variable is used? When the player is not moving Frame1 needs to be 1 or 2 IN EVERY CYCLE (no sprite rotation). Second condition (IF Frame1 = 0) is there to prevent errors (when the loop starts Frame1 might equal 0 and the program might load a sprite out of bounds or something; I highly advise this sort of precaution measure).
If you compile the code again with these changes, you'll notice that warrior's legs are moving too fast. How to set the speed of sprite rotation? You need another variable like Frame1 (we'll named it Frame2) that will grow to a higher number and connect it with Frame1. This results in Frame1 not changing in every cycle but only when Frame2 equals a certain number. Check the following code:
Frame2 = (Frame2 MOD 16) + 1
IF Frame2 = 10 THEN Frame1 = (Frame1 MOD 2) + 1
Now Frame1 will change (from 1 to 2 or vice versa) every time Frame2 equals 10, and Frame2 will equal 10 every 16 cycles (it grows from 1 to 16 by 1 in every cycle and then drops to 1). We reduced the speed of rotation of the Frame1 variable! Change 16 to some other number to get a different speed of sprite rotation. Be sure to declare Frame2 as you did with Frame1. Using several "Frame" variables in your code, some connected and some not, will become necessary in larger projects where you will have many objects represented with sprites that need to rotate with different speeds (monsters which walk with different paces, the speed of explosion animations, etc.). With "walking" objects you need to synchronize the speed of that object with sprite rotation (the best you can) or your "walking" object (player, monster, etc.) might seem like it’s sliding or running in place.
One of the last things we'll do in the second example is add a line that pastes the background. It should be placed before the PUT statement that pastes the warrior (as the warrior is pasted OVER the background):
PUT (0, 0), background1, PSET
You can also remove CLS now since in every new cycle of the loop the background is pasted over the entire screen erasing all the graphics from the previous cycle.
Last 4 conditions we'll add in the code are there to prevent the warrior to walk off the screen.
IF Player.X < 0 THEN
Player.Move = FALSE
Player.X = 0
END IF
IF Player.X > 600 THEN
Player.Move = FALSE
Player.X = 600
END IF
IF Player.Y < 0 THEN
Player.Move = FALSE
Player.Y = 0
END IF
IF Player.Y > 440 THEN
Player.Move = FALSE
Player.Y = 440
END IF
You should be able now to understand this code. Player.Move is changed to FALSE so that the warrior doesn't seem like he is trying to push the edge of the screen. Try to REM these lines (Player.Move = FALSE) and see it yourself.
The FINAL version of the code (for this lesson) looks like this (yippee!):
#include "fbgfx.bi"
Using FB

' Useful constants (makes your code easier to read and write).
const FALSE = 0
const TRUE = 1

SCREEN 18,8,2,0 ' Sets the graphic mode
SETMOUSE 0,0,0  ' Hides the mouse cursor

DIM SHARED background1 AS ANY PTR ' A pointer that points to a memory
                                  ' buffer holding the background graphics
DIM SHARED WarriorSprite(12) AS ANY PTR ' A pointer that points to a memory
					' buffer holding the warrior sprites
DIM SHARED workpage AS INTEGER
DIM SHARED AS INTEGER Frame1, Frame2

' Let's hide the work page since we are
' going to load program graphics directly
' on the screen.
SCREENSET 1, 0

' Load the background image and store
' it into a memory buffer.
background1 = IMAGECREATE (640, 480)
BLOAD "BACKGRND.bmp", 0
GET (0,0)-(639,479), background1

CLS ' Clear our screen since we
    ' are loading a new image (not
    ' neccesary but wise).

' Load the sprites onto the screen and store them
' into an array.
BLOAD "SPRITES.bmp", 0
FOR imagepos AS INTEGER = 1 TO 12
	WarriorSprite(imagepos) = IMAGECREATE (40, 40)
	GET (0+(imagepos-1)*48,0)-(39+(imagepos-1)*48,39),  WarriorSprite(imagepos)
NEXT imagepos

TYPE ObjectType
X          AS SINGLE
Y          AS SINGLE
Speed      AS SINGLE
Frame      AS INTEGER
Direction  AS INTEGER
Move       AS INTEGER
Attack     AS INTEGER
Alive      AS INTEGER
END TYPE

DIM SHARED Player AS ObjectType

' Warrior's (player's) initial
' position, speed (constant)
' and direction (1 = right)
Player.X = 150
Player.Y = 90
Player.Speed = 1
Player.Direction = 1

DO

' Player.Direction = 1 -> warrior moving right
' Player.Direction = 2 -> warrior moving left
' Player.Direction = 3 -> warrior moving down
' Player.Direction = 4 -> warrior moving up

Player.Move = FALSE ' By deafult the player is not
                    ' moving.

' According to pushed key move the
' player and flag the proper direction.
IF MULTIKEY(SC_RIGHT) THEN
    Player.X = Player.X + Player.Speed
    Player.Direction = 1
    Player.Move = TRUE
END IF
IF MULTIKEY(SC_LEFT) THEN
    Player.X = Player.X - Player.Speed
    Player.Direction = 2
    Player.Move = TRUE
END IF
IF MULTIKEY(SC_DOWN) THEN
    Player.Y = Player.Y + Player.Speed
    Player.Direction = 3
    Player.Move = TRUE
END IF
IF MULTIKEY(SC_UP) THEN
    Player.Y = Player.Y - Player.Speed
    Player.Direction = 4
    Player.Move = TRUE
END IF

' The following 4 conditions prevent
' the warrior to walk off the screen.
IF Player.X < 0 THEN
Player.Move = FALSE
Player.X = 0
END IF
IF Player.X > 600 THEN
Player.Move = FALSE
Player.X = 600
END IF
IF Player.Y < 0 THEN
Player.Move = FALSE
Player.Y = 0
END IF
IF Player.Y > 440 THEN
Player.Move = FALSE
Player.Y = 440
END IF

screenlock ' Lock our screen (nothing will be
           ' displayed until we unlock the screen).
screenset workpage, workpage xor 1 ' Swap work pages.

' Frame1 changes from 1 to 2 or vice versa every
' 16 cycles (set with Frame2 variable).
Frame2 = (Frame2 MOD 16) + 1
IF Frame2 = 10 THEN Frame1 = (Frame1 MOD 2) + 1
IF Player.Move = FALSE OR Frame1 = 0 THEN Frame1 = 1

' According to player's direction flag the
' proper sprite (check in the tutorial on which
' position each sprite is stored).
IF Player.Direction = 1 THEN Player.Frame = 6 + Frame1
IF Player.Direction = 2 THEN Player.Frame = 4 + Frame1
IF Player.Direction = 3 THEN Player.Frame = 0 + Frame1
IF Player.Direction = 4 THEN Player.Frame = 2 + Frame1

' Pastes the background.
PUT (0, 0), background1, PSET
' Paste the warrior on Player.X and Player.Y coordinates,
' using sprite number Player.Frame, and skip background color.
PUT (Player.X, Player.Y), WarriorSprite(Player.Frame), TRANS


workpage xor = 1 ' Swap work pages.
screenunlock ' Unlock the page to display what has been drawn.

SLEEP 10, 1 ' Slow down the program and prevent 100 % CPU usage.

LOOP UNTIL MULTIKEY(SC_Q) OR MULTIKEY(SC_ESCAPE)

' Destroy our memory buffers before ending the program
' (free memory).
IMAGEDESTROY (background1)
FOR imagepos AS INTEGER = 1 TO 12
IMAGEDESTROY WarriorSprite(imagepos)
NEXT imagepos
Note how I used the IMAGEDESTROY statement to free the memory before ending the program. Always use this when allocating memory with IMAGECREATE.
Compile and test the program.
Download the completed example compiled with the graphics files: move_warrior.zip
If you want to convert example #2 into 16-bit or higher color depth mode, you need to convert the two images used in that example to 24-bit color depth mode (24 BPP). The best tool for this task is IrfanView, which is something anyone who owns a PC must have. But if you are going to use 24- or 32-bit screen modes, you should use Paint Shop Pro or some other similar program. With IrfanView the transparent bright pink color is not converted properly from 8-bit mode. With sprites you need to replace the background color 0 with color RGB 255,0,255 (bright pink) like it's done on this image (click on it):
Another change you need to do is change the second parameter with SCREEN to 16 or 24.The code:
SCREEN 18,16,2,0

...
Download the entire code with all the changes and new graphics files (24-bit version of example #2): move_warrior24bit.zip
That's all for lesson #1.
In the next issue we'll deal with some more complex stuff, like artificial smarts, particles layers, more insight into FPS control and time-based movement. Stay tuned!
A tutorial written by Lachie D. (lachie13@yahoo.com ; The Maker Of Stuff)
Dang! I have to write something here too? Hrm...Well, I hope you enjoyed reading this issue as the last one. With issue #2, this is no longer a curiosity. It's a tradition! As always, I'm opened to suggestions, letters to the editor, articles and tutorials. Write! I'll read!
Since I'm editing this ezine in good will, I am hoping your responses will always be written in good will.
For the very end, if you are one of those who can't, doesn't want, or cares not to develop games, watch this video: Don Logan - Yes, Yes, Yes. I think I made myself clear.
Happy coding!
~ Lachie (lachie13@yahoo.com)