BASIC Gaming
Issue #3 ~ November 13th, 2011
"A FreeBASIC, QBasic and QB64 games magazine"
In This Issue
- Regular Columns
- Articles & Editorials
"A FreeBASIC, QBasic and QB64 games magazine"
Hello dear friends!
The third issue is finnaly here and I dare to say, it's another great one. It turned out to be a much bigger bite to swallow than I predicted, but luckily I was able to muster up my energy this weekend and bring it to an end. A lot of news pilled up, so be sure to check out all the new releases and projects in development. It's a mouthful.
Beside the whooping news briefs, this issue comes with the usual gallery and awards sections, 2 reviews and my old giant newbie-level game dev tutorial updated for the latest FB version. All in all, I'm happy with the final content of the issue and looking forward to working on the next, though I'm hoping it won't be so demanding to compile as this turned out to be.
Sorry for the huge size of the ZIP archive of this issue, but I wanted to include all the releases and demos locally. Work in progress tends to disappears from the net too often, so I think it's smart to try to preserve such releases as much it's possible.
Oh yes, you might have noticed the slight change in the ezine name, from BASIC Gamer to BASIC Gaming. Though I prefer BASIC Gamer, due to a name conflict with a website bearing the same name, I opt to use BASIC Gaming as the new name. Also, I compiled a website for the ezine, so you can check that out too: http://games.freebasic.net/basicgaming.php
Next issue? I don't know. I doubt this year, so maybe end of January.
Thank you for your support so far.
All the best,
~ Lachie Dazdarian (lachie13@yahoo.com)
I am just getting back to basic with QB64 after some years and running it on a mac. I am not sure of the limitations but we will see. Thanks for the magazine. I did not see a contribute link. I know this is a lot of hard work. Thanks
~ Stanley Morris
Yay, my first letter! Anyway, thank you for your kind words. As I previously said, I'm opened to all contributions in any form. Just email me and I'll have a look. Cheers!
~ LD
News about the latest FB/QB64/QB games, game engines, game-dev libraries and site updates.
Destructosoft releases a very cool Lights Out game coded in FreeBASIC, with expanded gameplay and unlockable mini-games. A bit overlooked release in my opinion and I highly recommend you check it out.
Download: Blackout_1.0.rar (625 KB)
Original forum thread: http://www.freebasic.net/forum/viewtopic.php?t=18561


Mysoft releases a wonderful FreeBASIC Arkanoid clone entitled Reinkarnoid, both for Windows and Nintendo DS. The game comes with excellent presentation, passwords feature and 33 original levels in total. Not to be missed!
Download (Windows): reinkarnoidwin32.rar (1085 KB)
Download (Nintendo DS): reinkarnoidds.rar (1048 KB)
Original forum thread: http://games.freebasic.net/forum/index.php?topic=523.0


Eternal Pain released a new version of his Diamond Dash clone, this time entitled Dashit. It features somewhat better gameplay and presentation than his earlier Brillian Bash. Compiled in FreeBASIC.
Download: dashit.zip (2461 KB)
Developer's website: http://eternalpain.tgp-gaming.de/

FB-Snarl is an interesting random generating maze game by Eric Kohl. Check it out!
Download: FB-Snarl.zip (86 KB)
Developer's website: http://erichkohl.blogspot.com/p/my-software.html

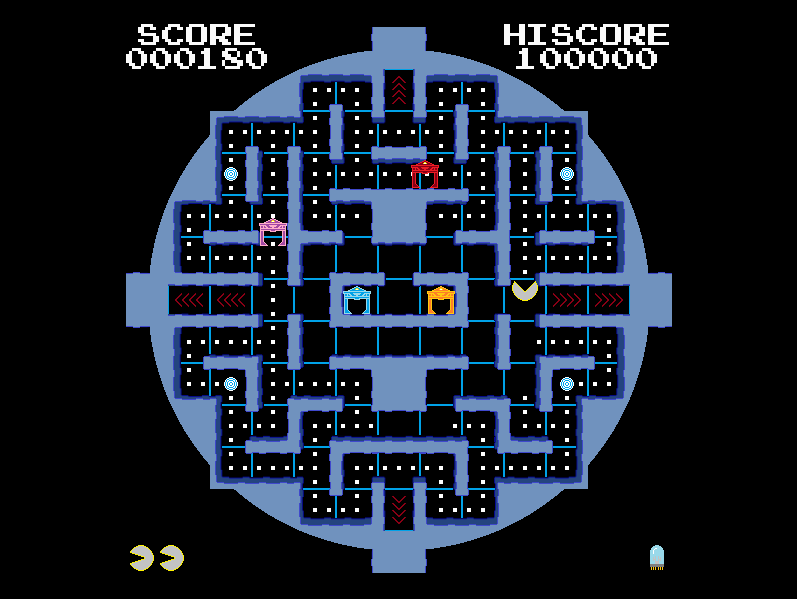
Tron: Pacman is a QB64 release from June I missed in the last issue. But hopefully it's not too late to correct this. A very cool Pacman clone with Tron theme. Try it out!
Download: tronpacman.zip (487 KB)
Original forum thread: http://www.qb64.net/forum/index.php?topic=3691.45
N3trunn3r was kind enough to keep maintaining Witchcraft Adventure releasing several patches and gameplay fixes, leading to the most recent version 1.8. In case you missed this game earlier, be sure to check it out now, or read my review on it first.
Download: WitchcraftAdventure.zip (ver.1.8, 20180 KB)
Developer's website: http://catbone.freebasic.net
DeeBee showcases Yet Another Game of Life in QB64. Check out the forum thread (source only): http://www.qb64.net/forum/index.php?topic=4742.0
vrensul posted a small update on his QB64 Stardom project in Semptember, but no new versions since them. Nevertheless, the developer promised to continue working on this top-down shooter.
Original forum thread: http://www.qb64.net/forum/index.php?topic=4153.15
Jobert14 continues to develop Card Captor Sakura EX, a QB64 platformer. Updates include new graphics, enemies and cross-platform support for Linux (probably for MacOSX too). A little bit earlier he posted a link to the last QuickBASIC 4.5 build of the game, for those curious about project history.
Download latest QB64 demo: CCSakura-FR1.rar (2360 KB)
Download the abandoned QB 4.5 version: QB45_Sakura.zip (647 KB)
New forum thread: http://www.qb64.net/forum/index.php?topic=4808.0

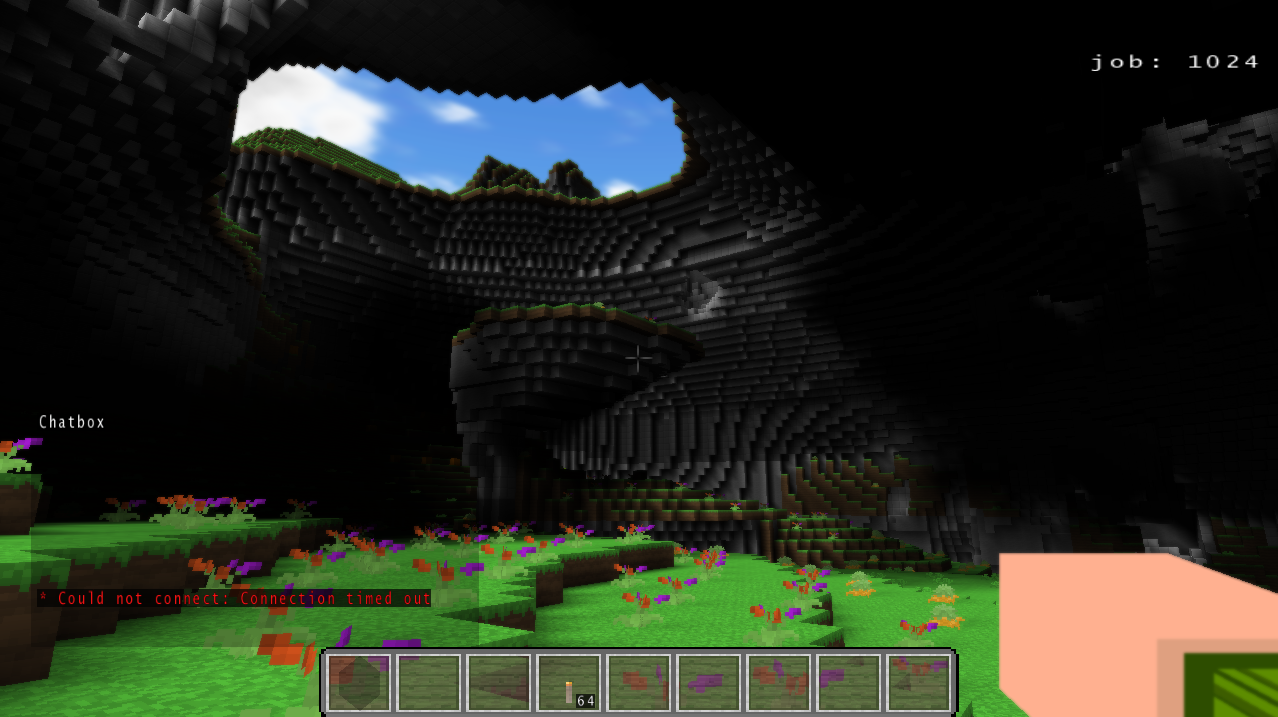
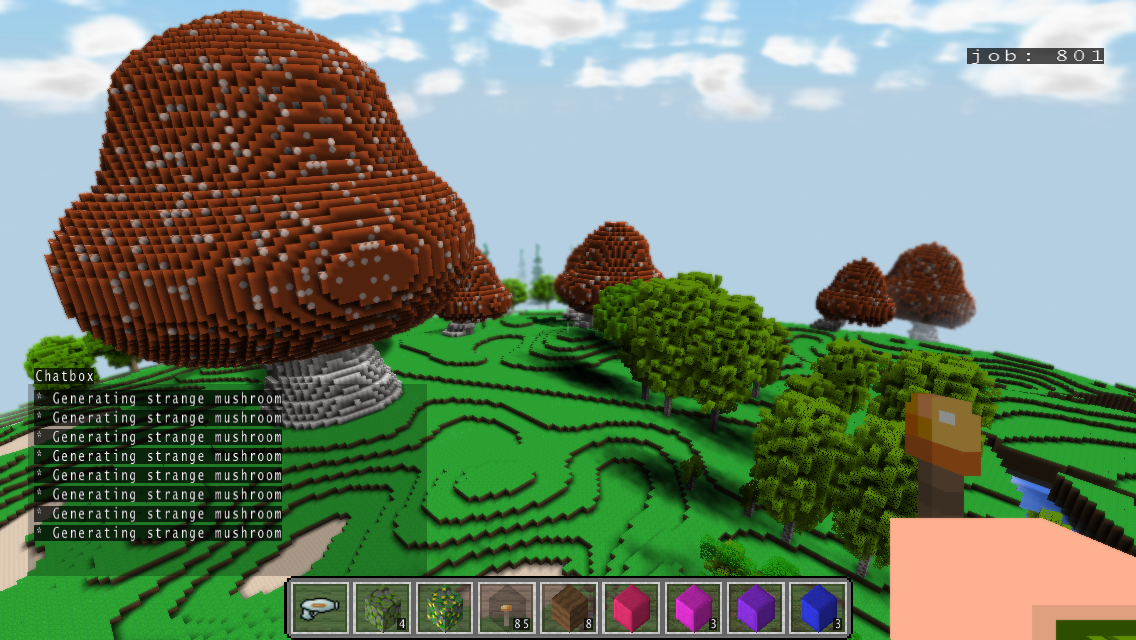
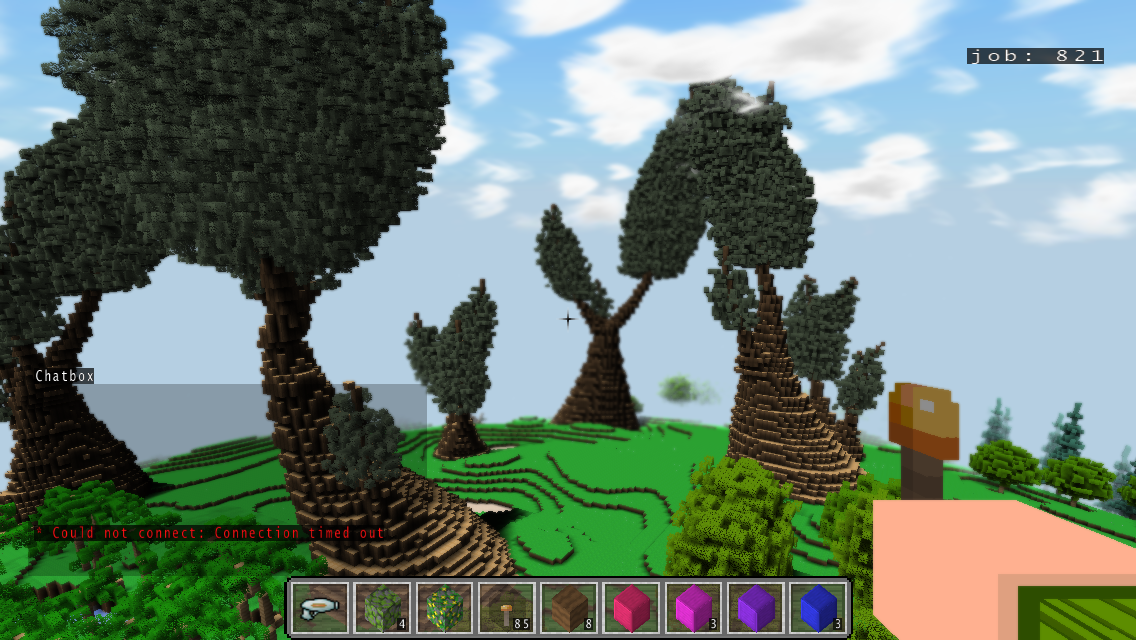
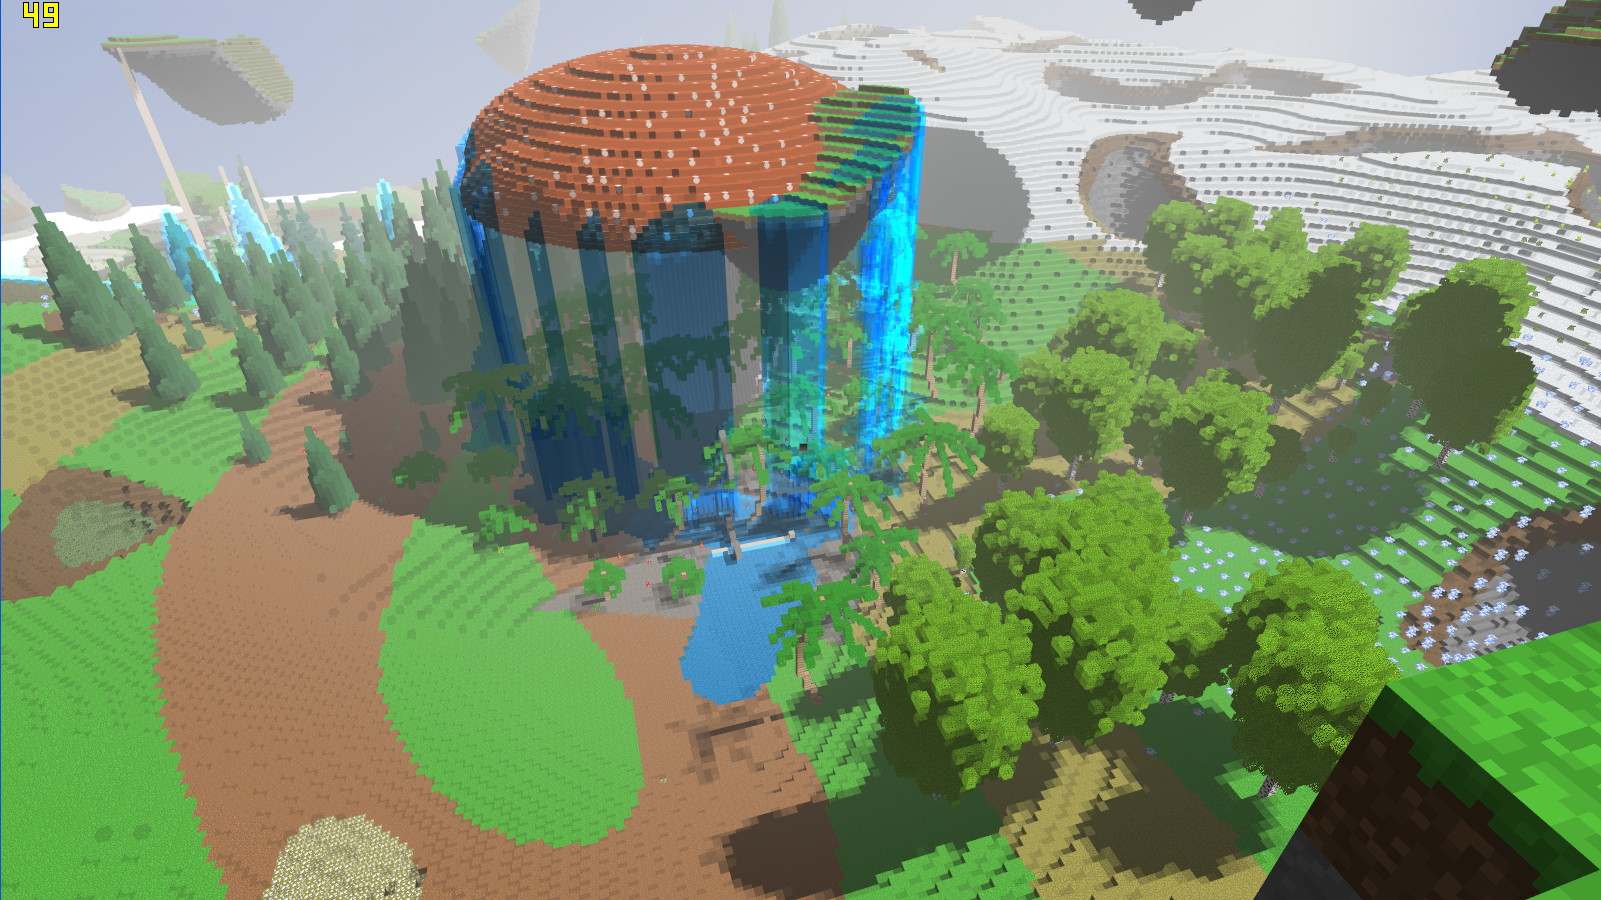
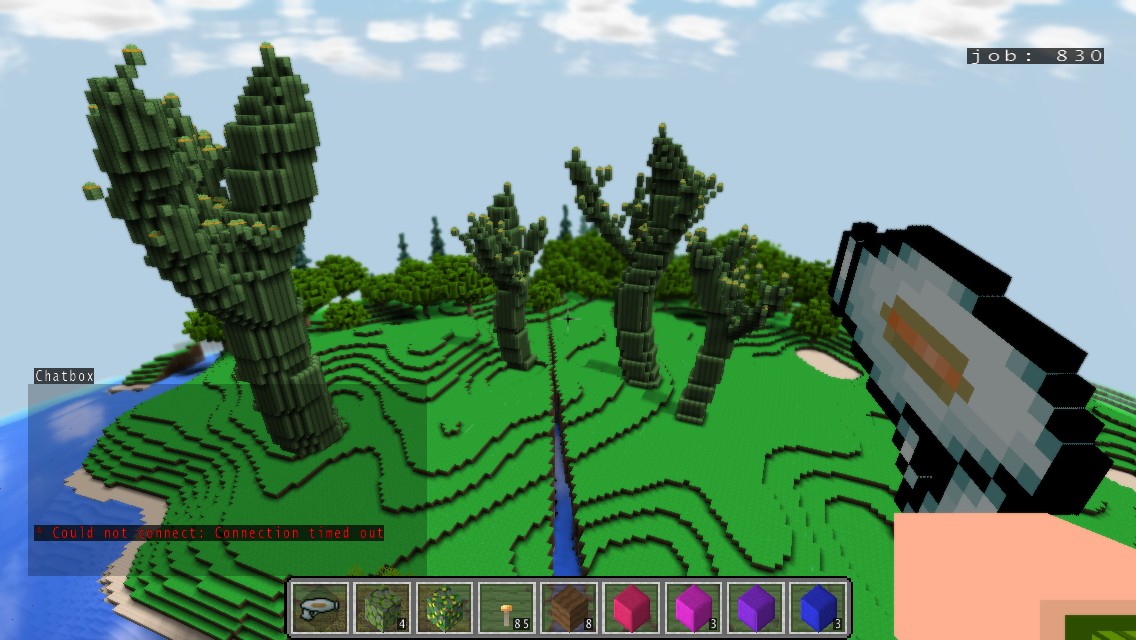
fbcraft, a FreeBASIC Minecraft-like procedural world engine continues to develop. A very interesting and potent project to keep a track on. Follow the official forum thread for the constant influx of news on the project, new videos and screenshots.

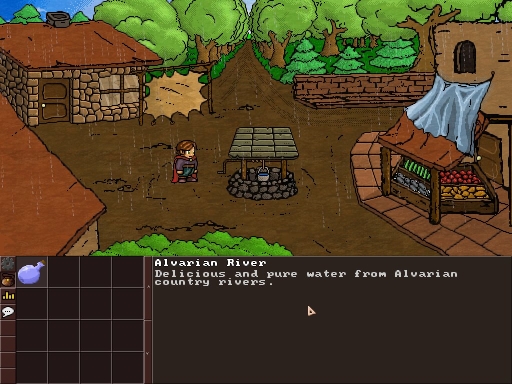
After 7 months of silence, mrToad posts news on Alvarin Tales, a cool FreeBASIC RPG in development. The most important news are, return to hand-drawn art style.
Official forum thread: http://www.freebasic.net/forum/viewtopic.php?t=14564
gothon is currently developing a Minecraft-like Block/voxel game in FreeBASIC, and occasionlly posts screenshots/downloads in the FreeBASIC forum.
Some posts by him: http://www.freebasic.net/forum/viewtopic.php?t=16773
Download: WallCraft.zip (522 KB)

oog continues to release updates on Train Simulator. Latest version - 0.45. Check it out! oog also announces the release of a vector graphics library that appeared first as a part of Train Simulator, but he stripped it into a stand-alone lib and is advancing it. Not public downloads available yet.
Official forum thread:
http://www.freebasic.net/forum/viewtopic.php?t=18185&postdays=0&postorder=asc&start=45
Download: http://proog.de/joomla/index.php/dl/viewcategory/4
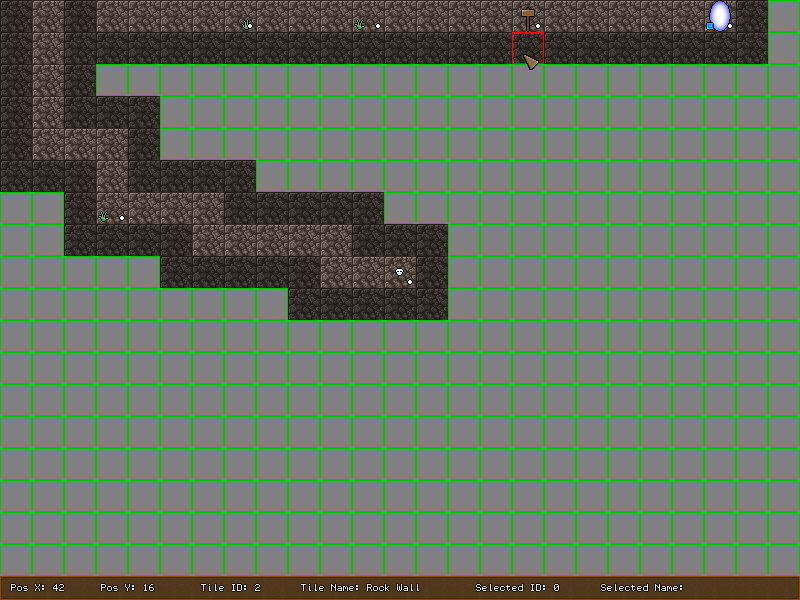
leopardpm is currently working on an isometric game, could be a RTS. He is currently experimenting and has released a cool isometric 3D world generator, featuring heightmap transformation to display in isometric style.
Official forum thread: http://www.freebasic.net/forum/viewtopic.php?t=16773
Download: Easy ISO Test ver 2.zip (128 KB)

After a long hiatus, Noah returns to the forum and talks a bit about his abandoned RPG project. Sadly, this wonderful project is still on hold, but this was an opportunity for us to fish out the working download link for the latest version and check out few screenshots. At the moment Noah and his wife are working on another FreeBASIC project.
Noah's blog: http://www.rhondabowlin.com/artemis/
Download Artemis (last playable demo, from November 9th, 2009):

Landeel announces the close release of his excellent Iceroyds! game. He was kind enough to share a demo of the game with me a bit earlier and I'm quite impressed by it. Looking forward to the final release. Check out few new screenshots, courtesy of Landeel:
iceroyds-new-snap-4.jpg
iceroyds-new-snap-5.jpg
iceroyds-new-snap-6.jpg
iceroyds-new-snap-7.jpg
Iceroyds! website: http://iceroyds.darkphear.com/
Official forum thread: http://www.freebasic.net/forum/viewtopic.php?t=18332
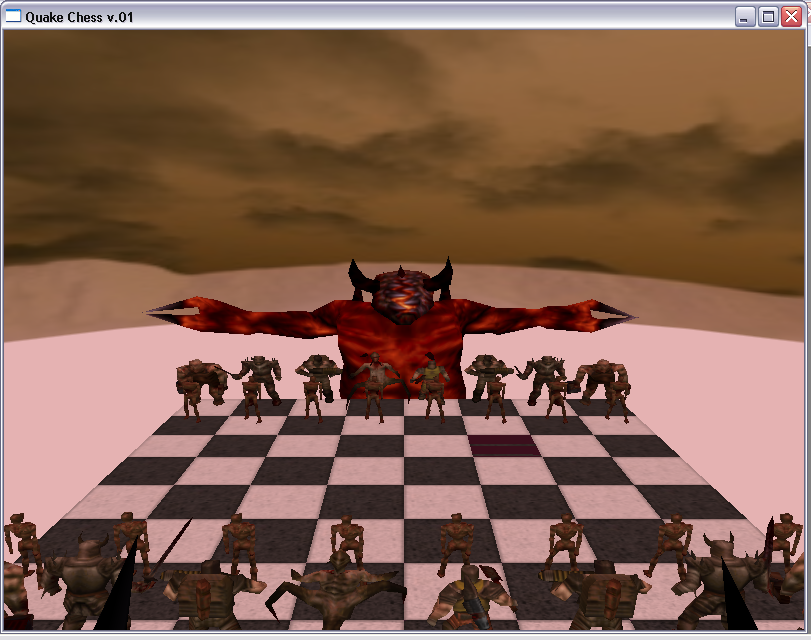
Unseen introduces a new QB64 project - a chess game with Quake theme.
Official forum thread: http://www.qb64.net/forum/index.php?topic=4581.0
Ummagumma Games is announcing the release of a mean-looking ASCII platform game for this month. Check out the trailer at YouTube and follow the official blog. If we are going to believe the developer, the release is a matter of a week or so.
Official blog: http://ummagummagames.wordpress.com/
Game trailer at YouTube: http://www.youtube.com/watch?v=EO4TVEVeM7w&feature=channel_video_title

Jobert14 realeased a really nice 3D raycaster demo program. Check it out: 3D_Raycaster_Demo.rar (176KB)
Forum thread: http://www.qb64.net/forum/index.php?topic=4818.0

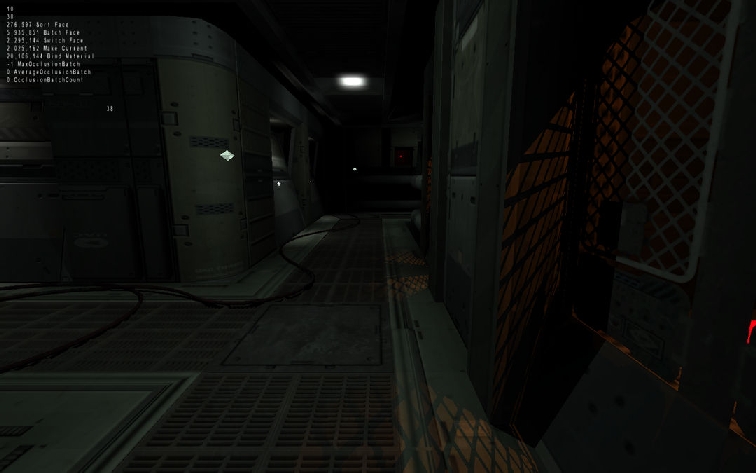
brybry showcases his Doom 3 style 3D engine (in FreeBASIC). For download links visit this forum thread: http://www.freebasic.net/forum/viewtopic.php?t=18631
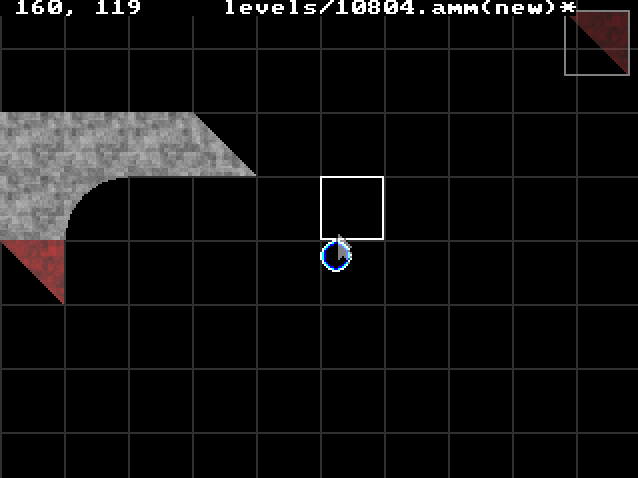
oog showcases an interesting tile-based 3D world generator (an early build) you can walk around. Also, it has been expanded by chung to feature car/flight sim + a map editor.
For dowloads and more info visit the forum thread: http://www.freebasic.net/forum/viewtopic.php?t=18809

Unseen continues the work on the OpenGL edition of his GDK library.
Official forum thread: http://www.qb64.net/forum/index.php?topic=4006.0
For the latest version of these font routines check this thread: http://www.qb64.net/forum/index.php?topic=4495.15
Check out the official forum thread: http://www.qb64.net/forum/index.php?topic=4642.0
Yours truly ported his Zelda-style FB screen by screen scrolling engine to QB64. If curious, check this thread out: http://www.qb64.net/forum/index.php?topic=4558.0

Angros continues to maintain his 3D library for FreeBASIC - MiniB3D. Official forum thread: http://www.freebasic.net/forum/viewtopic.php?t=15409
This is an interesting 3D engine I forgot to mention in previous issues. Have a look.
Official forum thread: http://www.freebasic.net/forum/viewtopic.php?t=17822
Website: http://www.tinygfx.com/

dkl called out for help in bringing the various FB headers up to date, and the response is already good. If you can and are willing to help, follow the official forum thread or visit the official FB headers website.
Updated GL headers: http://www.freebasic.net/forum/viewtopic.php?t=18601
FreeBASIC Games Directory is hosting and sponsoring another FreeBASIC game dev competition. This year's theme is - Rescue The Colors! Submission period lasts till 31st of January 2012. For more details and rules check the official competition thread.
Past competitions: http://games.freebasic.net/competitions.php
I'm showcasing Gonzo's fbcraft in this issue, a FB Minecraft-like procedural world engine with network support. The scope of the project and final goals the developer wants to keep a secret at the moment.


For his release of excellent Reinkarnoid and past contributions to the community like the pixel perfect routine or Scale2X, I award Mysoft with the developer of the issue title. Download Reinkarnoid below.


Witchcraft Adventure is a first-person view dungeon crawler, Dungeon Master-style, but it introduces a novel idea by featuring a top-down view mode that switches on when the player dies. As a ghost the player can pass through walls, talk with other ghosts and learn secrets from them, explore the map further than it's possible when alive, and finally revive on specific locations. This concept enables a wonderful interplay of the two different game modes and results with great gameplay experience.

But allow me to present a little bit of background regarding the creation of Witchcraft Adventure, as it is important to explain the origin of the already mentioned game mechanics, the game's strongest aspect.
Witchcraft Adventure was originally developed for a FreeBASIC Games Directory sponsored competition about some 10 months ago, which had a "gameplay combo" theme. The goal of the competition was to create a game that combines two or more different gameplays (game modes) in a single game on the most clever and original way, the combined gameplays driving (or resulting from) the story/plot if possible.
Witchcraft Adventure ended up winning the competition hands down, with its brilliant concept of combining two gameplays, one played when alive and one as a ghost after dying/getting killed in the first mode, but also featuring excellent presentation and graphical design.
In my opinion, this is the best FB game in the last 3 years and somewhat overlooked in that sense. I feel it should have been played and talked about a bit more, but I also think it's still not too late for that. The game was updated and perfected several times, and the latest version (1.8) is several weeks old. Anyway, I'll do my best to give Witchcraft Adventure the recognition it deserves with this review, and hopefully find few more players for it.
Witchcraft Adventure opens up with an intriguing animated story intro, cleverly directed and voice narrated by the developer, establishing an interesting fantasy setting and immediately announcing that we are about to play a very well polished and designed game.
The game begins with the player being transported into an unknown dungeon by sinister cosmic forces. The starting game viewpoint is first-person, as in so many dungeon crawlers from the past. As we explore the first dungeon and learn the game mechanics from helpful wizards, the game soon takes a sudden spin after we die from a trap, allowing us to continue playing the game from a top-down view as a ghost. This novel idea might be confusing to the player in the very start. I was personally left asking myself questions like: "What now? Was I supposed to die? Could I have continued playing the game alive? What happens now?" But soon as you discover magic circles through which you can revive yourself, it will all click in and start making sense. You will realize that for a success in this game you will have to take the advantage of both states, living and ghost, and by their interplay solve the puzzles you are pit against. While the very idea is, I dare to say, ingenious itself, N3trunn3r manages to futher enrich it with various elements that create an even better balance of the two game modes, adding more depth and resulting in more challenging puzzles to solve.


In the first-person "alive" state the game is very much played as a classic first-person RPG, where you move through a sector (square) based map (scene by scene movement). While in this state you can meet friendly "living" characters with useful information and sometimes a mission for you, and a whole load of enemies you need to fight in real-time fashion, similar to Hired Guns or Dungeon Master. Through battles you earn experience and level up. In the dungeons you can also find a wide range of objects, from weapons, equipment, food and water, potions, tools, magic items, etc. Some of the items are used for combat, some for solving puzzles, some for survival. Another specific feature of this engine is that you need to constantly drink and eat to survive, but in the lack of food and water in the inventory you can drink from puddles of water and eat dungeon grass. This can save you, but is somewhat tedious and slow, so the game mechanics direct you not to wander too much and save the food you have as longer as possible. Beside finding ready food and water, the game allows you to do actions like bake bread from flour you can find or to fill up empty water bags. Another interesting element in this game mode is ability to dig certain parts of the level after you acquire a pickaxe.

In the top-down "ghost" state you can explore sections of the map you can't when alive, since you can see more of your surrounding, as well as being able to pass through walls and locked doors, but you can't pick up objects. You can however revive yourself on locations that might be inaccessible to you when alive. In the ghost state you can also talk with other ghosts and learn secrets from them. The movement through walls in the ghost state is limited by mana, which slowly refills by itself, but which you can also refill to full power on certain locations. I think the way the ghost mode is imagined with the change of perspective is a really clever idea, and reminded me of a dialogue from The Mothman Prophecies where some professor argues with the Richard Gere character: "Hey, look up there. If there was a car crash ten blocks away, that window washer could probably see it. But that doesn't mean he's God, or even smarter than we are. But from where he's sitting, he can see a little further down the road."
Both these game modes separately could function as solid games, especially the first, but together they create something magical and new, and above all, fun. Simply, it's a very smart gameplay idea that wholly works in practice.


Luckily, the game doesn't remain on its excellent gameplay. N3trunn3r designed wonderful old-school graphics for the game, which are not only consistent in its style, but are effective and skillfully executed. I started appreciating N3trunn3r's style even before Witchcraft Adventure by playing his unfinished 8venture game. He has the talent to create old-school feel pixel art which avoids imitating or awing the classics, but still manages to contain their spirit and quality.
The game comes with excellent sound effects, quite suitable and pleasant. Not sure if they are original, but are well picked. I can say the same for the music, some of which seems to be from a C64 game. It also suits the game theme and setting perfectly, but I would prefer if N3trunn3r took the effort to credit this non-original work.
Witchcraft Adventure is packed with 4 dungeons to explore and solve (plus one more sub-dungeon), with 2nd and 3rd being the most challenging to beat. The 4th is more like some sort of bizzaro, playful dungeon, which you simply have to see with your own eyes. All in all, it contains at least 2 hours of playtime, but if we include learning the game mechanics and exploring, it can extend up to 4-5 hours.
It should be mentioned that Witchcraft Adventure also comes with a dungeon editor.
What stops this excellent game from reaching its full potential of being great is the unfortunate modesty of the developer and his lack of vision, in my opinion. His failure to recognize the quality and potential of the engine and the idea in his hands drags the game down a bit (enough for it not to be great), by failing to deliver few more dungeons, definitely a more rewarding ending, and less tongue-in-cheek episodes the game could have passed without.
Hopefully the developer will gain some healthy game dev pride when developing a new project. I also hope to see another Witchcraft Adventure game, because this first installment does not exploit the potentials of the engine fully, so there is space for at least one more (better) game with the same/similar concept.
Definitely a must play for anyone interested in FreeBASIC games, but also a game worth the attention of any retro gamer.


Antiman is one of those few FreeBASIC games I have an especially fond memory of (unrelated to my affiliation with the FreeBASIC community). It delivered one of the most exhiliaring gameplay exepriences I had with a FreeBASIC game, albeit, not repeated when I revisited the game for this review. More about that later.

Antiman was developed my Lithium, known in the QBasic scene for his XGMAE, and later in the FreeBASIC community for several other high quality releases, including Battle Pong, one of the earliest FreeBASIC games. He was also known for working with Zamaster, so most of his FB releases feature Zamaster's wonderful heart pumping action tracks. Today he is developing for mobile phones/tablets market. You might want to check his latest iPhone application, Abstract Melody, here: http://www.probeapps.com/am/
Zamaster, on the other hand, is still present in the community. In the past he was kind enough to share his talent with several others developers in the community, including me, and anyone who animates him into doing music for his/her game is trully blessed.
On with the review.
Antiman features a rather simplistic gameplay, but I'm unable to remember any other game with the same concept, and according to Lithium it was not inspiried by another title. It's a top-down scrolling game where you control a space-ship and the engine features inertia (and gravity in some levels). The game is divided into levels, each with a different time limit, and the objective is to collect all the anti-matter mines inside a level within the time limit. This is done simply by hovering over the mines, upon which they get captured by the ship's energy field and eventually absorbed. The obstacles are the very level walls, as well as moving objects, like square-shaped blocks or balls, that can crush the ship and destroy it instantly, while bumping into the walls only takes some of the energy, depending on the speed the ship hits them with.
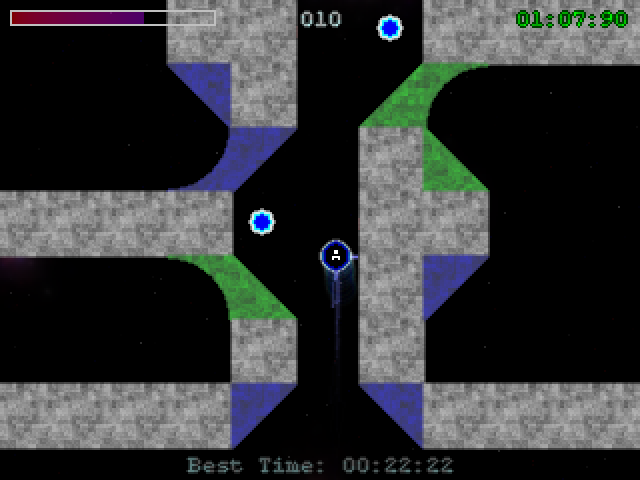
Antiman opens with a rather though-out story, so despite the abstract nature and appearance of the game, the gameplay connects with the plot about collecting anti-matter mines left from a recent inter-stellar war quite well. The story creates a belivable backdrop, but does not impose on the overall experience.
The action in the game is quite fast-paced and exciting, but nevertheless requires steady fingers and good overview of the near sourroundings for success. The player simply can't rush into certain areas of the level without stoping and recognizing the right moment to do so. The game is in a nutshell a simple race against the clock, but the one that really hits the right buttons and results in a very satisfying gameplay experience. Finishing every difficult levels really feels like a rewarding process.
This already excellent gameplay is enhanced by Zamaster music that fully manages to elevate the game to a higher level, and in Antiman Zamaster's affinity for more action oriented tracks finds its best outlet.
The game graphics are rather unimpressive, place-holder appearing, but still neatly compiled and pleasent for the eyes. They leave much to be desired, but nevertheless do not hinder the quality of the gameplay. Another game which illustrates that even if you can't deliver above average graphics, you can create pleasent-looking place-holders (at least in most cases). With Photoshop and dozen of other graphics editing programs, free and commercial, UGLY graphics don't have an excuse anymore.
Antiman only features 11 levels, with first 3 being somewhat slow and dullish. The action picks up quite fast, and you'll probably need about an hour to finish all of them when playing for the first time (your progress is saved after each completed level). I must admit, the game turned out to be much less challening when I revisited it for this review, so the limited amount of levels proves to be a much bigger flaw than I originally felt it was. The game definitely leaves room for more challenging levels. Ideas like levels with lethal walls (that kill you instantly) cross my mind instantly, among other.


The game does feature a level editor, but you can never rely too much on the users to create the content for you, even with much more popular games, so no levels were created by users back them. What maybe would have helped the game to be much more popular in my opinon, is an online score-board, because level finish times are saved, and with that feature the replay value of every level would be much higher. Some of you might remember Prompt Critical featuring an online score-board, and it helped boost the game's popularity quite a lot.
But, time has passed, developers switched to other languages, websites disappeared. It's a closed book now. What Antiman was meant to acomplish, it did. But we should definitely learn from Antiman's misses when developing a similar game, and also be inspiried by its positive traits.
In conclusion, Antiman is an excellent FreeBASIC game worthy of being remembered and revisited, slightly underachived in the amount of play time it offers. But still, an excellent game for sure.

In case you missed it before, this is a perfect opportunity to try this FreeBASIC classic. I doubt you'll feel cheated for you time.
In this lesson I'll cover several topics that should introduce you with some slightly more demanding game design oriented programming. It's the programming that extends on the simple "walk around and do nothing" type of demos. Stuff like player to monsters/objects/whatever interaction, artificial smarts, as well as some basics like subroutines (declaration, usage, etc.). I'll also show you how to use the mouse routines with GFXlib. So these two lessons will include most of the statements, methods and routines I think you should know to code any DECENT game using GFXlib. Just don't fear to EXPAND on the topic discussed here.
This lesson continues on example #2 from lesson #1 (download).
We'll add sheep in our mini-game, implement artificial smarts which will tell the sheep to run from the warrior, and add the code that will allow the player to kill them. Poor sheep. :P I'll also add a menu in the code just to point out that it's BAD to end the program completely when the player loses a game. I've seen that in few QBasic games and found it very annoying. This menu will also be a nice opportunity to show you how the mouse routines work in GFXlib and write some more "generic" code. And that's just some of the things we'll cover.
This section is for real beginners so if you are familiar with this topic, just skip to the next chapter.
SUBROUTINES are sections of code which execute any set of instructions placed inside them every time you call them (and only then). What's important is that you can pass variables to them. I believe this will be more clear to you if you think of these variables as PARAMETERS. Let's say we want to have a subroutine that draws a circle on the position specified by the user. So we need to have a subroutine declared with two variables (parameters) which would flag (set) the circle's position. Here is a simple example of how this would work in FreeBASIC. We would first declare the subroutine like this:
DECLARE SUB DrawCircle (xpos AS INTEGER, ypos AS INTEGER)
Subroutine declarations go on the beginning of our code before the variable declarations. Some subroutines need to declared behind a user defined type, but only if that subroutine includes parameters (variables) defined with this type.
The very subroutine would be formatted like this:
SUB DrawCircle (xpos AS INTEGER, ypos AS INTEGER)

CIRCLE (xpos, ypos), 10, 15

END SUB
Subroutines need to be placed after all the code in the main module. The concept of the main module might not be clear to you since FBIDE (version 0.4.5) still doesn't separate the main module from the subroutines like QBasic IDE did. Just think of the main module as all the code before the first subroutine starts.
The user would call the subroutine like this:
DrawCircle 120, 55
This line would draw a circle on coordinates 120, 55, with a radius of 10 and color 15. We could make a sub that would pass the radius and the color too.
Of course, you will never create this kind of sub since the very CIRCLE statement is simple enough, but this example illustrates the issue we are talking about very well.
FUNCTIONS work on a similar way like subroutines, but functions can return a value (like be TRUE or FALSE). The most obvious example of a function (from a game design perspective) is a function which checks if the player is colliding with a colliding tile (or object) according to his position. If he is colliding we would flag the function as TRUE and according to this state tell the program to prevent the player to move. Check R.E.Lope's scrolling engine I ported to FreeBASIC to see how this type of function works (go to the end of this tutorial for the download).
The first thing we'll do with our mini-game code is place all the graphics loading code in a subroutine named "LoadGraphics", the main loop in a subroutine named "MainLoop", lines that initiate player's position in a subroutine named "InitVariables" and create an extra subroutine named "MainMenu".
After these changes our code should look like this (reduced version):
#include "fbgfx.bi"

' Our subroutine declarations will go here!
DECLARE SUB MainMenu ' Sub that runs our main menu loop.
DECLARE SUB MainLoop ' Sub that runs our main game loop.
DECLARE SUB LoadGraphics ' Sub that loads all the program's graphics.
DECLARE SUB InitVariables ' Sub that initiates the game variables
                          ' (should be called before every new game).

' Useful constants (makes your code easier to read and write).
const FALSE = 0
const TRUE = 1

DIM SHARED background1 AS ANY PTR ' A pointer that points to a memory
                                  ' buffer holding the background graphics
DIM SHARED WarriorSprite(12) AS ANY PTR ' A pointer that points to a memory
										' buffer holding warrior sprites

DIM SHARED workpage AS INTEGER ' Our work page
DIM SHARED AS INTEGER Frame1, Frame2

SCREEN 18,8,2,0 ' Sets the graphic mode
				' 18 means 640 * 480
                ' 8 means 8bit color depth; 2 means two work pages and
                ' 0 means window mode( 1 would be full screen mode).
                ' When your program is running you can toggle
                ' between full screen/window mode with ALT+ENTER.

SETMOUSE 0,0,0  ' Hides the mouse cursor.

' Our user defined type containing 8 variables.
TYPE ObjectType
X          AS SINGLE
Y          AS SINGLE
Speed      AS SINGLE
Frame      AS INTEGER
Direction  AS INTEGER
Move       AS INTEGER
Attack     AS INTEGER
Alive      AS INTEGER
END TYPE

DIM SHARED Player AS ObjectType ' Our player.

LoadGraphics ' Load the program's graphics.
MainMenu ' Initiate main menu.
END ' End program.

' MAIN MODULE ENDS HERE!
' **********************

SUB LoadGraphics

' Graphics loading code goes
' in here!

END SUB

SUB MainLoop

' Main loop code goes in here!

END SUB

SUB MainMenu

' We'll add code here later that calls
' the main loop after the player clicks
' on an option in the menu. For now
' the main loop is called right away.

' Load initial variables(player's position, etc.).
InitVariables
' Call the main game loop.
MainLoop

END SUB

SUB InitVariables

' Warrior's(player's) initial
' position, speed(constant)
' and direction(1 = right).
Player.X = 150
Player.Y = 90
Player.Speed = 1.5
Player.Direction = 1

END SUB
You can check the full code here: codever1.txt
I didn't want to input it directly in the tutorial since it's too long and repeats all the code from lesson #1.
Copy and paste the full code in a new FBIDE document. You can compile it and the result is the same as in lesson #1. But now our code is easier to read and manage. You will notice how the “MainMenu” subroutine runs the main loop right away (no conditions). In the final version the main loop will be called only after the player clicks on the right option (like "START GAME") in the main menu.
A subroutine that resets all the game variables (game variables in the sense of player's health, position, number of lives, score, etc.) is something you should always include. I've noticed in several QBasic games bugs which were the result of the programmer putting the initiation of some or all game variables on the beginning of the program and not on the place where the user starts a new game. This caused for some or all game variables not to reset properly when another new game was started (after the first was loss).
I also noticed quite few designers placing the main loop in the main module which is something I don’t understand. It always made their code more difficult to read and to me that kind of code is clumsy to manage. But this depends on programming style and if you frown upon using SHARED variables.
Before we continue we need to add new graphics into our program. The new graphics will be loaded from this image:

As you see it contains the sheep sprites (two sprites for each direction), bloody sheep pieces (7 of them), fireball sprite (the warrior will be able to shoot them at the sheep), a mouse cursor and a menu pointer we'll use on the main menu to flag graphically which option is active.
The code that loads this graphics needs to be inputted in the "LoadGraphics" sub but before that we need to create a generic sprite array that will hold all these sprites. We'll name it "ExtraSprite" and declare it where we declared the other graphics arrays("background1" and "WarriorSprite") with the following line:
DIM SHARED ExtraSprite(18) AS ANY PTR   ' An array that will hold
                                        ' the additional sprites.
18 because in the new image file we have 18 sprites total.
Now we should add this code in the "LoadGraphics" sub (at the end of it):
' Load the image holding the additional sprites and store
' them into the "ExtraSprite" array on specific positions.
BLOAD "EXTRASPR.BMP", 0
' Load the sheep sprites.
FOR imagepos AS INTEGER = 1 TO 8
    ExtraSprite(imagepos) = IMAGECREATE (40, 40)
    GET (0+(imagepos-1)*48,0)-(39+(imagepos-1)*48,39), ExtraSprite(imagepos)
NEXT imagepos
' Load the bloody sheep meat.
FOR meatpos AS INTEGER  = 1 TO 7
    ExtraSprite(meatpos + 8) = IMAGECREATE (24, 19)
    GET (12+(meatpos-1)*26,50)-(34+(meatpos-1)*26,68), ExtraSprite(meatpos + 8)
NEXT meatpos
' Load the fireball.
ExtraSprite(16) = IMAGECREATE (24, 24)
GET (22, 84)-(46, 106), ExtraSprite(16)
' Load the mouse cursor.
ExtraSprite(17) = IMAGECREATE (33, 42)
GET (212, 44)-(246, 85), ExtraSprite(17)
' Load the menu pointer.
ExtraSprite(18) = IMAGECREATE (24, 25)
GET (254, 50)-(278, 74), ExtraSprite(18)

' The sprites are saved in the "ExtraSprite" array as follows:
' ExtraSprite(1, 0) - sheep moving down image #1
' ExtraSprite(2, 0) - sheep moving down image #2
' ExtraSprite(3, 0) - sheep moving up image #1
' ExtraSprite(4, 0) - sheep moving up image #2
' ExtraSprite(5, 0) - sheep moving left image #1
' ExtraSprite(6, 0) - sheep moving left image #2
' ExtraSprite(7, 0) - sheep moving right image #1
' ExtraSprite(8, 0) - sheep moving right image #2
' ExtraSprite(9, 0) - ExtraSprite(15, 0) - 7 bloody meat pieces
' ExtraSprite(16, 0) - the fireball sprite
' ExtraSprite(17, 0) - the mouse cursor
' ExtraSprite(18, 0) - the menu pointer
I think this code speaks for itself. Note how I was able to use two FOR loops to capture the sheep and bloody meat sprites since I aligned them nicely in the BMP image.
Now we should create an array that will be used to control the sheep. Let's agree we'll have 10 of them in the playfield. This array should be declared with the following line and placed where the player array is declared ('DIM SHARED Player AS ObjectType'):
DIM SHARED Sheep(10) AS ObjectType
10 stands for the maximum number of sheep we'll manage. If you want to have 100 sheep maximum on one map/location just change 10 to 100. Sometimes it's good to dimension this type of object with two dimensions, first representing the location/map/etc. Something like this:
DIM SHARED Sheep(15, 10) AS ObjectType
Let's image we would have a game with 15 locations max and with 10 sheep max on each location. This kind of declaring allows us to manage such type of objects (like NPCs) on a more efficient way. Every time the player would change location we would flag a specific "location" variable and according to its value manage the NPCs on THAT SPECIFIC locations (flagged with the first element in the array). But for our mini-game we'll only need one dimension (use the first line).
Note how we connected the "Sheep" array with "ObjectType" so we can use the variables inside "ObjectType" to control the sheep.
We'll add now the code that initiates sheep's positions and their mode (alive or dead) in the "InitVariables" sub. Sheep positions will be RANDOMIZED so the next piece of code shows how you do that too. Entire "InitiVariables" sub with the new code should look like this:
SUB InitVariables

RANDOMIZE TIMER

' Warrior's(player's) initial
' position, speed(constant)
' and direction(1 = right).
Player.X = 150
Player.Y = 90
Player.Speed = 1.5
Player.Direction = 1

' Initiate all the sheep(their positions, etc.).
FOR countsheep AS INTEGER = 1 TO 10
	' Randomize a number 1 to 600 (sheep's X position).
	Sheep(countsheep).X = INT(RND * 600) + 1
	' Randomize a number 1 to 440 (sheep's Y position).
	Sheep(countsheep).Y = INT(RND * 440) + 1
	' Randomize a number 1 to 4.
	Sheep(countsheep).Direction = INT(RND * 4) + 1
	' New game -> all sheep alive by deafult.
	Sheep(countsheep).Alive = TRUE
	' Speed of all sheep.
	Sheep(countsheep).Speed = 0.9
NEXT countsheep

END SUB
All that RND does is returns a number from 0 to 1 based on the random seed. You set the seed with 'RANDOMIZE seed' and the best way to get unpredictable random numbers is to use 'RANDOMIZE TIMER' where TIMER returns the number of milliseconds past midnight. I also recommend you to use 'RANDOMIZE TIMER' every time you start a new game. INT converts the expression in brackets into an integer since we need WHOLE numbers. You can change ' + 1 ' in lines with RND to any number you want to be the minimum possible. For example, the following line would randomize a number from 50 to 60:
RandomNumber = INT(RND * 10) + 50
Ok, now we are fully ready to create a sub that will draw and move the sheep according to player's position. We should declare a new sub named "MoveDrawSheep" with this line:
DECLARE SUB MoveDrawSheep
And at the end of our program we have to input the following lines:
SUB MoveDrawSheep

' Our "sheep" code goes in here!

END SUB
Now, let's create a code that will draw the sheep according to their positions and directions. We need to create a FOR loop that will "go through" all the sheep and according to their direction flag the proper sprite. And if the sheep is alive draw it! The variable that will cycle in the FOR loop (countsheep) will be connected with the Sheep array as you will see in the next piece of code.
SUB MoveDrawSheep

' Loop through all the sheep.
FOR countsheep AS INTEGER = 1 TO 10

	' The current sheep is not moving by default.
	Sheep(countsheep).Move = FALSE

	' Sheep(countsheep).Direction = 1 -> sheep moving right
	' Sheep(countsheep).Direction = 2 -> sheep moving left
	' Sheep(countsheep).Direction = 3 -> sheep moving down
	' Sheep(countsheep).Direction = 4 -> sheep moving up

	' The current sheep frame(sprite) by default(sheep not moving).
	IF Sheep(countsheep).Direction = 1 THEN Sheep(countsheep).Frame = 7
	IF Sheep(countsheep).Direction = 2 THEN Sheep(countsheep).Frame = 5
	IF Sheep(countsheep).Direction = 3 THEN Sheep(countsheep).Frame = 1
	IF Sheep(countsheep).Direction = 4 THEN Sheep(countsheep).Frame = 3

	' If the current sheep is moving flag the proper sprite according
	' to its direction.
	IF Sheep(countsheep).Move = TRUE THEN
		IF Sheep(countsheep).Direction = 1 THEN Sheep(countsheep).Frame = 6 + Frame1
		IF Sheep(countsheep).Direction = 2 THEN Sheep(countsheep).Frame = 4 + Frame1
		IF Sheep(countsheep).Direction = 3 THEN Sheep(countsheep).Frame = 0 + Frame1
		IF Sheep(countsheep).Direction = 4 THEN Sheep(countsheep).Frame = 2 + Frame1
	END IF

	' If the current sheep is ALIVE draw it!
	IF Sheep(countsheep).Alive = TRUE THEN PUT (Sheep(countsheep).X, Sheep(countsheep).Y), ExtraSprite(Sheep(countsheep).Frame), TRANS

NEXT countsheep

END SUB
I think this sub is very illustrative a needs no clarifications. It works almost the same way like the code that draws the player. Just be aware that you can put a variable behind 'TO' with any FOR loop. Like you might want to have different maximum numbers of NPCs on different locations. On the other hand, you can always tag with "Alive" or some other variable NPCs you don't want to manage and draw on the screen. To play this sub we need to call it in the main loop. Just place 'MoveDrawSheep' right after the line that pastes the warrior on the screen('PUT (Player.X, Player.Y), WarriorSprite(Player.Frame), TRANS'). Since we are now using the "Frame1" variable outside the main loop in another sub we need to make it SHARED by placing 'DIM SHARED Frame1' right after the player and sheep declarations. Without this declaration "Frame1" would be always 0 in the "MoveDrawSheep" sub as well as in any other sub where its value is not changed. There are other ways that do not require for us to make it shared, like by passing Frame1 to MoveDrawSheep as parameter or declaring Frame1 in the very MoveDrawSheep subroutine, but as I said earlier, if you don't have problems with using SHARED variables, this alternative approach is not necessary.
After all the changes the code should look like this: codever2.txt
Compile it and the sheep should appear on the screen. But that's not what we want. The sheep just sit there and do nothing. We need to implement an artificial smarts algorithm (a very simple one) so the sheep would react on the warrior. It sounds more complex than it really is. It’s just a set of lines which tells the sheep to move in this or that direction according to warrior’s position. We’ll also add some code that will prevent the sheep to walk off the screen like we did with the warrior. The updated "MoveDrawSheep" sub should look like this:
SUB MoveDrawSheep

' Loop through all the sheep.
FOR countsheep AS INTEGER = 1 TO 10

	' The current sheep is not moving by default.
	Sheep(countsheep).Move = FALSE

	' Sheep(countsheep).Direction = 1 -> sheep moving right
	' Sheep(countsheep).Direction = 2 -> sheep moving left
	' Sheep(countsheep).Direction = 3 -> sheep moving down
	' Sheep(countsheep).Direction = 4 -> sheep moving up

	' The next 4 IF clauses is the AS (artificial smart) algorithm.
	' In more demanding projects your AS code will most likely be more
	' complex so you will probably place it in a separate sub.
	' Each IF checks if the player is less than 100 pixels away from
	' the sheep in both directions (scope of detection - change all 100 to
	' higher or less number to get a different scope of detection/reaction).
	' The first condition in each IF checks where's the player according
	' to sheep (in X or Y direction) and then we flag the sheep's direction
	' if that condtition is met. The last two IFs have another condition
	' inside them which is just nitpicking and gives slightly better result.
	IF Player.Y < Sheep(countsheep).Y AND ABS(Player.Y-Sheep(countsheep).Y) < 100 AND ABS(Player.X-Sheep(countsheep).X) < 100 THEN
			Sheep(countsheep).Move = TRUE
			Sheep(countsheep).Direction = 3
	END IF
	IF Player.Y > Sheep(countsheep).Y AND ABS(Player.Y-Sheep(countsheep).Y) < 100 AND ABS(Player.X-Sheep(countsheep).X) < 100 THEN
			Sheep(countsheep).Move = TRUE
			Sheep(countsheep).Direction = 4
	END IF
	IF Player.X > Sheep(countsheep).X AND ABS(Player.X-Sheep(countsheep).X) < 100 AND ABS(Player.Y-Sheep(countsheep).Y) < 100 THEN
			Sheep(countsheep).Move = TRUE
			IF ABS(Player.X-Sheep(countsheep).X) > 40 THEN Sheep(countsheep).Direction = 2
	END IF
	IF Player.X < Sheep(countsheep).X AND ABS(Player.X-Sheep(countsheep).X) < 100 AND ABS(Player.Y-Sheep(countsheep).Y) < 100 THEN
			Sheep(countsheep).Move = TRUE
			IF ABS(Player.X-Sheep(countsheep).X) > 40 THEN Sheep(countsheep).Direction = 1
	END IF

	' If the current sheep is moving change its position
	' according to its direction (flagged with the AS code).
	' If the current sheep is out of bounds prevent it to
	' walk off the screen. Note how the SELECT CASE statement
	' works.
	IF Sheep(countsheep).Move = TRUE THEN
			SELECT CASE Sheep(countsheep).Direction
				CASE 1
				Sheep(countsheep).X = Sheep(countsheep).X + Sheep(countsheep).Speed
				IF Sheep(countsheep).X > 600 THEN Sheep(countsheep).X = 600
				CASE 2
				Sheep(countsheep).X = Sheep(countsheep).X - Sheep(countsheep).Speed
				IF Sheep(countsheep).X < 0 THEN Sheep(countsheep).X = 0
				CASE 3
				Sheep(countsheep).Y = Sheep(countsheep).Y + Sheep(countsheep).Speed
				IF Sheep(countsheep).Y > 440 THEN Sheep(countsheep).Y = 440
				CASE 4
				Sheep(countsheep).Y = Sheep(countsheep).Y - Sheep(countsheep).Speed
				IF Sheep(countsheep).Y < 0 THEN Sheep(countsheep).Y = 0
			END SELECT
	END IF

	' The current sheep frame(sprite) by default(sheep not moving).
	IF Sheep(countsheep).Direction = 1 THEN Sheep(countsheep).Frame = 7
	IF Sheep(countsheep).Direction = 2 THEN Sheep(countsheep).Frame = 5
	IF Sheep(countsheep).Direction = 3 THEN Sheep(countsheep).Frame = 1
	IF Sheep(countsheep).Direction = 4 THEN Sheep(countsheep).Frame = 3

	' If the current sheep is moving flag the proper sprite according
	' to its direction.
	IF Sheep(countsheep).Move = TRUE THEN
	IF Sheep(countsheep).Direction = 1 THEN Sheep(countsheep).Frame = 6 + Frame1
	IF Sheep(countsheep).Direction = 2 THEN Sheep(countsheep).Frame = 4 + Frame1
	IF Sheep(countsheep).Direction = 3 THEN Sheep(countsheep).Frame = 0 + Frame1
	IF Sheep(countsheep).Direction = 4 THEN Sheep(countsheep).Frame = 2 + Frame1
	END IF

	' If the current sheep is ALIVE draw it!
	IF Sheep(countsheep).Alive = TRUE THEN PUT (Sheep(countsheep).X, Sheep(countsheep).Y), ExtraSprite(Sheep(countsheep).Frame), TRANS

NEXT countsheep

END SUB
Few things I want to explain here. You will notice I used a new statement here - SELECT CASE. SELECT CASE works very simple and it's a nice substitute for IF clauses. In QBasic it was known as being faster than IF clauses. It functions like this:
SELECT CASE some_variable
	CASE value1
	' You put here the code that
	' needs to execute if
	' some_variable = value1
	CASE value2
	' You put here the code that
	' needs to execute if
	' some_variable = value2
	CASE value3
	.
	.
	.
END SELECT ' End every SELECT CASE with this.
Anyway, SELECT CASE comes in handy very often with certain problems that can be coded more illustrative and simpler than using several IF clauses.
Another thing I didn't point out the first time I pasted the "MoveDrawSheep" sub. In some cases you will need to add another variable to the user defined type you will connect with your enemy array ("ObjectType" in our mini-game). I usually name that variable "Exists". You see, you might want to have a game where a corpse of a monster or an enemy is left in the playfield once the player kills it. So you need another variable together with "Alive". "Alive" would flag if the monster/enemy/whatever is alive or not and according to this status we would check for collision with it and similar. "Exists" would flag if this monster/enemy is activated (present) at all and if it's not the program wouldn't draw it! If "Exists" of that monster would be TRUE we would always draw it no matter if it's alive or not. If this monster would be dead (Alive = FALSE) we would tell the computer to paste the "corpse" sprite of that monster and not the regular "walking" sprite. In our mini-game when the player kills the sheep we'll spawn some bloody meat pieces in the playfield (be patient) so we don't need corpses. We WANT for the sheep to DISAPPEAR from the playfield once we kill it. Just have this in mind when working on your own project where your requirements might be different. Also, the more "smarter" enemies you want for your game to feature you will have to create a more complex AS algorithm and will probably place it in a separate sub. Old QB Express issues feature quite few AS tutorials so if interested in this topic read your QB Express :P
Now I'll do some more coping and pasting of the current code. I know, this is probably annoying you on this stage, but it needs to be done. I'll remove all the code that controls and pastes the warrior from the main loop and place it in a separate sub. We'll name this sub "MoveDrawPlayer". We also need to declare it and call it in the main loop. This new sub should look like this:
SUB MoveDrawPlayer

' Player.Direction = 1 -> warrior moving right
' Player.Direction = 2 -> warrior moving left
' Player.Direction = 3 -> warrior moving down
' Player.Direction = 4 -> warrior moving up

Player.Move = FALSE ' By deafult player is not
                    ' moving.

' According to pushed key move the
' player and flag the proper direction.
IF MULTIKEY(SC_RIGHT) THEN
    Player.X = Player.X + Player.Speed
    Player.Direction = 1
    Player.Move = TRUE
END IF
IF MULTIKEY(SC_LEFT) THEN
    Player.X = Player.X - Player.Speed
    Player.Direction = 2
    Player.Move = TRUE
END IF
IF MULTIKEY(SC_DOWN) THEN
    Player.Y = Player.Y + Player.Speed
    Player.Direction = 3
    Player.Move = TRUE
END IF
IF MULTIKEY(SC_UP) THEN
    Player.Y = Player.Y - Player.Speed
    Player.Direction = 4
    Player.Move = TRUE
END IF

' The following 4 conditions prevent
' the warrior to walk off the screen.
IF Player.X < 0 THEN
    Player.Move = FALSE
    Player.X = 0
END IF
IF Player.X > 600 THEN
    Player.Move = FALSE
    Player.X = 600
END IF
IF Player.Y < 0 THEN
    Player.Move = FALSE
    Player.Y = 0
END IF
IF Player.Y > 440 THEN
    Player.Move = FALSE
    Player.Y = 440
END IF

IF Player.Move = FALSE OR Frame1 = 0 THEN Frame1 = 1

' Attack variable needs to reduce to 0 by 1 in
' each cycle since we want for the attack to
' "time out" once we initiate it(swing with the
' sword).
Player.Attack = Player.Attack - 1
IF Player.Attack < 0 THEN Player.Attack = 0

' When the player presses SPACE and the SPACE
' key is released from the last time you
' swung the sword (KeyPressed = FALSE)
' initiate new attack (Player.Attack = 10) and
' flag that SPACE is pressed (KeyPressed = TRUE).
' KeyPressed variable is used to prevent the
' player to be able to hold the SWING. This can
' be done on more ways like prevent the player
' to swing until Player.Attack = 0 (replace
' KeyPressed = FALSE with this condition).
IF MULTIKEY(SC_SPACE) AND KeyPressed = FALSE THEN
	KeyPressed = TRUE
	Player.Attack = 10
END IF

' According to player's direction flag the
' proper sprite (check in the tutorial on which
' position each sprite is stored).
IF Player.Direction = 1 THEN Player.Frame = 6 + Frame1
IF Player.Direction = 2 THEN Player.Frame = 4 + Frame1
IF Player.Direction = 3 THEN Player.Frame = 0 + Frame1
IF Player.Direction = 4 THEN Player.Frame = 2 + Frame1

' If the player is attacking flag the proper attack
' sprite according to player's direction.
IF Player.Attack >0 THEN
	IF Player.Direction = 1 THEN Player.Frame = 12
	IF Player.Direction = 2 THEN Player.Frame = 11
	IF Player.Direction = 3 THEN Player.Frame = 10
	IF Player.Direction = 4 THEN Player.Frame = 9
END IF

' Paste the warrior on Player.X and Player.Y coordinates,
' using sprite number Player.Frame, and skip background color.
PUT (Player.X, Player.Y), WarriorSprite(Player.Frame), TRANS

' Flag KeyPressed as FALSE (pressing is not locked!) only when
' the player releases SPACE and ENTER.
IF NOT MULTIKEY(SC_ENTER) AND NOT MULTIKEY(SC_SPACE) THEN KeyPressed = FALSE

END SUB
You'll notice one new thing in this code - I implemented sword swinging! In our mini-game we'll control sword swinging only with one variable - "Attack". When the player presses SPACE "Attack" is set as 10. As long as "Attack" is above 0 we'll treat this as a situation where the warrior is swinging with his sword - attack mode is active! We also must have two lines of code which reduce "Attack" to 0 so we can "time out" the attack. Change 10 to some other number if you want to have a longer or shorter period of swinging. This can be done one more ways. I often use two variables. One that "times" the attack (usually named "AttackTime") and one which flags if attack is TRUE or FALSE. But for the sake of our mini-game we'll use only one variable. With projects where you would have more sprites representing swinging, some even swinging and running you'll need to code this on a slightly different way. But in any game where you have a hero with a short range weapon you must have one main variable which will flag if swinging is happening or not so you can check for collision with the enemies. Also note how I used the "KeyPressed" variable to prevent the player to double press as well as to hold the swing all the time (he must push SPACE repeatedly). This method I use more often on places where I want to prevent double clicking (or double pressing). I recommend you to become familiar with this method since it's a simple and efficient solution for "double press" problems. I declared KeyPressed as SHARED on the top of the program.
The updated "MainLoop" subroutine should look like this:
SUB MainLoop

DO

screenlock ' Lock our screen (nothing will be
           ' displayed until we unlock the screen).
screenset workpage, workpage xor 1 ' Swap work pages.

' Frame1 changes from 1 to 2 or vice versa every
' 16 cycles (set with Frame2 variable).
Frame2 = (Frame2 MOD 16) + 1
IF Frame2 = 10 THEN Frame1 = (Frame1 MOD 2) + 1

' Pastes the background.
PUT (0, 0), background1, PSET

MoveDrawPlayer ' draw/move our player
MoveDrawSheep ' draw/move our sheep

workpage xor = 1 ' Swap work pages.
screenunlock ' Unlock the page to display what has been drawn.

SLEEP 10, 1 ' Slow down the program and prevent 100 % CPU usage.

LOOP UNTIL MULTIKEY(SC_Q) OR MULTIKEY(SC_ESCAPE)
' Execute the loop until the user presses Q or ESCAPE.

END SUB
Now the main loop is easier to manage. For example, if you want for the sheep to paste OVER the player you should just place 'MoveDrawSheep' AFTER 'MoveDrawPlayer'. But we'll leave it like this.
The entire code now should look like this: codever3.txt
It's best you copy and paste all of this into FBIDE.
Ok, we have the warrior, we have the sheep, we have implemented swinging. So what now?
Let's first add collision (swing detection) with the sheep. When the player is swinging and a sheep is in range we will kill it (make this sheep's Alive = FALSE). We'll work in the "MoveDrawPlayer" sub now. We should place this code inside the 'IF Player.Attack > 0' clause above other IF clauses. We'll create a FOR loop which will go through all the sheep like in the "MoveDrawSheep" sub and check for distance between the sheep and the warrior according to warriors's direction. The new code is as follows:
' If the player is attacking...
IF Player.Attack >0 THEN

	' If the player is swinging check for collision with the sheep.
	' In our specific range detector we have 3 main conditions.
	' First, the sheep must be alive for us to check collision with
	' it. Second, the warrior and the sheep must be less that 15 pixels
	' apart in horizontal direction. Third, the warrior and the sheep
	' must be less than 15 pixels apart in vertical direction.
	' You can tweak the pixel distances if you want and can get a
	' better result. The secondary condition depends on the direction.
	' For example, if the warrior is facing right (Direction = 1) sheep
	' must be at least one pixel to the right from the warrior.
	' Anyway, if all conditions are met the sheep is killed(Alive = FALSE).
	FOR checksheep AS INTEGER = 1 TO 10
		IF Sheep(checksheep).Alive = TRUE AND ABS(Player.X-Sheep(checksheep).X) < 15 AND ABS(Player.Y-Sheep(checksheep).Y) < 15 THEN
			IF Player.Direction = 1 AND Sheep(checksheep).X > Player.X THEN Sheep(checksheep).Alive = FALSE
			IF Player.Direction = 2 AND Sheep(checksheep).X < Player.X THEN Sheep(checksheep).Alive = FALSE
			IF Player.Direction = 3 AND Sheep(checksheep).Y > Player.Y THEN Sheep(checksheep).Alive = FALSE
			IF Player.Direction = 4 AND Sheep(checksheep).Y < Player.Y THEN Sheep(checksheep).Alive = FALSE
		END IF
	NEXT checksheep

	' If the player is attacking flag the proper attack
	' sprite according to player's direction.
	IF Player.Direction = 1 THEN Player.Frame = 12
	IF Player.Direction = 2 THEN Player.Frame = 11
	IF Player.Direction = 3 THEN Player.Frame = 10
	IF Player.Direction = 4 THEN Player.Frame = 9
END IF
I belive this code is enough commented and needs no extra explanation. If you update the "MoveDrawPlayer" sub on this way and compile the code you'll be able to kill the sheep but they will simply disappear off the screen and that's boring.
This is where the real fun starts. I'm going to introduce now the "layering" method I re-invented. I'm using the expression "re-invention" since I know other people used/use something similar, but I came up with this method myself. Anyway, I think mine is very user-friendly and versatile. What is this layering method? Well, it's based on two parts. Initiation subs and layer subs. Layer subs paste various particles on the screen (anything from bullets to blood spills) if they are active (a bullet shot out or a blood squired out). They "go through" the particles with a FOR loop like it's done in the "MoveDrawSheep" sub. You can have more particle layers for different types of particles (one for blood, one for bullets, one for explosions, etc.) or place all of them in one layer. Initiation subs INITIATE/SPAWN a free particle (not already activated) on a specific positions with a specific type. You are meant to call this sub on places where you want for a new particle to appear on the screen (monster killed so we need new blood, the player shot a projectile from a weapon, etc.). Some programmer call these type of subs emit-subs (emitters).
We need first to declare our particles. We'll do this with the following line (place it after the player and the sheep declarations):
DIM SHARED Particle(100) AS ObjectType
As you see we connected this array with the "ObjectType" user defined type. We can create a new user defined type especially for the particles, but for the sake of this tutorial we won't complicate. With 100 we have set the maximum possible number of particles on the screen. The more demanding your game will be in this perspective you will have to set a higher number. Since our particle layer will have other requirements than the "Sheep" and the "Player" array, we need to add few more variables in the "ObjectType" user defined type. "Typ" will flag the type of the particle, and "Duration" generic duration from the duration of the very particle to the duration of its movement (will depend on the particle's type). Updated "ObjectType" user defined type should look like this:
TYPE ObjectType
X          AS SINGLE
Y          AS SINGLE
Speed      AS SINGLE
Frame      AS INTEGER
Direction  AS INTEGER
Move       AS INTEGER
Attack     AS INTEGER
Alive      AS INTEGER
Typ        AS INTEGER
Duration   AS INTEGER
END TYPE
In our mini-game we will feature only two types of particles - bloody meat pieces and the fireball. We'll start with the bloody meat pieces and say that they will be flagged with "Typ" value of 1. "Typ" value of 2 will flag the fireball (later).
We need to declare a new subroutine named "InitiateParticle". We'll declare it on this way (place this line together with other subroutine declarations):
DECLARE SUB InitiateParticle (xpos AS SINGLE, ypos AS SINGLE, parttype AS INTEGER, partdirec AS INTEGER)
This is our first sub with parameters (variables that are passed to it when it's called). First two values need to be single since we are going to use decimal precision for particles' positions, or in other words, we'll move them using velocities that are not whole numbers. "parttype" will flag the type of the particle we want to initiate (spawn) and "partdirec" its direction (not used with the bloody meat pieces but will be with the fireball). The concept of our mini-game doesn't require more variables to be passed, but your project might so don't hesitate to declare this subroutine with more variables. The very "InitiateParticle" sub will seek for a free particle which is flagged with the "Alive" variable. Once a free particle is found its characteristics are set (some of the characteristics are passed with the sub parameters), it's flagged as taken (not free -> Alive = TRUE) and the sub is exited (with 'EXIT SUB'). It's usually better to create a special user defined type for particles where you would declare a variable named "Locked" which then would be used to flag the status of a particle (free or not). But to keep it simple we'll use "Alive" from the "ObjectType" user defined type. Just don't be confused with the way "Alive" is used with the sheep and with how "Alive" is used with the particles.
This is the first version of the "InitiateParticle" sub which for now only manages the bloody meat pieces (place this code at the end of our program):
SUB InitiateParticle (xpos AS SINGLE, ypos AS SINGLE, parttype AS INTEGER, partdirec AS INTEGER)

' Check the particles for a free one.
FOR countparticle AS INTEGER = 1 TO 100

    ' If the current one is free (Alive = FALSE) activate
    ' it and pass certain values to it.
    IF Particle(countparticle).Alive = FALSE THEN

        Particle(countparticle).Alive = TRUE
        Particle(countparticle).Typ = parttype ' Pass the particle type
                                               ' from parttype.
        Particle(countparticle).X = xpos ' Pass the particle's position
        Particle(countparticle).Y = ypos ' from xpos! and ypos!

        ' If the particle is type 1 (bloody meat pieces)
        ' randomize its DIRECTION (from 1 to 8), set
        ' its DURATION (with bloody meat pieces it flags
        ' how much the piece will move once it's spawned),
        ' set its speed (from 0.1 to 1) and its FRAME (sprite
        ' from ExtraSprite array -> from 9 to 15, check
        ' LoadGraphics sub).
        IF Particle(countparticle).Typ = 1 THEN
            Particle(countparticle).Direction = INT(RND * 8) + 1
            Particle(countparticle).Duration = 10
            Particle(countparticle).Speed = (INT(RND * 10) + 1) / 10
            Particle(countparticle).Frame = INT(RND * 6) + 9
        END IF
        EXIT SUB ' Once the particle is initiated exit this sub.

    END IF

NEXT countparticle ' If a particle is not free in this slot
                   ' seek in the next.

END SUB
I think the comments say all you need to know at this point. I would just like to point out that the way you will pass values to a particle will depend on your project. What's mandatory in this method is a FOR loop which seeks for a FREE PARTICLE and 3 values you pass into the sub, particle's x and y position and its type. I really doubt you can work without these 3 variables. You will notice that we are not using "partdirec" with bloody meat pieces since the direction of a spawned meat piece is randomized. So when you are initiating a bloody meat piece the last value can be any number since it won't be used.
What's also good about this method is that if you have the maximum number of particles already present on the screen (100 in our case) and you try to initiate a new one the program won't crash or interrupt. Simply, a new particle won't be initiated. Of course, this is the situation you should avoid in your programs.
Now we need a sub that will draw and manage (move if needed) activated particles. Place this code at the end of the program:
SUB ParticleLayer

' Go through all the particles...
FOR countparticle AS INTEGER = 1 TO 100

    ' If the current particle is activated (Alive = TRUE)
    ' manage and draw it.
    IF Particle(countparticle).Alive = TRUE THEN

        ' If the current particle is type 1 (bloody meat piece)
        ' reduce its duration from 10 to 0. While duration is
        ' above 0 the particle it moved according to its
        ' direction.
        IF Particle(countparticle).Typ = 1 THEN
            Particle(countparticle).Duration = Particle(countparticle).Duration - 1
            IF Particle(countparticle).Duration < 0 THEN Particle(countparticle).Duration = 0
            ' While duration is above 0 move the particle
            ' according to its direction with preset speed.
            ' Directions span from up(1), up-right(2), right(3), all
            ' the way to up-left(8).
            IF Particle(countparticle).Duration > 0 THEN
                SELECT CASE Particle(countparticle).Direction
                    CASE 1
                    Particle(countparticle).Y = Particle(countparticle).Y - Particle(countparticle).Speed
                    CASE 2
                    Particle(countparticle).Y = Particle(countparticle).Y - Particle(countparticle).Speed
                    Particle(countparticle).X = Particle(countparticle).X + Particle(countparticle).Speed
                    CASE 3
                    Particle(countparticle).X = Particle(countparticle).X + Particle(countparticle).Speed
                    CASE 4
                    Particle(countparticle).Y = Particle(countparticle).Y + Particle(countparticle).Speed
                    Particle(countparticle).X = Particle(countparticle).X + Particle(countparticle).Speed
                    CASE 5
                    Particle(countparticle).Y = Particle(countparticle).Y + Particle(countparticle).Speed
                    CASE 6
                    Particle(countparticle).Y = Particle(countparticle).Y + Particle(countparticle).Speed
                    Particle(countparticle).X = Particle(countparticle).X - Particle(countparticle).Speed
                    CASE 7
                    Particle(countparticle).X = Particle(countparticle).X - Particle(countparticle).Speed
                    CASE 8
                    Particle(countparticle).Y = Particle(countparticle).Y - Particle(countparticle).Speed
                    Particle(countparticle).X = Particle(countparticle).X - Particle(countparticle).Speed
                END SELECT
            END IF  ' End if duration is above 0.
        END IF  ' End if particle is type 1.

        ' Draw the current particle on its position with its frame.
        PUT (Particle(countparticle).X, Particle(countparticle).Y), ExtraSprite(Particle(countparticle).Frame), TRANS

    END IF ' End if particle is activated(Alive = TRUE).

NEXT countparticle ' Check next particle.

END SUB
Again, comments explain all of it. Be sure to declare this subroutine too with:
DECLARE SUB ParticleLayer
For particles to appear on the screen we need to call the "ParticleLayer" sub in the main loop. Place it before "MoveDrawSheep" and "MoveDrawPlayer" sub calls since we want for the warrior and the sheep to walk ON the blood (paste other sprites OVER the blood). Some particle layers need to be pasted over other sprites (for example, explosions). The updated "MainLoop" sub:
SUB MainLoop

DO

screenlock ' Lock our screen (nothing will be
           ' displayed until we unlock the screen).
screenset workpage, workpage xor 1 ' Swap work pages.

' Frame1 changes from 1 to 2 or vice versa every
' 16 cycles (set with Frame2 variable).
Frame2 = (Frame2 MOD 16) + 1
IF Frame2 = 10 THEN Frame1 = (Frame1 MOD 2) + 1

' Pastes the background.
PUT (0, 0), background1, PSET

ParticleLayer ' Paste the particles.
MoveDrawPlayer ' Paste/move our player
MoveDrawSheep ' Paste/move our sheep

workpage xor = 1 ' Swap work pages.
screenunlock ' Unlock the page to display what has been drawn.

SLEEP 10, 1 ' Slow down the program and prevent 100 % CPU usage.

LOOP UNTIL MULTIKEY(SC_Q) OR MULTIKEY(SC_ESCAPE)
' Execute the loop until the user presses Q or ESCAPE.

END SUB
No particles will appear if we don't initiate them. We have decided to initiate bloody meat pieces when a sheep is killed. We will spawn 7 bloody meat pieces every time a sheep is killed from the center of the killed sheep (with few pixels apart in all directions to get a better effect). This change happens in the "MoveDrawPlayer" sub:
' If the player is attacking...
IF Player.Attack >0 THEN

    ' If the player is swinging check for collision with the sheep.
    ' In our specific range detector we have 3 main conditions.
    ' First, the sheep must be alive for us to check collision with
    ' it. Second, the warrior and the sheep must be less that 15 pixels
    ' apart in horizontal direction. Third, the warrior and the sheep
    ' must be less than 15 pixels apart in vertical direction.
    ' You can tweak the pixel distances if you want and can get a
    ' better result. The secondary condition depends on the direction.
    ' For example, if the warrior is facing right (Direction = 1) sheep
    ' must be at least one pixel to the right from the warrior.
    ' Anyway, if all conditions are met the sheep is killed(Alive = FALSE).
    FOR checksheep AS INTEGER = 1 TO 10
        IF Sheep(checksheep).Alive = TRUE AND ABS(Player.X-Sheep(checksheep).X) < 30 AND ABS(Player.Y-Sheep(checksheep).Y) < 30 THEN
            IF Player.Direction = 1 AND Sheep(checksheep).X > Player.X THEN Sheep(checksheep).Alive = FALSE
            IF Player.Direction = 2 AND Sheep(checksheep).X < Player.X THEN Sheep(checksheep).Alive = FALSE
            IF Player.Direction = 3 AND Sheep(checksheep).Y > Player.Y THEN Sheep(checksheep).Alive = FALSE
            IF Player.Direction = 4 AND Sheep(checksheep).Y < Player.Y THEN Sheep(checksheep).Alive = FALSE
            IF Sheep(checksheep).Alive = FALSE THEN
                ' If the sheep is killed spawn 7 bloody meat pieces(particle type 1
                ' -> third parameter).
                InitiateParticle Sheep(checksheep).X+20, Sheep(checksheep).Y+20, 1, 0
                InitiateParticle Sheep(checksheep).X+23, Sheep(checksheep).Y+20, 1, 0
                InitiateParticle Sheep(checksheep).X+19, Sheep(checksheep).Y+23, 1, 0
                InitiateParticle Sheep(checksheep).X+18, Sheep(checksheep).Y+21, 1, 0
                InitiateParticle Sheep(checksheep).X+22, Sheep(checksheep).Y+18, 1, 0
                InitiateParticle Sheep(checksheep).X+21, Sheep(checksheep).Y+19, 1, 0
                InitiateParticle Sheep(checksheep).X+21, Sheep(checksheep).Y+19, 1, 0
            END IF
        END IF
    NEXT checksheep

END IF
Note where I placed 7 calls of the "InitiateParticle" sub and how the third parameter is 1 (bloody meat piece). The last parameter with type 1 particles can be any number since we are not using it in initiation.
The last version of the entire code: codever4.txt
If you compile this you'll be able to kill the sheep and the blood will squirt out of them. The result is not the best and perhaps we should have implemented sheep corpses too. Still, we are not trying here to win an award. This IS a tutorial.
If you went through the code you might have noticed one more change. I inputted these lines in the "InitVariables" sub:
FOR countparticle AS INTEGER = 1 TO 100
	Particle(countparticle).Alive = FALSE
NEXT countparticle
This FOR loop sets all particles as free (not activated!). ALWAYS make sure that you reset all the particles from the last game every time you start a new game. In your case particles' status might be flagged with another variable like "Locked" or whatever you choose.
Next thing we'll do is implement a fireball in the game which will be controlled with the particle layer and which will be able to kill the sheep. This is mainly to show you how particle layers can be used to control projectiles too. First we need to modify the "InitiateParticle" sub by adding the code for particle type 2.
SUB InitiateParticle (xpos AS SINGLE, ypos AS SINGLE, parttype AS INTEGER, partdirec AS INTEGER)

' Check the particles for a free one.
FOR countparticle AS INTEGER = 1 TO 100

    ' If the current one is free (Alive = FALSE) activate
    ' it and pass certain values to it.
    IF Particle(countparticle).Alive = FALSE THEN

        Particle(countparticle).Alive = TRUE
        Particle(countparticle).Typ = parttype ' Pass the particle type
                                               ' from parttype.
        Particle(countparticle).X = xpos ' Pass the particle's position
        Particle(countparticle).Y = ypos ' from xpos! and ypos!

        ' If the particle is type 1 (bloody meat pieces)
        ' randomize its DIRECTION (from 1 to 8), set
        ' its DURATION (with bloody meat pieces it flags
        ' how much the piece will move once it's spawned),
        ' set its speed (from 0.1 to 1) and its FRAME (sprite
        ' from ExtraSprite array -> from 9 to 15, check
        ' LoadGraphics sub).
        IF Particle(countparticle).Typ = 1 THEN
            Particle(countparticle).Direction = INT(RND * 8) + 1
            Particle(countparticle).Duration = 10
            Particle(countparticle).Speed = (INT(RND * 10) + 1) / 10
            Particle(countparticle).Frame = INT(RND * 6) + 9
        END IF
        ' If the particle is type 2 (fireball) flag
        ' its direction according to partdirec, its
        ' duration and speed (modify this for faster
        ' or slower fireball) and sprite (only one
        ' image of fireball in the ExtraSprite array
        ' placed on position 16).
        IF Particle(countparticle).Typ = 2 THEN
            Particle(countparticle).Direction = partdirec
            Particle(countparticle).Duration = 100
            Particle(countparticle).Speed = 2.8
            Particle(countparticle).Frame = 16
        END IF

        EXIT SUB ' Once the particle is initiated exit this sub.

    END IF

NEXT countparticle ' If a particle is not free in this slot
                   ' seek in the next.

END SUB
The direction of the fireball we'll pass using the player's direction since the fireball needs to travel in the direction the player is facing. Another update must happen in the "ParticleLayer" sub. Place this code after line 'END IF ' End if particle is type 1.':
' If particle type is 2 (fireball)...
        IF Particle(countparticle).Typ = 2 THEN
            ' If the particle's life has expired (duration = 0) cancel it (Alive = FALSE).
            Particle(countparticle).Duration = Particle(countparticle).Duration - 1
            IF Particle(countparticle).Duration < 0 THEN Particle(countparticle).Alive = FALSE
            ' According to particle's direction move it (right, left, down, up)
            ' with preset speed.
            SELECT CASE Particle(countparticle).Direction
            CASE 1
            Particle(countparticle).X = Particle(countparticle).X + Particle(countparticle).Speed
            CASE 2
            Particle(countparticle).X = Particle(countparticle).X - Particle(countparticle).Speed
            CASE 3
            Particle(countparticle).Y = Particle(countparticle).Y + Particle(countparticle).Speed
            CASE 4
            Particle(countparticle).Y = Particle(countparticle).Y - Particle(countparticle).Speed
            END SELECT

            ' If the fireball goes off the screen cancel it.
            IF Particle(countparticle).Y < -24 OR Particle(countparticle).Y > 480 OR Particle(countparticle).X < -24 OR Particle(countparticle).X > 640 THEN Particle(countparticle).Alive = FALSE

            ' Check all sheep if the fireball is in collision with any of them.
            ' The collision is check from the centers of the sheep and the
            ' fireball and they need to be less than 11 pixel apart.
            FOR checksheep AS INTEGER = 1 TO 10
                ' If the fireball is active (not destroyed upon collision with
                ' a previous sheep), the current sheep is alive and they are
                ' in collision cancel the fireball and kill the sheep.
                IF Particle(countparticle).Alive = TRUE AND Sheep(checksheep).Alive = TRUE AND ABS(Particle(countparticle).X+10-Sheep(checksheep).X-20) < 21 AND ABS(Particle(countparticle).Y+10-Sheep(checksheep).Y-20) < 21 THEN
                    Sheep(checksheep).Alive = FALSE ' Kill the fireball.
                    Particle(countparticle).Alive = FALSE ' Kill the sheep.
                    ' If the sheep is killed spawn 7 bloody meat pieces(particle type 1
                    ' -> third parameter).
                    InitiateParticle Sheep(checksheep).X+20, Sheep(checksheep).Y+20, 1, 0
                    InitiateParticle Sheep(checksheep).X+23, Sheep(checksheep).Y+20, 1, 0
                    InitiateParticle Sheep(checksheep).X+19, Sheep(checksheep).Y+23, 1, 0
                    InitiateParticle Sheep(checksheep).X+18, Sheep(checksheep).Y+21, 1, 0
                    InitiateParticle Sheep(checksheep).X+22, Sheep(checksheep).Y+18, 1, 0
                    InitiateParticle Sheep(checksheep).X+21, Sheep(checksheep).Y+19, 1, 0
                    InitiateParticle Sheep(checksheep).X+21, Sheep(checksheep).Y+19, 1, 0
                END IF
            NEXT checksheep ' Check next sheep for collision.

        END IF ' End if particle is type 2.
The code speaks for itself. There is the code that moves the fireball according to its direction, the code that cancels it if it goes off the screen and the code that checks for collision with the sheep, very similar to the one that checks for collision with the sword. All we need now is the code that spawns the fireball. The fireball will be spawn when the player pushes ENTER. Place this code in the "MoveDrawPlayer" sub above the PUT statement:
' If the player pushes ENTER initiate a fireball but only
' if another one is NOT ACTIVE (flagged with the FireBFree variable).
IF MULTIKEY(SC_ENTER) THEN
    FireBFree = TRUE ' By deafult the fireball is free.
    ' Go through all the particles and check if an active one is
    ' the fireball.
    FOR countparticle AS INTEGER = 1 TO 100
    IF Particle(countparticle).Alive = TRUE AND Particle(countparticle).Typ = 2 THEN FireBFree = FALSE
    NEXT countparticle
    ' Note how player's direction is passed into the sub (4th parameter).
    IF FireBFree = TRUE THEN InitiateParticle Player.X+8, Player.Y+10, 2, Player.Direction
END IF
As you see I coded this part on the way it prevents the player to fire a fireball if another one is already present on the screen. This is to prevent the abuse of the fireball feature and not to allow the player to fire fireballs one after another. You can solve this "problem" on more ways. Like add another variable which would be set to 100 every time the player would fire a fireball and then reduce it in every loop (like the "Attack" variable). Then the player wouldn't be able to shoot another fireball until this variable reaches 0. Think of this as "reload" feature in games with firearms which can be shorter or longer for different weapons.
We are coming close to finishing the very mini-game. What I still want to do is add a millisecond precise timer and print the playtime so we can "score" the game after all the sheep are killed. The very timer should be placed in the main loop (naturally). Just put it right after 'DO':
' Our timer (millisecond precise).
' starttime variable checks if
' a millisecond has passed
' using the TIMER statement.
' & is used with variables
' you want to return DOUBLE
' PRECISION values. When 10
' milliseconds has passed
' add one seconds and return
' the milliseconds to 0.
IF starttime + 0.1 <= TIMER& THEN
	milsec = milsec + 1
	IF milsec > 9 THEN
		seconds = seconds + 1
		milsec = 0
	END IF
	starttime = TIMER&
END IF
This is a piece of very simple code. The only new thing about this code is that it uses DOUBLE PRECISION variables. "seconds" will store the number of seconds passed in the round and "milsec" the number of milliseconds which are used to change seconds every time 10 of them passes (naturally). For this code to work we should declare "starttime", "seconds" and "milsec" on the beginning of our program together with other variable declarations as shared. The code:
DIM SHARED AS INTEGER seconds, milsec
DIM SHARED AS DOUBLE starttime
"starttime" needs to be DOUBLE because we are counting MILLISECONDS using the TIMER statement! Also, with every new game the timer needs to be reset so these lines need to be in the "InitVariables" sub:
milsec = 0
seconds = 0
We would like for the playtime to print on the screen while we are playing the game. We'll use the PRINT statement for this. At the end of this tutorial I'll give you a link to a better CUSTOM FONT printing routine, but to make this simple we'll use PRINT in our mini-game. Put these two lines before 'workpage xor = 1':
LOCATE 1, 1
PRINT "Playtime: " + STR$(seconds) + "." + STR$(milsec)
LOCATE sets the console cursor to the row and column given (1 and 1 in the above line). You'll only use it when using the PRINT statements. Very handy if you are making an ASCII game but in other situation not really.
The last thing we'll do is add a score screen which will print the playtime (how much seconds it took the player to kill all the sheep) and some message according to this time. We'll create another sub named "PrintScore" which should be declared like all the rest and looks like this:
SUB PrintScore

DIM message AS STRING
' This sub is executed when a game round
' is completed.

CLS ' Clear the screen.

' If any of the sheep is alive EXIT this sub since
' the user aborted the game and no sense in
' printing the score.
FOR checksheep AS INTEGER= 1 TO 10
    IF Sheep(checksheep).Alive = TRUE THEN EXIT SUB
NEXT checksheep

' Play a loop which ends until the use
' pushes escape.
DO

    screenlock  ' Lock our screen (nothing will be
                ' displayed until we unlock the screen).
    screenset workpage, workpage xor 1 ' Swap work pages.

	CLS
    ' Print the number of seconds the round took
    ' to complete.
    LOCATE 2, 1
    PRINT "You needed " + STR$(seconds) + "." + STR$(milsec)+" seconds"
    LOCATE 3, 1
    PRINT "to kill all the sheep."

    ' According to this time print a different
    ' message. More time it took the player
    ' to finish a round print a less
    ' complimenting message.
    message = "An ok score...for a granny!"
    IF seconds < 16 THEN message = "Not bad!"
    IF seconds < 11 THEN message = "Good job!"
    IF seconds < 8 THEN message = "Excellent job!"
    LOCATE 5, 1
    PRINT message
    LOCATE 7, 1
    PRINT "Press ESCAPE to return to main menu."

    workpage xor = 1 ' Swap work pages.
    screenunlock ' Unlock the page to display what has been drawn.
    sleep 2

    ' End loop when ESCAPE is pushed.
LOOP UNTIL MULTIKEY(SC_ESCAPE)

END SUB
Nothing groundbreaking here and it's all said in the comments. We need to call this sub when the game ends in the main menu sub (after the main loop call). The updated main menu sub:
SUB MainMenu

' Will add code here later that calls
' the main loop after the player clicks
' on an option in the menu. For now
' the main loop is called right away.

' Load initial variables(player's position, etc.).
InitVariables
' Call the main game loop.
MainLoop
' Show the score screen if all sheep are killed.
PrintScore

END SUB
We aren't done yet because if you remember the main loop ends only when the player pushes ESCAPE. We need to add another condition. We'll add a variable in the main loop named "GameEnd". We'll input that it's TRUE by default and then right after it add a FOR loop which will check if any of the sheep is alive. If any alive sheep is found "GameEnd" is changed to FALSE. An condition is added to the main DO loop which should end it when "GameEnd" is TRUE. So until all the sheep are dead "GameEnd" will always be changed to FALSE and the loop won't end. The changed end of the "MainLoop" sub:
	workpage xor = 1 ' Swap work pages.
    screenunlock ' Unlock the page to display what has been drawn.

    SLEEP 10, 1 ' Slow down the program and prevent 100 % CPU usage.

    ' A round is over by deafult.
    GameEnd = TRUE
    ' Check all the sheep. If any of them is alive the
    ' game should not end (round not completed).
    FOR checksheep AS INTEGER = 1 TO 10
        IF Sheep(checksheep).Alive = TRUE THEN GameEnd = FALSE
    NEXT checksheep

END SUB
That's it. The mini-game is completed! And I must say, it came out better than I thought. There is actually some play value there. Or not. Not important. Like I already said, this is a tutorial.
The entire code done so far: codever5.txt
We could end here now, but I won't. I really want to add a main menu. It will contain a bunch of generic code and some new code that uses the mouse routines. It should allow you to start and exit the game, and when a round is completed or aborted the program should get back to the main menu again.
For the main menu screen we'll use this image (link). Don't get excited by it. Only two options ("Play Sheep Massacre" and "Exit") will be active. Other two mini-games I originally planed for the next lessons, but this probably will not happen.
To store the main menu image we need to declare another memory array (memory buffer).
We can re-dimension the "background1" and declare it with two elements, but to keep it simple we'll declare another pointer named "background2". Put this with other variable declarations:
DIM SHARED background2 AS ANY PTR
We also need to load this image into memory. Put these lines in the "LoadGraphics" sub:
background2 = IMAGECREATE (640, 480)
BLOAD "mainmenu.bmp", 0
GET (0,0)-(639,479), background2
All is ready for the new "MainMenu" sub:
SUB MainMenu

DIM AS INTEGER MPos

' Default menu position is 1 (first from
' the top).
MPos = 1

DO

    screenlock ' Lock our screen (nothing will be
           ' displayed until we unlock the screen).
    screenset workpage, workpage xor 1 ' Swap work pages.

    ' If the user pushed up and the key pushed
    ' last time is released reduce menu
    ' position by 1. Minimum menu position is 1.
    IF MULTIKEY(SC_UP) AND KeyPressed = FALSE THEN
        MPos = MPos - 1
        KeyPressed = TRUE
        IF MPos < 1 THEN MPos = 1
    END IF
    ' If the user pushed down and the key pushed
    ' last time is released increase menu
    ' position by 1. Minimum menu position is 1.
    IF MULTIKEY(SC_DOWN) AND KeyPressed = FALSE THEN
        MPos = MPos + 1
        KeyPressed = TRUE
        IF MPos > 4 THEN MPos = 4
    END IF

    ' If the user pushes enter execute
    ' the current menu option (flagged
    ' with MPos).
    IF MULTIKEY(SC_ENTER) THEN
        SELECT CASE MPos
            CASE 1  ' Play Sheep Massacre option
                workpage xor = 1
                screenunlock
                ' Load initial variables(player's position, etc.).
                InitVariables
                ' Call the main game loop.
                MainLoop
                ' Show the score screen if all sheep are killed.
                PrintScore
                MPos = 1
				' Loop while the user holds ESCAPE.
                WHILE MULTIKEY(SC_ESCAPE)
					SLEEP 1
                WEND
            CASE 2
            ' Inactive!
            CASE 3
            ' Inactive!
            CASE 4  ' Exit option
                    ' Destroy our memory buffers before ending the program
                    ' (free memory).
                IMAGEDESTROY (background1)
                IMAGEDESTROY (background2)
                FOR imagepos AS INTEGER = 1 TO 12
                IMAGEDESTROY WarriorSprite(imagepos)
                NEXT imagepos
                FOR imagepos AS INTEGER = 1 TO 18
                IMAGEDESTROY ExtraSprite(imagepos)
                NEXT imagepos
                END
        END SELECT
    END IF

    ' Pastes the menu background.
    PUT (0, 0), background2, PSET

    ' Pastes the menu pointer according to MPos. The menu
    ' pointer is stored on position 18 in the ExtraSprite
    ' array.
    PUT (176, 150+((MPos-1)*26)), ExtraSprite(18), TRANS

    ' Key pressing variable won't be restored(key pressing
    ' unlocked) until the user releases all these keys
    ' (doesn't hold any of them).
    IF NOT MULTIKEY(SC_ENTER) AND NOT MULTIKEY(SC_UP) AND NOT MULTIKEY(SC_DOWN) THEN KeyPressed = FALSE

    ' Standard statements in each loop.
    workpage xor = 1 ' Swap work pages.
    screenunlock ' Unlock the page to display what has been drawn.
    sleep 1

LOOP

END SUB
Most of code is explained in the comments. Yet another DO...LOOP. "MPos" is used to flag the active option and "MPos" is changed with UP/DOWN arrow keys. "Play Sheep Massacre" option is under "MPos" value of 1 (CASE 1) and "Exit" under "MPos" value of 4 (CASE 4). The other two options are inactive (unused). When the user pushes ENTER an option is executed according to "MPos". The final thing I'll do is add mouse control to the menu. This is not NEEDED, but I want to show you how to use the GFXlib's mouse routines.
The statement that returns the mouse status is GETMOUSE and you should place it in all the loops where you want to check for the mouse status. Just put this line in the "MainMenu" sub right after 'DO':
GETMOUSE mx, my, , buttons
This line stores mouse cursor x position in "mx", mouse cursor y position in "my" and button status in the "buttons" variable. The last parameter returns 1 for left mouse click and 2 for right mouse click. The third parameter is the mouse wheel counter and it's not used in our menu. Check GFXlib's documentation for more details on this statement. We also need to declare mx, my and buttons.
You should put the following code after the PUT statement that pastes the menu pointer:
' Paste the mouse cursor (image number 17)
    PUT (mx, my), ExtraSprite(17), TRANS

    ' If the mouse cursors is on any of the options
    ' change the current option to the one
    ' on which the mouse it.
    IF mx > 174 and mx < 500 THEN
    IF my > 150 and my < 174 THEN MPos = 1
    IF my > 178 and my < 200 THEN MPos = 2
    IF my > 202 and my < 226 THEN MPos = 3
    IF my > 228 and my < 252 THEN MPos = 4
    ' If the user has clicked with the left
    ' mouse button and the cursors is on
    ' one of the options PAUSE until the
    ' user releases the click and go to
    ' the IF clause with SELECT CASE MPos.
    IF buttons = 1 AND my > 150 AND my < 252 THEN
        buttons = 0
        GOTO optionactivated:
        END IF
    END IF
I can hear some people cringing now. I used a GOTO statement! Anyway, the first statement is most important and it draws the mouse cursors using the "mx" and "my" variables. Always import your own custom cursor when developing a mouse controlled game/application. This illustrates how this is easy to do. The rest of the code simply changes the menu option if the mouse cursor is on any of them. The mouse in our menu is above the keyboard in hierarchy so while the mouse cursor is on any of the options you can't change it with the keyboard. optionactivated: label is placed under 'IF MULTIKEY(SC_ENTER) THEN' so when you click with the mouse it's just like you pushed ENTER. This can be done differently, but in this specific situation, GOTO is a clean and easy solution.
And that's it. We are really done now with the mini-game! Yippee! But this is not yet the end of the tutorial(aaargh!).
Check the final code of the mini-game here: codever6.txt
I did one final change in the code in the last version. Every 'TO 10' in the sheep FOR loops I changed to 'TO numofsheep', made the "numofsheep" variable shared and set it as 10 in the "InitVariables" sub. I also re-dimensioned the "Sheep" array to hold 100 elements and the "Particle" array to hold 1000 elements (as well as changed all the particle FOR loops to loop to 1000). This change allows us to alter the number of sheep inside the game simply by changing 10 in the line 'numofsheep = 10' to the desired number of sheep you want in the game. We don't need to go into every sheep FOR loop and change 'TO 10'. Always try to connect as many values in your game with variables since then you can change your game's "characteristics" very easily if needed. Be sure that you don't loop to higher numbers than you dimensioned your arrays with. Like in our mini-game "numofsheep" shouldn't be above 100 as we dimensioned the "Sheep" array to hold 100 elements. Stay in bounds of your arrays! Or just use UBOUND command. I've re-dimensioned the "Particle" array since in the most extreme situation (100 dead sheep on the screen + the fireball) we would have 701 particle on the screen. Yes, I could dimension the "Particle" array to hold 701 particle, but 1000 is a nice round number. It just shouldn't be smaller than the maximum number of particles that might occur in the game. This is a screenshot with 40 sheep:
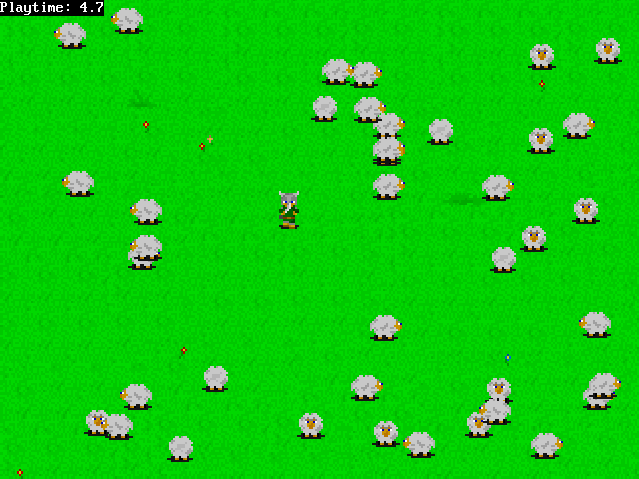
Download the compiled mini-game with the source and all the graphics files here: mini_game.zip
I feel I should say something about loading and storing data into files since you will most likely use it in any larger project. I don't want to attach this tutorial on the mini-game since it's really unnecessary and I feel this can be explained better in a separate example program.
Stéphane Richard wrote an excellent series about file manipulation (QB Express issues #4, #6 and #8) so if interested in a more deep-through tutorial on this check them out. In this tutorial we'll cover the basics. Simple raw data retrieving and storing from/to plain text files. External data files are a must have with more ambitious projects where you have huge numbers of variables that need to be initiated before every new game. Like NPCs positions on every map/location in the game. Not to mention the very map files that hold the information about tile positions and numbers.
First, let's create a file which will contain these numbers (use Notepad):
50
50
100
100
1
120
120
2
130
155
1
160
150
4
Name it "data.txt".
Now we'll create two objects, "Player" and "NPC" and connect them with a user defined type that will include 3 variables ("X", "Y", and "Typ"):
TYPE ObjectType
X    AS INTEGER  ' Will hold the object's X position.
Y    AS INTEGER  ' Will hold the object's Y position.
Typ  AS INTEGER  ' Will flag the object's type.
END TYPE

DIM SHARED Player AS ObjectType ' A generic player object.
DIM SHARED NPC(4) AS ObjectType ' A generic NPCs array.
Let's say that the first two entries in the file are the player's x and y position and the rest 12 entries hold the NPCs' x and y positions and types (one after another). The way you would load this data into the desired variables is as follows:
' Open data.txt for retrevieng data on
' file handle #1
OPEN "data.txt" FOR INPUT AS #1
INPUT #1, Player.X
INPUT #1, Player.Y
' Loop through 4 NPCs and load
' the variables for each one.
FOR countNPC AS INTEGER = 1 TO 4
INPUT #1, NPC(countNPC).X
INPUT #1, NPC(countNPC).Y
INPUT #1, NPC(countNPC).Typ
NEXT countNPC
CLOSE #1 ' Close the file handle
         ' after retrieving data.
When you are LOADING data use "FOR INPUT" when opening a file and then pass the data from the file to variables like it's done in the code above. #1 represents the file handle. Be sure you are not opening one already opened. A good way to avoid this is to close each file after you got the data from it. You can also you the function "FREEFILE" which opens a free file handle.
You save data into files on a very similar way. Instead of "FOR INPUT" you need to use "FOR OUTPUT" and when writting data into a file you need to use "PRINT #filehandle". Like this:
OPEN "data.txt" FOR OUTPUT AS #1
PRINT #1, Player.X
PRINT #1, Player.Y
FOR countNPC AS INTEGER = 1 TO 4
PRINT #1, NPC(countNPC).X
PRINT #1, NPC(countNPC).Y
PRINT #1, NPC(countNPC).Typ
NEXT countNPC
CLOSE #1
A simple program that illustrates this:
#include "fbgfx.bi"
Using FB

TYPE ObjectType
X    AS INTEGER  ' Will hold the object's X position.
Y    AS INTEGER  ' Will hold the object's Y position.
Typ  AS INTEGER  ' Will flag the object's type.
END TYPE

DIM SHARED Player AS ObjectType ' A generic player object.
DIM SHARED NPC(4) AS ObjectType ' A generic NPCs array.

SCREEN 18, 8, 2, 0

' Open data.txt for retrevieng data on
' file handle #1
OPEN "data.txt" FOR INPUT AS #1
INPUT #1, Player.X
INPUT #1, Player.Y
' Loop through 4 NPCs and load
' the variables for each one.
FOR countNPC AS INTEGER = 1 TO 4
INPUT #1, NPC(countNPC).X
INPUT #1, NPC(countNPC).Y
INPUT #1, NPC(countNPC).Typ
NEXT countNPC
CLOSE #1 ' Close the file handle
         ' after retrieving data.

DO

' Print player's x and y position.
LOCATE 1, 1
PRINT "Player's X position: "; Player.X
PRINT "Player's Y position: "; Player.Y

' Print NPC 1 and 2 data.
LOCATE 4, 1
PRINT "NPC 1, X position:" ; NPC(1).X
PRINT "NPC 1, Y position:" ; NPC(1).Y
PRINT "NPC 1, type:" ; NPC(1).Typ
PRINT "NPC 2, X position:" ; NPC(2).X
PRINT "NPC 2, Y position:" ; NPC(2).Y
PRINT "NPC 2, type:" ; NPC(2).Typ

LOCATE 12, 1
PRINT "Use arrow keys to change the player's"
PRINT "position and S to save this new"
PRINT "information into data.txt."
PRINT "Press ESC to end the program."

' Change the player's position according to
' pushed arrow key.
IF MULTIKEY(SC_RIGHT) THEN Player.X = Player.X + 1
IF MULTIKEY(SC_LEFT) THEN Player.X = Player.X - 1
IF MULTIKEY(SC_UP) THEN Player.Y = Player.Y - 1
IF MULTIKEY(SC_DOWN) THEN Player.Y = Player.Y - 1

' If the letter "S" is pushed
' save the new data into
' the same file. Only Player's
' X and Y position can be
' changed.
IF MULTIKEY(SC_S) THEN
WHILE MULTIKEY(SC_S)
SLEEP 2
WEND
OPEN "data.txt" FOR OUTPUT AS #1
PRINT #1, Player.X
PRINT #1, Player.Y
FOR countNPC AS INTEGER = 1 TO 4
PRINT #1, NPC(countNPC).X
PRINT #1, NPC(countNPC).Y
PRINT #1, NPC(countNPC).Typ
NEXT countNPC
CLOSE #1
END IF

SCREENCOPY
SCREENSYNC
SLEEP 2

LOOP UNTIL MULTIKEY(SC_ESCAPE) ' End loop when ESC is pushed.

END
This program allows you to change the player's x and y position and save this change in "data.txt" (by pushing the letter "S"). If you start the program again you will see that the change has been saved. You can't change the NPC data. The NPC array is there just to show you how you can load large amounts of data from files with a FOR loop and store it into arrays. Download this example packed: file_usage.zip
What also wouldn't be bad for a beginner to know is how to convert strings into integers and vice-versa. Something often done when data is being retrieved/stored from/to files.
To convert an integer into a string use:
DIM YourString AS STRING
DIM YourInteger AS INTEGER
YourString = STR(YourInteger)
To convert a string into an integer use:
YourInteger = VAL(YourString)
Where YourString$ can be "124" or something like that. A string like "dssdsd" would return a 0 when converted into an integer.
Again, this is just the surface of file manipulation. For more information on this like using binary files read Stéphane Richard's tutorials.
When compiling a graphics application (that's what we are doing) with FreeBASIC you will most likely want to get rid of the console window. To get rid of it you need to compile your .bas files with:
fbc yourfile.bas -s gui
In FBIde you set this in the View -> Settings -> FreeBASIC window. The "Compiler command" input box. Just put '-s gui' behind 'filename> '. Omit the apostrophes.
I will list here few routines/tools that you might find very useful, especially if you are going to stick to using GFXlib.
This is a set of custom font printing routines I wrote some time ago.
Most likely you will use FMOD sound library (http://www.fmod.org) to play the sound and music in your games. FMOD is easy to use, multi-platform and supports a wide range of music file formats (WAV, MOD, MID, MP3, OGG, ...). This is a tutorial I wrote on using FMOD in FreeBASIC.
Richard Eric Lope's pixel by pixel scrolling engine ported to FreeBASIC by me in June 2005 (latest edition from Jan 2008, recompiled in FB ver.0.23 in Sep of 2011). It was originally coded in RelLib, a QuickBasic graphics library. This is edition #3 of the engine, compilable in FreeBASIC ver.0.23.
Tile Studio is a complete development utility for graphics of tile-based games. Import/exports from/to BMP files. Very useful tool when making 2D RPGs and similar tile-based games.
Excellent program for editing audio files. I found it very handy when editing sound effects and converting them to desired formats. A must tool for every game designer. Freeware.
You want hardware accelerated 2D graphics? Well, there is a solution. relsoft's wonderful Gfxlib2 wrapper for OpenGL.
Download: fbgl2d_v5.zip (341 KB)
Website: Genso's Junkyard II
Once more I'm recommending this IDE. I had the opportunity to try out two other FreeBASIC IDEs and they didn't appeal to me like FBIde did. Maybe it's a thing of habit. What's great is that FBIde since the version 0.4.5 includes FreeBASIC Wiki, a wonderful FreeBASIC encyclopedia. And if I'm not mistaken it's still growing.
I'm so glad I found time to review this old tutorial of mine and bring it to 2011. I know quite few programmers will frown on some of my "programming techniques" and general advices, but I'm sticking to my game design oriented programming foolosophy.
This is a very specific 2D game programming oriented tutorial meant for beginners mainly interested in 2D game design and should be observed as such.
I plan to write one more tutorial on FPS control and time-based movement, but like I said, it will be a separate tutorial.
With hopes I opened that "magical door" at least to one person, code long and prosper!
Download the tutorial zipped: how_to_lesson2_redux.zip (4679 KB)
Phew! Another issue is behind me. Beginning to feel that this section is a bit redundant. Maybe I should start putting a joke in here or something. Anyway, thank you for reading more or less of this issue and see you in 2 months or so. Keep developing! Or else...
~ Lachie (lachie13@yahoo.com)
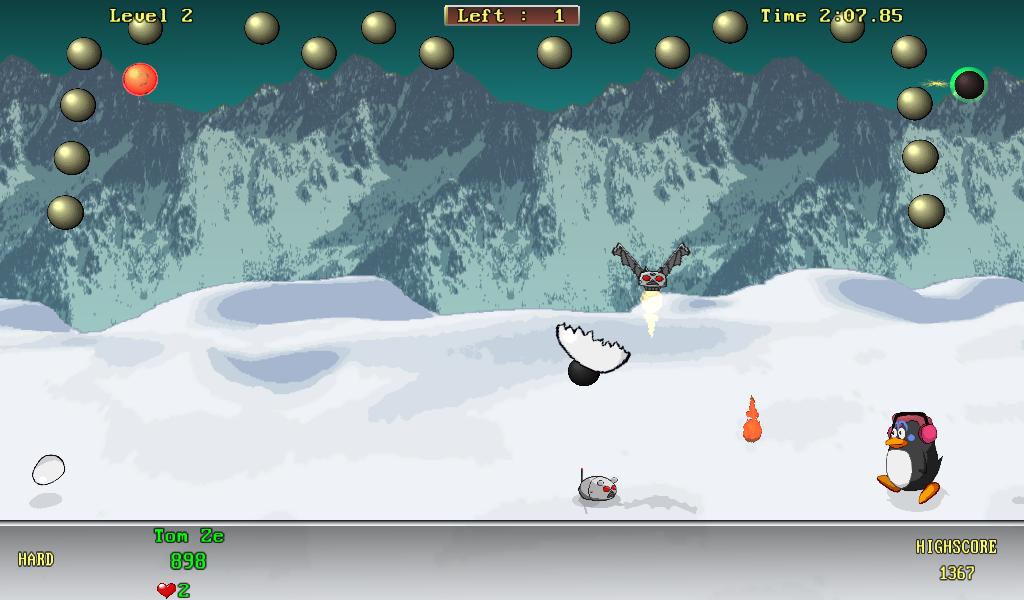
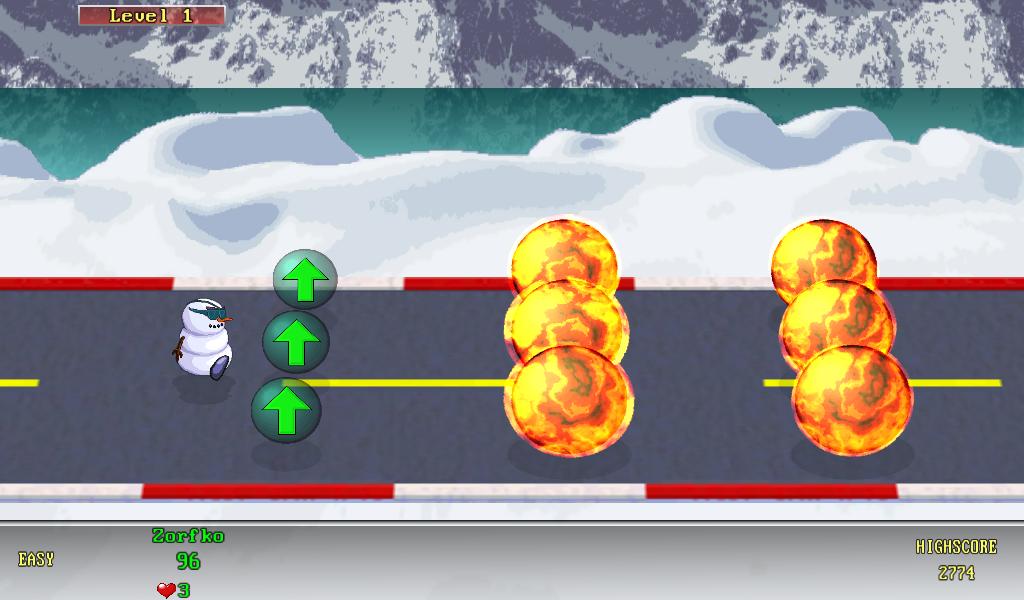