Message from the Editor
Hello everybody!
The new issue of BASIC Gaming is finally out. Sadly, the tutorial I've been waiting for the past few days didn't get done, and it was sort of the last ingredient necessary to raise the quality of this issue on a higher level. Nevertheless, this wait gave me the opportunity to proofread the issue more detailed, wait out for few news and incorporate some that otherwise might have been left out. In that sense, the news briefs really cover all that needs (or wants) to be covered at the moment. Anyway, at least now I have a definite high quality tutorial for the next issue.
In all honestly, it felt like a slower and less exciting period for game development in the community during these last two months, but while compiling this issue I realized it was only an impression and despite so many started projects disappearing off the map, I see now quite few new emerging and some older reappearing. It is a constant flux of creative energies one should appreciate more and not insist on concrete outputs at all time. Each serious project’s time will come in the end. So in a way compiling this number was a rewarding discovery of community's intrinsic creative energies that constantly keep fluctuating and this movement is not subsiding, despite temporary lack of obvious evidences. It was definitely a reassuring process for me that rebuilt my faith in the game dev future of FreeBASIC and QB64.
Back to the issue itself. We have another Revisiting The Classics article, this time covering Prompt Critical. I think this will be the last review in the series and I might eventually start a QBasic equivalent of it, but it will depend on my energies as QBasic Classics will me a much longer commitment that this was. Beside this article we have two solid tutorials, sadly lacking one more that would put a stamp on all of it, but nevertheless these two cover different and interesting topics, each valuable on their own way.
Anyway, check out the news briefs, gallery and awards section as well, download stuff, explore them, return to working on your projects and pleasantly surprise the community before the next issue. I have faith in you people. We still have a lot to say in FB and QB64. Thank you for being with me at this very place in this right moment of time.
With love,
~ Lachie Dazdarian (lachie13@yahoo.com)
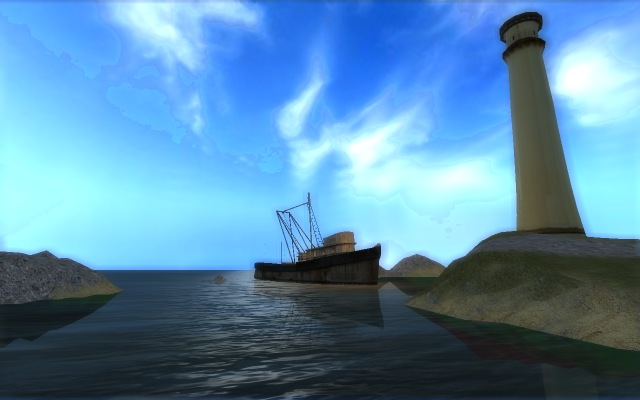
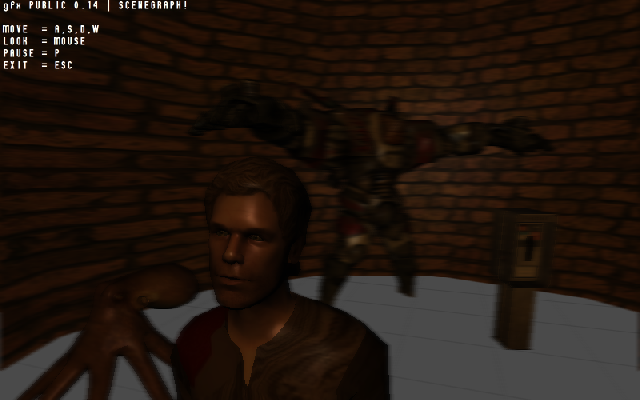
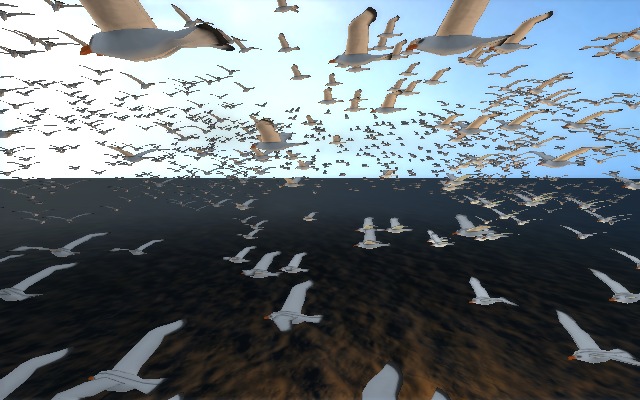
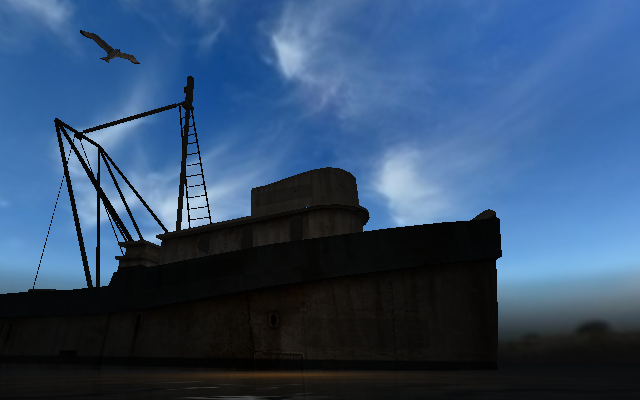
Gallery - tinyGFX
tinyGFX is a lightweight 3D engine for Windows and Linux based on openGL, openAL, ODE and LUA. It's been in development by phpboxxx for about a year now, and we are still waiting for a public version. So far only compiled demos have been available.
Click on the screenshots for full size images


From the developer:
What I have so far:
- a scene graph
- scene load/save/restore
- taking screenshot
- state sorting
- job system (threads)
- asynchronous asset streaming
- glsl support and gl extensions support
- light ubershader for forward rendering/light volumes (point light, directional light, materials, phong, bump, parallax, specular mapping)
- partially working terrain (mesh is created from heightmap, but not split into smaller pieces yet)
- obj/3ds support
- accumulated timer (highest framerate possible for any machine, same rate of movement on all machines)
- basic openal support (WAV)
- frustum/sphere/boundingbox culling
- surface caching for static meshes
- zip support (stream textfiles directly, extract binary files)
- soil integration (BMP, PNG, JPG, TGA, DDS, PSD, HDR, DXT Compression)
TODO & WIP:
-
skeletal animation (CPU and GPU version)
- MD5/MD5anim model support
- BVH motion capture format
- deferred rendering ubershader
- virtual texturing ala ID Tech 5 (i have this partially working in a test source)
- shadow volumes/shadow mapping
- ODE physics lib integration (i would really prefer to compile it statically into the engine, to make life easier)
- LUA integration
- networking (so far I had good experience with TSNE, probably this will be what I will use)
Visit the official website.
FreeBASIC Extended Library - Tutorial: Frogger-like Game 
Written by sir_mud (April, 2012)
The example in this tutorial was written in FreeBASIC Extended Library by its author, showcasing the library's features. To compile the code you'll need to download the library in question here. ~ Ed
Introduction and Setup
Also available in Japanese, thanks Makoto WATANABE.
In this tutorial, I will show you how easy it is to make a simple game very quickly using the Extended Library. This tutorial assumes that you have a working knowledge of the FreeBASIC language. This game only requires a very small portion of what the Library provides. The code we'll be using here will make the entire process easier to create, faster to code and will eliminate a lot of hassle down the road. Rather than writing a bunch of boiler plate code for loading and manipulating images, we will be using the Extended Library, which provides us with high quality, tested functions and classes. You can download the full source code and images here [8kb]. Let's dive right in.
#include once "fbgfx.bi"
#define FBEXT_NoBuiltinInstanciations() 1
#define FBEXT_NO_EXTERNAL_LIBS () -1

#include once "ext/graphics/sprite.bi"
#include once "ext/graphics/manip.bi"
#include once "ext/graphics/bmp.bi"
#include once "ext/graphics/colors.bi"
using ext
using fb
Here we include several parts of the Graphics module, the Sprite class, the Manipulation module, the BMP file loader and the included color definitions. We also set a couple of options for ext. The first is used to speed up the compile time, since we are not using any of the provided container classes. The second is used because this is a small example and I wanted to keep the dependancies minimal. See the full documentation for a list of other available options.
screenres 640,480,32
'magic numbers
const frog_speed as integer = 32
const car_log_sp as integer = 2

'toggle between east and west directions
#define dtoggle(d) ((d) xor 2 )

enum direction explicit
	north =0
	east
	south
	west
end enum

#define FROG_DEAD 4
#define FROG_WIN 5
Now we define some of the magic numbers we're going to use to control things later on.
dim frog as gfx.sprite
dim frog_dir as integer
dim car(1 to 4) as gfx.sprite ptr
dim car_dir(1 to 4) as integer
dim logs(1 to 4) as gfx.sprite ptr
dim logs_dir(1 to 4) as integer
dim pads(1 to 5) as gfx.sprite ptr
These are the variables that hold all of the sprites for our game. Arrays are used for objects that have multiple instances. One of the things the Sprite class does is hold the position of itself, which is used for collision detection as well as drawing.
cls
'create a frog image
var iFrog = gfx.bmp.load("frog.bmp")
frog.init(6)
frog.SetImage(direction.north, iFrog)
frog.RotateFrom(direction.north, direction.east, -90)
frog.RotateFrom(direction.north, direction.south, 180)
frog.RotateFrom(direction.north, direction.west, 90)
frog.SetImage(FROG_DEAD, gfx.grayscale(iFrog))
frog.DuplicateImage(direction.north, FROG_WIN)
gfx.change_color(frog.GetImage(FROG_WIN), &HFF22B14C /'green'/, gfx.colors.gold, true)
Here we load the image we will use for our hero. Notice how we load one image, then rotate and recolor it as needed.
var iCar = gfx.bmp.load("beetle.bmp")
car(1) = new gfx.sprite(4)
car(1)->SetImage(direction.east, iCar)
car(1)->SetImage(direction.west, gfx.flipHorizontal( iCar ))
for l as integer = 2 to 4
        car(l) = new gfx.sprite(*(car(1))) 'just a 1 to 1 copy of the car
next
'What rolls down stairs
'alone or in pairs
'rolls over your neighbor's dog?
'what's great for a snack and fits on your back
'it's log, log, log!
var iLogs = gfx.bmp.load("log.bmp")
logs(1) = new gfx.sprite(4)
logs(1)->SetImage(direction.east, iLogs)
logs(1)->SetImage(direction.west, gfx.flipHorizontal( iLogs ))
for l as integer = 2 to 4
        logs(l) = new gfx.sprite(*(logs(1))) 'just a 1 to 1 copy of the log
next
var iPads = gfx.bmp.load("pad.bmp")
pads(1) = new gfx.sprite(1)
pads(1)->SetImage(0, iPads)
for l as integer = 2 to 5
        pads(l) = new gfx.sprite(*(pads(1))) 'and again a 1 to 1 copy
next
What do ya know, we'll do the same thing with the cars, logs and lily pads.
'draw background
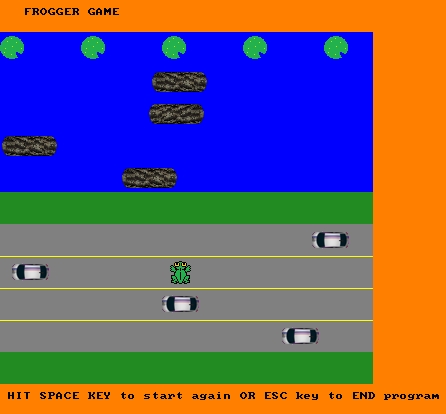
line (0,0)-(640,480),gfx.colors.orange,bf 'orange display area
line (0,32)-(372,62),gfx.colors.blue,bf 'brown-ish home
line (0,63)-(372,191),gfx.colors.blue,bf 'blue river
line (0,192)-(372,223),gfx.colors.forest_green,bf 'green safe spot
line (0,224)-(372,351),gfx.colors.grey,bf 'grey road
line (0,352)-(372,383),gfx.colors.forest_green,bf 'green start
line (0,384)-(372,415),gfx.colors.orange,bf 'orange display area
'lines on road
line (0,256)-(372,256),gfx.colors.yellow 'yellow lines
line (0,288)-(372,288),gfx.colors.yellow
line (0,320)-(372,320),gfx.colors.yellow
'display text
locate 2,1
color gfx.colors.black, gfx.colors.orange 'black text on orange bg
print " FROGGER GAME "
var backGround = imagecreate(640,480,0)
get (0,0)-(639,479),backGround
Here we setup the playing field graphic and store it for easy placement for when we need to redraw the screen later.
var reply = "" 'will hold the player's response to keep playing or quit
'set lily pad positions, only ever needs to be done once
for i as integer = 1 to 5
        pads(i)->position((i-1)*81,35)
next i
For the last part, before we start looping in the game, we're setting the position for the lily pads so they're displayed in the right place and we'll be able to tell when the hero has won. Continue on to the next part, for great justice!
Main Game Loop
In the previous part we got the intial portions setup, now we're hitting the meat and potatoes.
do
        reply = ""  'signal to keep going while reply <> "y" or "x"
        frog.position( 170, 357 )
        frog_dir = direction.north
        car(1)->position( 0, 230 )
        car_dir(1) = direction.east
        car(2)->position( 300, 262 )
        car_dir(2) = direction.east
        car(3)->position( 150, 294 )
        car_dir(3) = direction.east
        car(4)->position( 30, 326 )
        car_dir(4) = direction.east
        logs(1)->position( 0, 72 )
        logs_dir(1) = direction.east
        logs(2)->position( 300, 104 )
        logs_dir(2) = direction.east
        logs(3)->position( 150, 136 )
        logs_dir(3) = direction.east
        logs(4)->position( 30, 168 )
        logs_dir(4) = direction.east
        var chosenLog = 0
        var now = 0d
This section is where we reset all of the positions and helper variables for a new game. The Sprite class lets you set the position using the x and y location. You can also use a Vector2 if you maintain one seperately, ie, if you are doing some magic to the Sprite's location.
do
                'used for location testing later
                var temp_cx = -1f
                var temp_cy = -1f
                screenlock()
                'cls
                'draw background
                put (0,0),backGround,pset
                for i as integer = 1 to 5
                        pads(i)->DrawImage 0, , gfx.trans_
                next
                'draw logs under frog
                for i as integer = 1 to 4
                        logs(i)->DrawImage logs_dir(i), , gfx.trans_
                next i
                'draw dead frog if speed = 0 else draw live frog
                if frog_dir = FROG_DEAD then
                        'put (frog.x,frog.y),iFrog,trans  'change to a dead frog sprite later
                        frog.DrawImage frog_dir, , gfx.trans_
                else'alive
                        'put (frog.x,frog.y),iFrog, trans
                        frog.DrawImage frog_dir, , gfx.trans_
                end if
                'draw cars on top of frog
                for i as integer = 1 to 4
                        car(i)->DrawImage car_dir(i), , gfx.trans_
                next i
                locate 50,1
                if frog_dir = FROG_DEAD then
                        print "  ****  FROG DEAD  ****"
                end if
                print " HIT SPACE KEY to start again OR ESC key to END program"
                screenunlock()
First we draw all of our objects, paying attention to what should be drawn on top of what. We are using the DrawImage method of the Sprite class to draw our objects. The function takes 3 parameters but here we only need two because we're just drawing to the screen. The parameters that end in _dir are the direction each object is facing. We're using the direction as the index into our Sprite to determine which frame to draw. You could also use this as an index into a frame for an animation.
if frog_dir < FROG_DEAD then
                        'update car positions
                        for i as integer = 1 to 4
                                select case car_dir(i)
                                        case direction.east
                                                car(i)->update( car_log_sp, 0 )
                                        case direction.west
                                                car(i)->update( -(car_log_sp), 0 )
                                end select
                        next i
                        'update log positions and frog position if on a log
                        for i as integer = 1 to 4
                                select case logs_dir(i)
                                        case direction.east
                                                logs(i)->update( car_log_sp, 0 )
                                                if chosenLog = i then
                                                        frog.update( (car_log_sp), 0 )
                                                end if
                                        case direction.west
                                                logs(i)->update( -(car_log_sp), 0 )
                                                if chosenLog = i then
                                                        frog.update( -(car_log_sp), 0 )
                                                end if
                                end select
                        next i
                        'reverse car directions if out of bounds
                        for i as integer = 1 to 4
                                car(i)->position(temp_cx, -1)
                                if temp_cx < 0 or temp_cx > 332 then car_dir(i) = dtoggle(car_dir(i))
                                temp_cx = -1
                        next i
                        'reverse logs directions if out of bounds
                        for i as integer = 1 to 4
                                logs(i)->position(temp_cx, -1)
                                if temp_cx < 0 or temp_cx > 312 then logs_dir(i) = dtoggle(logs_dir(i))
                                temp_cx = -1
                        next i
                end if
                frog.position(temp_cx, temp_cy)
Our logic for object movement is very simple; all moving objects, besides the frog, just bounce back and forth on the screen. We're using the Sprite.update method to change the object's positions. It adds the amount passed to the sprites' position, that's why we pass -(speed) when we want the sprite to move to the left. We are directly setting the frog's position here to make it simpler while the frog is on a log.
'user input accepted only every 0.25 seconds - feels like the real thing
                if temp_cy < 64 then
                        for i as integer = 1 to 5 'check all 5 pads
                                if frog.isCollided( *(pads(i)) ) then
                                        print "  ****  FROG HOME  ****"
                                        frog_dir = FROG_WIN
                                end if
                        next
                end if
This section uses the Sprite class' built-in pixel perfect collision detection to see if the frog has landed on one of the lily pads.
if timer > (now + 0.25) then
                        if multikey(SC_SPACE) then reply = "y"
                        if multikey(SC_ESCAPE) then reply = "x"
                        if temp_cy > 63 and frog_dir < FROG_DEAD then'test frog hasn't reached home
                                if multikey(SC_DOWN) and temp_cy <352 then
                                        frog.update(0, frog_speed)
                                        now = timer
                                        chosenLog=0
                                        frog_dir = direction.south
                                end if
                                if multikey(sc_up)  then
                                        frog.update(0, -(frog_speed))
                                        frog_dir = direction.north
                                        now = timer
                                        chosenLog=0
                                end if
                                if multikey(SC_right) and temp_cx < 302 then
                                        frog.update(frog_speed, 0)
                                        frog_dir = direction.east
                                        now = timer
                                        chosenLog=0
                                end if
                                if multikey(sc_left) and temp_cx > 10  then
                                        frog.update(-(frog_speed), 0)
                                        frog_dir = direction.west
                                        now = timer
                                        chosenLog = 0
                                end if
                        end if
                end if
Check for the arrow keys and update the frog's position accordingly.
if temp_cy < 352 and temp_cy > 224 then
                        'test for collision with car
                        for i as integer = 1 to 4
                                if frog.isCollided( *(car(i)) ) then frog_dir = FROG_DEAD
                        next i
                end if
                if temp_cy < 192 and temp_cy > 64 then
                        'test collision with a log
                        for i as integer = 1 to 4
                                if frog.isCollided( *(logs(i)) ) then chosenLog = i
                        next i
                        if  chosenLog=0 then
                                locate 1,1
                                print "MISSED LOG"
                                frog_dir = FROG_DEAD
                                sleep
                        end if
                end if
                sleep 10, 1
                screensync
        loop while reply <> "y" and reply <> "x"
loop while reply = "y"
And then we finish up, checking to see if we got ran over by a car, landed on or missed a log. Then sleep a bit, wait for vsync and do it all over again if the player wants to.
for i as integer = 1 to 4
        delete car(i)
        delete logs(i)
        delete pads(i)
next
delete pads(5)
imagedestroy background
Finally, we clean up what we need to. Remember to always practice safe memory allocation. Notice how we don't destroy any of the images we loaded into the sprites? We don't have to! The sprite class took over responsibility for those images when we loaded them into it.
Conclusion
The Extended Library gives you, the game developer, many high quality tools to make your life easier and your development faster. This simple game just scratches the surface of what is available. I also recommend browsing the API Documentation, every function or class is documented there.
We need your help!
The FreeBASIC Extended Library is always looking for new submissions. Submissions do not necessarily need to be code, in fact our primary concern at the moment is improving the documentation. We feel the best way to improve the documentation is with more tutorials and a User's Guide that combines an overview of the api (the what) of the modules with the why, the how and the when. So if you are handy with a text editor and know your way around a certain part of the library, please help us out by writing a tutorial or an in-depth article about a submodule/class/set of functions. After review, your submission may be added to the User's Guide. Thank you for your time and I hope you enjoy using the FreeBASIC Extended Library as much as we have enjoyed working on it!
See Also:
Downloads:
QB64 Screen Modes 
Written by OlDosLover (April, 2012)
Welcome to QB64 Screen Modes tutorial. Here I will attempt to help QB64 newcomers understand the legacy QBasic graphics screen modes compared to the new QB64 graphics screen commands and how to use them. I will use some terms to describe things later in the text so allow me to define them at the start.
TERMS
- Legacy = QBasic or QB45
- QB64 = The new underscored keywords
- Graphics surface = a set sized screen of pixels at a certain amount of colors
- Pages = a number of associated graphics surfaces all the same size and color depth
- Color Depth = maximum number of colors that can be displayed on a graphics surface
- Statement = a BASIC keyword used to invoke a command with correct parameters
- Monitor = computer screen
- Mode = a particular legacy screen
- Handle = Identifying label (a name)
LEGACY SCREENS
In the old DOS QBasic a user could only create fixed legacy screens in preset size and color depth. In QBasic a user would create this single graphics window by using the statement SCREEN with a number. For example, the main graphics screen modes that QBasic features are:
- SCREEN 7
- SCREEN 9
- SCREEN 12
- SCREEN 13
The resolutions of these old screen modes are:
- SCREEN 7 => 320 x 200 x 16 colors, 4 pages
- SCREEN 9 => 640 x 350 x 16 colors, 2 pages
- SCREEN 12 => 640 x 480 x 16 colors, 1 page
- SCREEN 13 => 320 x 200 x 256 colors, 1 page
The coder initiates a screen mode by using the SCREEN statement with the desired screen number. It is immediately created and made visible. On today’s modern computer monitors that have much larger resolutions these screens will appear very small. Nevertheless, they can be switched to full screen by using the keyboard command ALT + ENTER (with QBasic, it depends on your video card, in other words, doesn’t always work ~ Ed).
QB64 SCREENS
The coder can still use the above QBasic syntax for invoking a screen mode or use the QB64's new command _NEWIMAGE.
_NEWIMAGE allows the user to create a graphics surface. This surface has a horizontal and vertical size and a color depth.
The color depth is indicated by using the legacy MODE number (0,1,2,7,8,9,10,11,12,13) or by stating the color depth as 256 (number of colors) or 32 (color bit depth).
QB64 allows you to set the horizontal pixel size, the vertical pixel size and the number of colors with the arguments in the statement declaration.
For legacy screens the programmer indicates the color depth by using the Screen number (Mode) as the color depth variable. To create the same legacy screen with the _NEWIMAGE command the user would do:
Handle& = _NEWIMAGE(320,200,7)	'Legacy QBasic Screen 7
Handle& = _NEWIMAGE(640,350,9)	'Legacy QBasic Screen 9
Handle& = _NEWIMAGE(640,480,12)	'Legacy QBasic Screen 12
Handle& = _NEWIMAGE(320,200,13)	'Legacy QBasic Screen 13
You can also make a 640 by 480 pixels screen in the above legacy modes like above with the following code:
Handle& = _NEWIMAGE(640,480,7)	'Legacy QBasic Screen 7
Handle& = _NEWIMAGE(640,480,9)	'Legacy QBasic Screen 9
Handle& = _NEWIMAGE(640,480,12)	'Legacy QBasic Screen 12
Handle& = _NEWIMAGE(640,480,13)	'Legacy QBasic Screen 13
HANDLE& is either the keyword SCREEN or a variable defined by the coder. Here are two examples:
SCREEN  _NEWIMAGE(640,480,12)		'immediately created and made visible
GraphicSurface& = _NEWIMAGE(640,480,12)	'immediately created, but is not made visible
What is the difference? When the SCREEN statement is used as in the first line of code QB64 immediately creates 640 by 480 pixels surface in legacy SCREEN 12 mode with 16 colors and makes it immediately visible to the user. When the user creates a surface with a handle name, QB64 allocates a negative number that isn’t in use to flag the identity of that surface. Secondly, QB64 immediately creates a 640 by 480 pixels surface with 16 colors. It does not make this surface visible. It exists located in memory, but is not actually shown.
Interestingly, the user can use the print statement on this surface to display the negative number assigned to that surface. Please note that -1 (negative one) is reserved to indicate that an error has occurred.
So if your graphics surface variable is -1 then it isn’t created and can’t be used. Observe this piece of code that illustrates this:
REM
GraphicSurface& = _NEWIMAGE(640,480,16)	'create the equivalent Legacy Screen 12
SCREEN  GraphicSurface&			'make this Surface visable
PRINT GraphicSurface&			'print the surfaces handle number
SLEEP
SYSTEM
So the user can replicate the old DOS graphics screens, but what about custom screen sizes? Well, with _NEWIMAGE the users can create any screen size they desire with 32 bit colors. This screen can be an 8 by 8 pixels square, up to 1000 by 1000 pixels square! Now, even though you can make a 2500 pixel screen the average computer monitor cannot show the entire surface on the screen. What you will see is part of the screen. If you use your
mouse cursor to click on the title bar of this screen and hold the button down you can slide it sideways to see its complete size. The user is better off using standard screen resolutions that most monitors support.
Ok, so _NEWIMAGE would be used to create blank graphics surfaces of varying sizes and color depths. This surface can replicate the old legacy screen modes or be of larger sizes and greater color depths. What if the programmer wanted to load an unknown sized image of unknown color depth? We would use new QB64 command _LOADIMAGE. Here's an example:
REM Example of loading an unknown size and color depth image and make it immediately visable on the screen
DEFLNG A-Z
SCREEN _LOADIMAGE("Lilies.bmp", 32)	' note the 32
SLEEP
SYSTEM
The reader should note 32. This indicates the color depth we will try to display this picture at. As we don’t know the image color depth we need to attempt to load it at the maximum allowable color depth and it should display correctly.
Download all the image files used in the previous example and which are used in the following ones here.
How can we find out the size of the picture? Observe the following code:
REM Example of loading an unknown size and color depth image and make it immediately visable on the
REM screen and determine its sizes

DEFLNG A-Z

SCREEN _LOADIMAGE("Lilies.bmp", 32)
Wide& = _WIDTH(0)	'Note the ZERO in brackets
High& = _HEIGHT(0)	'Note the ZERO in brackets
PRINT "Width="; Wide&, "Height="; High&
SLEEP
SYSTEM
The zero is used to indicate the currently visible surface. As we have made this surface to be the immediate screen, this works as long as this surface exists and is currently shown. What if we know the color depth, but not the size of the image? We can load it as shown in this example:
REM Example of loading an image of unknown size, but known color depth,
REM and make it immediately visible on the screen and determine its sizes
DEFLNG A-Z

SCREEN _LOADIMAGE("Lilies16.bmp", 256)		'a 16 colour image

Wide& = _WIDTH(0)
High& = _HEIGHT(0)
PRINT "Width="; Wide&, "Height="; High&
SLEEP
SYSTEM
The above example loads a 16 color (Legacy SCREEN 12). Note that the mode used is 256!
REM Example of loading an image of unknown size, but known colour depth
REM and make it immediately visible on the screen and determine its size
DEFLNG A-Z

SCREEN _LOADIMAGE("Lilies256.bmp", 256)		'256 colour image

Wide& = _WIDTH(0)
High& = _HEIGHT(0)
PRINT "Width="; Wide&, "Height="; High&
SLEEP
SYSTEM
The above example loads a 256 colour (Legacy SCREEN 13). Note that the mode used is 256!
REM Example of loading an unknown size but known colour depth and make it immediately visable
REM on the screen and determine its sizes
DEFLNG A-Z

SCREEN _LOADIMAGE("Lilies32.bmp", 32)		'32 bit image

Wide& = _WIDTH(0)
High& = _HEIGHT(0)
PRINT "Width="; Wide&, "Height="; High&
SLEEP
SYSTEM
The above example loads a 32 bit image. Note that we use the 32 bit MODE to load a 32 bit colour image.
To summarize: we use parameter 256 to load a known 16 color and a known 256 color images, but we use parameter 32 to load 32 bit color images.
The reader might be wondering and thinking "Is there a way to load a 32 bit image into a legacy screen?"
The answer is yes! The following example illustrates this:
REM Example of loading a 32 bit image into a QBasic screen
DEFLNG A-Z

Video1& = _NEWIMAGE(640, 480, 12) 'a screen for user to select on

SCREEN Video1&
_DELAY 1

DO
    GOSUB Message
LOOP UNTIL _KEYDOWN(27)

SLEEP
SYSTEM

Message:
PRINT "press ESCAPE key to exit"
PRINT "Press (A) for SCREEN  1"
PRINT "Press (B) for SCREEN  2"
PRINT "Press (C) for SCREEN  7"
PRINT "Press (D) for SCREEN  9"
PRINT "Press (E) for SCREEN  10"
PRINT "Press (F) for SCREEN  11"
PRINT "Press (G) for SCREEN  12"
PRINT "Press (H) for SCREEN  13"

Dummy$ = UCASE$(INPUT$(1))
LetsLook% = 1
SELECT CASE Dummy$
    CASE IS = "A"
        Video2& = _NEWIMAGE(640, 480, 1)
        Mode% = 1
    CASE IS = "B"
        Video2& = _NEWIMAGE(640, 480, 2)
        Mode% = 2
    CASE IS = "C"
        Video2& = _NEWIMAGE(640, 480, 7)
        Mode% = 7
    CASE IS = "D"
        Video2& = _NEWIMAGE(640, 480, 9)
        Mode% = 9
    CASE IS = "E"
        Video2& = _NEWIMAGE(640, 480, 10)
        Mode% = 10
    CASE IS = "F"
        Video2& = _NEWIMAGE(640, 480, 11)
        Mode% = 11
    CASE IS = "G"
        Video2& = _NEWIMAGE(640, 480, 12)
        Mode% = 12
    CASE IS = "H"
        Video2& = _NEWIMAGE(640, 480, 13)
        Mode% = 13
    CASE ELSE
        LetsLook% = 0
END SELECT

IF LetsLook% = 1 THEN
    Picture& = _LOADIMAGE("Earth1.jpg")
    _PUTIMAGE , Picture&, Video2&
    SCREEN Video2&
    PRINT "Press any key to try new MODE"
    PRINT "this is SCREEN "; Mode%
    Junk$ = INPUT$(1)
END IF
SCREEN Video1&
CLS
RETURN
The above example correctly loads the picture, but only displays the amount of colors that are available in that legacy screen mode. So what would happen if the user wanted to load
the following:
- 16 bit picture in a 16 bit screen, 256 colors screen or 32 bit screen?
- 256 colors picture in a 16 bit screen, 256 colors screen or 32 bit screen?
- 32 bit picture in a 16 bit screen, 256 colors screen or 32 bit screen?
REM Example of select loading a ?? bit picture onto an ?? bit  screen and made visible
DEFLNG A-Z

What = -1
_DELAY 1

DO
    GOSUB Message
LOOP UNTIL _KEYDOWN(27)

SLEEP
SYSTEM


Message:
SCREEN 0
IF What = -1 THEN
    PRINT
    PRINT "press (1) to Select Lillies picture or (2) to select Colours picture"
    What$ = UCASE$(INPUT$(1))
    What = VAL(What$)
    PRINT
END IF
PRINT
PRINT "press ESCAPE key to exit"
PRINT
PRINT "Press (A) for 16 bit picture in 16 bit Screen"
PRINT "Press (B) for 16 bit picture in 256 bit Screen"
PRINT "Press (C) for 16 bit picture in 32 bit Screen"

PRINT "Press (D) for 256 colors picture in 16 bit Screen"
PRINT "Press (E) for 256 colors picture in 256 bit Screen"
PRINT "Press (F) for 256 colors picture in 32 bit Screen"

PRINT "Press (G) for 32 bit picture in 16 bit Screen"
PRINT "Press (H) for 32 bit picture in 256 bit Screen"
PRINT "Press (I) for 32 bit picture in 32 bit Screen"


Dummy$ = UCASE$(INPUT$(1))
LetsLook% = 1
SELECT CASE Dummy$
    CASE IS = "A"
        Video2& = _NEWIMAGE(640, 480, 12)
        SCREEN Video2&
        Mode% = 16
        IF What$ = "1" THEN Picture& = _LOADIMAGE("Lilies16.bmp")
        IF What$ = "2" THEN Picture& = _LOADIMAGE("16BitColors.bmp")
        _PUTIMAGE , Picture&, Video2&
    CASE IS = "B"
        Video2& = _NEWIMAGE(640, 480, 256)
        SCREEN Video2&
        Mode% = 256
        IF What$ = "1" THEN Picture& = _LOADIMAGE("Lilies16.bmp")
        IF What$ = "2" THEN Picture& = _LOADIMAGE("16BitColors.bmp")
        _PUTIMAGE , Picture&, Video2&
    CASE IS = "C"
        Video2& = _NEWIMAGE(640, 480, 32)
        SCREEN Video2&
        Mode% = 32
        IF What$ = "1" THEN Picture& = _LOADIMAGE("Lilies16.bmp")
        IF What$ = "2" THEN Picture& = _LOADIMAGE("16BitColors.bmp")
        _PUTIMAGE , Picture&, Video2&
    CASE IS = "D"
        Video2& = _NEWIMAGE(640, 480, 12)
        SCREEN Video2&
        Mode% = 16
        IF What$ = "1" THEN Picture& = _LOADIMAGE("Lilies256.bmp")
        IF What$ = "2" THEN Picture& = _LOADIMAGE("256BitColors.bmp")
        _PUTIMAGE , Picture&, Video2&
    CASE IS = "E"
        Video2& = _NEWIMAGE(640, 480, 256)
        SCREEN Video2&
        Mode% = 256
        IF What$ = "1" THEN Picture& = _LOADIMAGE("Lilies256.bmp")
        IF What$ = "2" THEN Picture& = _LOADIMAGE("256BitColors.bmp")
        _PUTIMAGE , Picture&, Video2&
    CASE IS = "F"
        Video2& = _NEWIMAGE(640, 480, 32)
        SCREEN Video2&
        Mode% = 32
        IF What$ = "1" THEN Picture& = _LOADIMAGE("Lilies256.bmp")
        IF What$ = "2" THEN Picture& = _LOADIMAGE("256BitColors.bmp")
        _PUTIMAGE , Picture&, Video2&
    CASE IS = "G"
        Video2& = _NEWIMAGE(640, 480, 12)
        SCREEN Video2&
        Mode% = 16
        IF What$ = "1" THEN Picture& = _LOADIMAGE("Lilies32.bmp")
        IF What$ = "2" THEN Picture& = _LOADIMAGE("32BitColors.bmp")
        _PUTIMAGE , Picture&, Video2&
    CASE IS = "H"
        Video2& = _NEWIMAGE(640, 480, 256)
        SCREEN Video2&
        Mode% = 256
        IF What$ = "1" THEN Picture& = _LOADIMAGE("Lilies32.bmp")
        IF What$ = "2" THEN Picture& = _LOADIMAGE("32BitColors.bmp")
        _PUTIMAGE , Picture&, Video2&
    CASE IS = "I"
        Video2& = _NEWIMAGE(640, 480, 32)
        SCREEN Video2&
        Mode% = 32
        IF What$ = "1" THEN Picture& = _LOADIMAGE("Lilies32.bmp")
        IF What$ = "2" THEN Picture& = _LOADIMAGE("32BitColors.bmp")
        _PUTIMAGE , Picture&, Video2&
    CASE ELSE
        LetsLook% = 0
END SELECT

IF LetsLook% = 1 THEN
    PRINT "Press any key to try new MODE"
    PRINT "this is SCREEN "; Mode%
    Junk$ = INPUT$(1)
    SCREEN 0
    _FREEIMAGE Video2&
    _FREEIMAGE Picture&
END IF

CLS
RETURN

The above program will illustrate all of these differences clearer than any of the examples so far. You have the choice of loading 2 varying different colored pictures to see the changes clearer!