QB Express
Issue #24 ~ September 11, 2007
"A magazine by the QB community, for the QB community!"
In This Issue
Editors
- Pete Berg
- Imortis Inglorian
- MystikShadows
Contributors
- Lachie Dazdarian
- Redcrab
- RubyNL
- notthecheatr
- diffeecult
- Mentat
- Sir_Mud
- Dean Menezes
- Hartnell
- stylin
- Pritchard
- SmithcoSoft
- Brandon Cornell
- Elitecpr
- Regular Columns
- Articles & Editorials
- Tutorials
From The Editor's Desk
Written by Pete
Two dozen issues.
Wow.
Here we are, three years and a month after QB Express first launched, and still running strong. Who would have thought?
With 24 issues, QB Express has proven to have the most longevity of any online BASIC magazine, ever. We've outlasted The BASIX Fanzine and QB Cult Magazine, the previous champs with 17 issues each, and have doubled the 12-issue run of the legendary QBasic: The Magazine.
And it's all thanks to you, the readers and the contributors. Without your submissions, QB Express would be nothing. We appreciate each and every article we get. And as long as you keep sending them in, we'll keep making issues.
I'm not kidding. By the time you read this, I will be in my car with all of my earthly belongings, heading toward the setting sun in Los Angeles, California -- where I'll be living for the forseeable future. I'll be seeking fame and fortune in the television industry. But no matter what, I will not forget about QB Express. Whatever I need to do to keep this magazine running and successful, I will do it. That's a promise...just so long as you hold up your end of the bargain!
Submit To QB Express
You all know the drill. This magazine can't exist without people SUBMITTING articles, editorials, tutorials, reviews, news and feedback. This is not just a solo effort by me... it's a group effort by people throughout the QB community. If you have anything to submit, or have time to write something, DO IT!
If you want to write about something, but can't think of a topic, or need inspiration, check out the "Official QB Express Article Requests" thread! There have been quite a few articles requested -- and even if none of them strikes your fancy, we can help you come up with something that you would like to write about. If you're interested in getting your own monthly column or just want to write an article or two, by all means, do it! Anything that is submitted will be included!
I also want feedback and letters to the editor regarding this magazine. I want suggestions and critiques. What do you like? What don't you like? What could be done better? Let me know!
All submissions and feedback can be sent to qbexpress@gmail.com. You can also PM me on the Pete's QB Site or QBasic News message forums. If QB Express is going to continue to be so good, YOU need to contribute!
-Pete
Letters
Letter From Lachie Dazdarian
I want to congratulate you on another great issue, Pete. It was so good to see it
finally compiled, and featuring so much content.
The section I'm most interested in, News Briefs, the highlight of the magazine,
was so well compiled it was a joy to read. Such a detailed scoop of the community
events for the past month/two months is an invaluable source of information for
anyone interested in the community as the community, other than in his/her own
project (whatever it might be). The ability to download the magazine and have this
part of history saved on my hard disk is only another plus. Anyway, I'm glad I was
able to help with some parts of it.
It's nice to see Qlympics moving forward, although after a year of delay. :P
I only hope the next edition of the awards will be managed much better. I must admit
that I was somewhat disappointed with certain finalists for some categories, but that's
what you get with any community voting. Not that I think people are dumb, but the
majority just doesn't take the time to seriously reconsider and analyze their choice.
They just click. I mean, do I have to mention People Choice Awards? Funny, I remembered
to vote in the Qlypmics poll only yesterday. I hope most will remember to do the same.
I didn't vote in several sections. Mostly those I'm not interested in, and those I'm
highly disappointed with (namely, Best FB Ports of a Past QB Game). Anyway, seeing some
of the results I'm starting to lose interest in such type of awards (where the entire
community decides) so I probably won't be much of a help with the next Qlympics. Sorry.
It's just how the human mind works. When you put effort into something and it turns out
quite different from what you expected, not a big chance you'll do it all over again.
Am I right? I guess I was never a fan of democracy. :P
It was interesting to read your response on Z!re's article and the community reactions
on it. I don't remember anymore if I was against publishing the article back then, but
I honestly don't blame you for publishing it. I was mostly annoyed with Z!ire writing
it, and mainly criticized the article, not the very fact of QBE publishing it.
Pritchard's article about disliking QBE was also an interesting read, and although he
is not completely wrong, I pretty much don't agree with most of his points. I definitely
didn't create the FreeBASIC Games Directory because QBE disappeared. I did it because
FreeBASIC.info administrator couldn't handle hosting FB games anymore, weather along
archiving them properly. QBE is the result of the community, and not the opposite. If
the community stops being interested in QBE, less and less articles will get submitted,
you Pete will lose interest in editing the remaining bits of content, and that will be
the end of it. If the community turns toward some FB portal, submit news zealously,
comment other people news, fine by me. And even if such portal would exist, QBE would
make sense as its philosophy and format is rather different from any forum/news portal.
As you replied to Pritchard in the FreeBASIC.net forum, "The point of the magazine is
to take the most interesting content posted by the community and reformat it into a
concise, informative and easily-readable summary of everything that's going on."
Anyway, I'm having doubts in a success of a FB portal, especially one that is
user-driven. It simply seems that our community isn't breathing that way right now.
I can testify that with my FreeBASIC Game Directory. Maybe it�s because our community
is way more than a gaming community, which the old QB community mostly was, so it is
difficult to reconcile all the different parts of it with a web-portal sort of site.
QBE, on the other hand, with its editors and format can handle that aspect of the
community much better.
I can understand his slight annoyance with QB content, as I tend to be disappointed
seeing some tutorials written for QB instead for FB. I keep getting amazed still seeing
people around in some parts of the community asking question about using EMS in QB and
similar. I just don't get what these people are trying to accomplish, and why they are
so stubborn when a perfect substitute (the best they could wish for) exists.
The articles section in this issue was fine, but I felt it was somewhat lacking. I
kinda missed the usual gems from SJ_Zero and Deleter. Love their stuff. Hope to see more
of game design rambles in the next issue. I can never get enough of those.
The tutorials section was also good, but not great. I guess I just didn't find enough
content that would intrigue me. Mathias' "Programming Simple Cellular Automata with
Freebasic" tutorial was very interesting, and I'm glad someone decided to write a
tutorial on this topic. On the other hand, I'm still trying to crack stylin's tutorials,
as the topics he chose and the style are really getting through me. :P
Very nice comics in this issue, but I especially loved James Kinney's one.
Very witty, and one of the best I've seen in all the issues so far, together
with Matt2Jones's masterpieces.
I don't know else to say, only wish you many submissions for the next issue.
I'm not sure if I'll be able to compile something. The next edition of my angle
tutorial shouldn't be difficult to do, but since I started working I'm finding it
very difficult to allocate my free time properly. I'm learning new understanding
for people who can't find time for the community.
In case you missed, I released a final version of Mighty Line, so if you don't
mind, compile something in the news briefs about it. Thanks!
As for LONG, it�s in the mud, and I�m not sure if this will change soon. I
started brainstorming with Zamaster regarding a new joint project (don�t tell
anyone :P) so we�ll see.
Cheers!
Lachie Dazdarian - The Maker Of Stuff
Hey Lachie, lots of great feedback.
I agree that the results of the Qlympics nominations round were a bit disappointing, and for the Qlympics 2008, I'm considering selecting a panel of judges who will put a lot of thought into who they vote for. That doesn't mean I'm going to completely remove the Qmunity voting aspect, but I think that I will create two divisions -- "The People's Choice" and the "Judges' Choice" -- and see how everything down. It's many months away still, so I'll have a lot of time to come up with the fairest possible system.
As for Pritchard's whole debate about whether or not QB Express is hurting and stifling creativity in the community, I obviously don't agree with him; I think QB Express does just the opposite, and there are plenty of examples to prove it. If anything, QB Express is a motivator -- people know that their work will be featured in the magazine, so they will go above and beyond to do a better job on everything. I rest my case.
-Pete
Letter From Stéphane Richard (MystikShadows)
I know, I'm one of the editors, but hey, I still wanna have something to say
so I addressed it to Pete so i don't look like i'm talking to myself (you
know what they say about that hehe).
You said so in your introduction, that QBE was really back with Issue #23
and you weren't kidding. just look at all the awesome contents we've been
presented with in that issue. Beautiful work to all involved. NOW I can
say, just like you did, that QBE is back. I enjoyed everything i read in
there and the comics were great. ( in an effort to save computers all over
the world I looked long and hard to find that liballeg.dll.a is in
C:\FreeBASIC\lib\win32 ;-) ). there, now you all know. hehe.
Ok a small paragraph about Pritchard's article (I'll try to keep it small
atleast). I don't know how long Pritchard's been part of this whole FB
movement exactly but he needs to remember that Fb wouldn't be without the
people from QB. And I bet FB wouldn't have the success it has today without
the great startoff it got from the QB community too. And like you said,
there's plenty of FB contents in QBE so QBE isn't blocking FB out, no reason
for the opposite to occur. I still ponder his posts on FB.NET which I can't
link to since it was in the offtopic but I'm sure he knows them..Blaming QBE
for him giving up on those projects has no point or purpose. From what I've
seen with all the efforts made in different attempts at starting something
for FB (including other websites, other forums, other projects and the
"less than great feedback, or lack there of from other members" I'd say QBE
was brought back to life because the other efforts were welcomed so badly.
So QBE responsible for both his projects going to crap? I don't think so, I
don't buy it, he'll have to come up with a better excuse than that to
convince me.
As far as the rest of the magazine goes, what can I say, it's QBE like we
know and like we loved, every single part of it brought a smile to my face
and it showed that a great deal of work went into this issue. The comics
well hey, they were all great. Just can't get enough of those comics.
Short yet very entertaining. Can't wait to see more of them.
The Gallery was quite filled, that's great to see. I think Rokkuman's game
is looking very promising, Option V (even if not updated screenshots)
looked pretty darn awesome to me. Ande well just seeing anything in the
gallery is a good promise of things to come. So I always hope atleast a
couple of screenies of new things make it to the Gallery every issue :-).
also, It was great to see Color Triple YAHTZEE! mentionned too. My first
take at a real game. Sure the game itself isn't original, but it was fun to
make. :-)...I really enjoyed. I see Na_th_an's back among us a little
more. So na_th_an, when can we expect to see the next part of your awesome
series? ;-).
I can tell Lachie right now that his problem isn't from within himself.
It's not about how good you are. I think he's mixing cause and consequence
to his recipe. So to him I can say this. If I compare my Color Triple
Yahtzee to his vector X game demo, sure my game is complete, but it's text,
has no sound, and well he already knows what it is. I can't compare my game
to any of his, cause his games (as flawed as he says they are) are way out
of my league right now. And that's the main reason ColorTriple YAHTZEE is a
text based game. I could have given it a gui, but I not with FB, not as it
is right now. But you know what? Color Triple YAHTZEE is my first game, and
it gave me the bite I needed to get into it. So even though it might look,
let's not be shy with words, looks crappy to most people as Text Game can
only go so far these days, I'm proud of it. :-). So Lachie, hang in there,
stick with what you know, don't take on the world it doesn't work, but you
can start by taking your own backyard and you can make your backyard look
better than it was and you can make it look better than your neighbors ;-).
And while you perfect what you know, you can play with what you don't know
(whatever that is) and learn it as you go. Programming, game or otherwise
is a question of logic, design and patience. :-) He of all people should
know that already so sorry for sounding like your concience's broken record
lol. There's such a thing as being a harder judge on yourself than you are
when judging other people, that's a big part of it. And well,
games.freebasic.net rocks. :-) And what's to say about his "Angles in 2D
environments and artificial smarts based on them" great material right
there, I learned alot from it. :-).
I never realized that MOD and remainder were such an issue until I read
Moneo's article on the subject. And he might not know it (or maybe he does
;-) ) but I have the highest respect for his experience and knowledge. I
have to admit that in more than one time, now that I read his article, I
probably should have used the remainder technique instead but was too
stubborn to reinvent the wheel so I used mod with a set of operations on
them instead. Oh well, I should tattoo this article on my forehead in
reflected mirror image so I can read that again and again every morning lol.
I liked Mentat's tutorial on AI with value points. Short might have done good with a bit more explanation but I got what he was saying and the subject was awesome...I think he should write more. Interesting subject presented in an interesting way even if short ;-). Dean Menezes wrote the answer to one of my greater questions in his How to write a chess program article. I had some idea on how I would do it if i was to write a chess program. However, I gotta say my way would have been very different and probably longer than his. I really like the way he coded it and well, seems to work pretty good to (though I'm not a chess master and can't test it thoroughly).
Programming Simple Cellular Automata by Mathias was good too. anything that leads to simulations or AI is greate in my book :-). And this is one of the better ones i've read on cellular automatas. he has a great way of explaining things in there. :-) great work to say the least. Likewise for stylin's Singletons tutorial. Clearly written by someone that knows what singletons are all about. Coincidentally I have the same thing to say about his "Using procedure pointers to vary behavior" article. I want more from stylin hehe. I like his gift in explaining. :-).
And yes, as if 6 parts weren't enough I had to be bold and create a 7th part to my Commercial and Professional software development series (hangs low and out of sight for a while hehe). But yeah, this aspect of a project is often neglected by personal projects and I've seen it neglected at a professional level as well. So I figured something to emphasize the importance of that phase might be a good thing. :-).
Great work to all, I can't wait to read more in the next issue. :-)
MystikShadows (NOT WRITING TO HIMSELF HERE, BUT TO PETE ;-) )
I always love your enthusiasm, MystikShadows! Regardless of how much people trash QB Express, I can always expect a positive response from you. I agree on your thoughts on Pritchard's article...we're all trying to make the QB & FB community a better place, so why can't we all just get along?
Great work on Triple Color Yahtzee. Even though a lot of people in the community consider you a veteran programmer, it's surprising to hear that this was your first game ever. Well, you really pulled it off -- it's a fun and complete game, and it really captures the game nicely.
Thanks again, and I'll expect another letter from you next month. :)
-Pete
Letter from E.K. Virtanen
Hi QBE :)
I hate to repeat myself here, but again it was a great issue. Also it
was good to see that Qlympics are back in business. Im waiting here to
see results. Not because of for some reason Bungy got nominated (i was
like "wtf???", bungy is nominated but atleast three great text-games was
not...maybe i do remember theyr years wrong or something.) when i did
see it there. But because i have there special favorites, wich ones i
really do hope to win.
One thing i did wonder was that FBSound by D.J.Peters was not
nominated at libraries. I have worked it with now for few weeks and i
can say it is a great sound library. I recommend it for every one to try
if any audio is needed. Hopefully D.J.Peters keeps up a good work with
it.
Closure of FreeBASIC "Off Topic" subforums was a good call. It
seemed like there were few persons who's only "Function" was
flaming and whining about everything. FreeBASIC forums dont need that
kind of posting.
Also your new policy is good one. If letter/article is made only for
a flame, it should _never_ get published. Hopefully things calms down
now. Too much bad and evil words has be seen. Cha0s and whole FB dev.
team; You are doin a great work, ignore all flamers and keep on
doing :)
E.K.Virtanen
www.ascii-world.com
Thanks for reminding us about FBSound. I agree that it should have been nominated! (But then again, the nominations were entirely up to the community, so I guess we collectively overlooked it.) Anyway, it will be eligible for next year's Qlympics, so never fear!
As for the closure of the Off-Topic forum at Freebasic.net, I actually don't think it was a good idea. The Off-Topic forum was a very active and interesting part of our community, and while there were some debates that occasionally denegrated to "flaming," I think it's important that those debates take place. I can't stand discussion getting silenced because some administrator doesn't like it. As I've said many times before in QB Express, I'm a near absolutist on free speech, and I wish the Off-Topic forum would return. It was also a very tough call for me to modify the QB Express policy on publishing *everything* due to Z!re's article, but once I realized that the subject matter was entirely unrelated to QB or FB, it made the decision easier.
-Pete
Have a letter for the editor? Send all your rants, raves, ideas, comments and questions to pberg1@gmail.com.
Express Poll
Every issue, QB Express holds a poll to see what QBers are thinking. The poll is located on the front page of Pete's QBasic Site, so that's where you go to vote. Make sure your voice is heard!
Greatest QB Game Programmer of all time? (Division 5)
| Programmer | Votes | Percent | Graph |
| Angelo Mottola | 12 | 41% |  |
| Delta Code | 3 | 10% | |
| Jace Masula | 2 | 7% | |
| Kevin Reems | 1 | 3% | |
| Michael Hoopman | 4 | 14% | |
| Milo Sedlacek | 3 | 10% | |
| Nick London / NutzBoy | 1 | 3% | |
| SonicBlue Productions | 0 | 0% | |
| StarsDev | 0 | 0% | |
| Tsugumo | 3 | 10% | |
| 29 Total Votes |
Angelo Mottola ran away with this poll, with 41% of the vote. It's no surprise -- his Wetspot and Wetspot II are two of the most beloved QB games of all time, and Wetspot II is probably the most played QB game ever. The runner-up was a close call, but it ended up going to Michael Hoopman, the programmer behind the QB RPG Dark Ages: The Continents. Dark Ages is one of my favorite QB games ever because of the huge world Hoopman created, and its depth -- despite having simplistic gameplay, graphics and music. Two worthy winners, indeed!
And with that, we finally wrap up the semi-finals our five-division poll to determine the GREATEST QB GAME DEVELOPER OF ALL TIME. Now, we are down to our top ten:
- Typosoft
- RelSoft & Adigun A. Polack
- DarkDread / Darkness Ethereal
- J.B.
- Lachie Dazdarian
- Piptol
- BINARYMagic
- Jaws v Soft
- Angelo Mottola
- Michael Hoopman
Please visit the front page of Pete's QBasic Site to vote in the final rounds of this competition!
Note: For some reason, this month's poll had the lowest turnout of any of our polls, ever. I have no idea why... just make sure to vote in next month's series of polls, because they will finally decide the winner of this tournament.
News Briefs
News from all around the QB community, about the latest games, site updates, program releases and more!
Site News
- Dav restores his QBasic site
-
Dav, a QBasic programming legend, restored his old QBasic site which is now hosted at www.qbasicnews.com. The site is his personal collection of QBasic stuff (programs, tools, �), but he also promised to restore soon his much more popular site (in the �good old days�) - The QB code post.

Visit the site here: http://www.qbasicnews.com/dav/
News Brief by Lachie Dazdarian
- RubyNL Launches new website
-
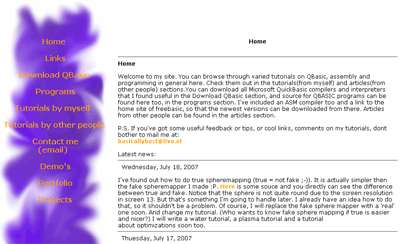
RubyNL has launched a new QBasic site featuring his original programs and tutorials.
RubyNL has programmed mostly graphics effects such as Sphere Mapping, Explosions, Rotozoomers, Scrolling maps, Water effects, Bumpmappers, Julia Fractals, etc., and has also written tutorials on the subject of QB graphics coding. (Many of his tutorials have been featured in QB Express, including a fantastic one this month.) Anyway, this is a very useful website, and very few people have even heard of it yet, so I thought I'd write a little news brief about it.
Visit RubyNL's Homepage!
News Brief by Pete
- FB-World moves to a new host
-

FB-World, a QBasic/FreeBASIC news portal, moved to a new host, and you can now find the site at this link: fbworld.adaworld.com. Also, a new forum has been installed.
News Brief by Lachie Dazdarian
- QuickBasic GUI Scene is alive...barely
-
It's been a few months since JacobPalm.dk went down and was replaced by an "Under Construction" message. Since then, the QB GUI Community has not been nearly as strong, and many have assumed that the death of Jacob Palm's site had ushered in the death of the QB GUI scene. In fact, the only GUI to release in 2007 is Brandon Cornell's Fun500 GUI.
But the scene is still not quite dead and gone. There are still about 5 dedicated members left and they hang out at The QuickBasic GUI Blog. If you're interested in checking out some of the GUIs this community has put out, or becoming a member, that's the place to go!
News Brief by Pete & Brandon Cornell
- Nine new games in the FreeBasic Games Directory
-
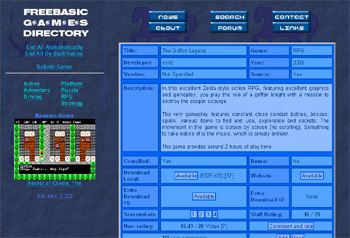
Lachie Dazdarian's FreeBasic Games Directory has continued its regular updates in the past month, with the addition of nine new games since the last issue. Lachie collects just about every FB game created for the FBGD, so this is an excellent barometer to judge how many new FB games have been released. Games that were added include: Mighty Line, Catloaf: 2600, 1945 ver0.55 and the Moon Project Beta and more.
We encourage you to log in and rate/comment a few of the games in the collection. While each game is given a master rating by the staff of the FBGD, user comments and ratings are just as important for helping the users judge which are the best (and worst) games.
News Brief by Pete
- QBasic.com Forum Changes
-
Mark Wilhelm, owner of the highly-trafficed but mostly inactive QBasic.com has updated the site's forums:
"If you take a good look at the new, upgraded QBasic.com forums (now running on vBulletin), you will see that the "Programming Help & Discussion" forum redirects to the N54 QBasic forum. There's still a subforum for people to post in for help if they don't want to leave QBasic.com."
That's it!
News Brief by Pete and Mark Wilhelm
Project News
- RetroSound with FMod
-
redcrab has released an interesting library for using QBasic-style SOUND
in FreeBasic, using either fmod or fbsound. One bug has been found; I'm not sure whether it has been fixed yet or not. In any case, I foresee much fun with this one.
You can get it here.
News Brief by notthecheatr
- HEX FACTOR demo released
-
Vdecampo has released a demo of his upcoming space shooter entitled HEX FACTOR. The game opens with an excellent AVI video, and features very cool graphics and sound. Vdecampo has several more features to complete before the final version, but the game looks very promising so far.
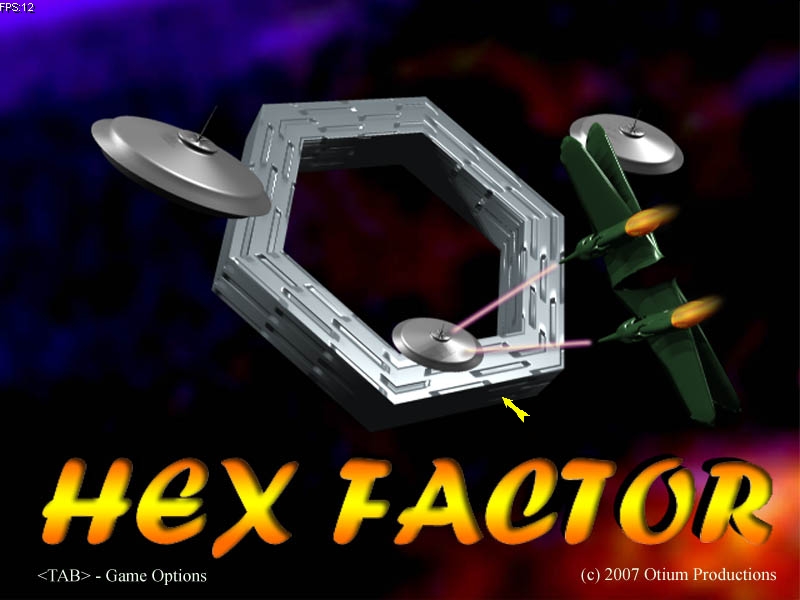
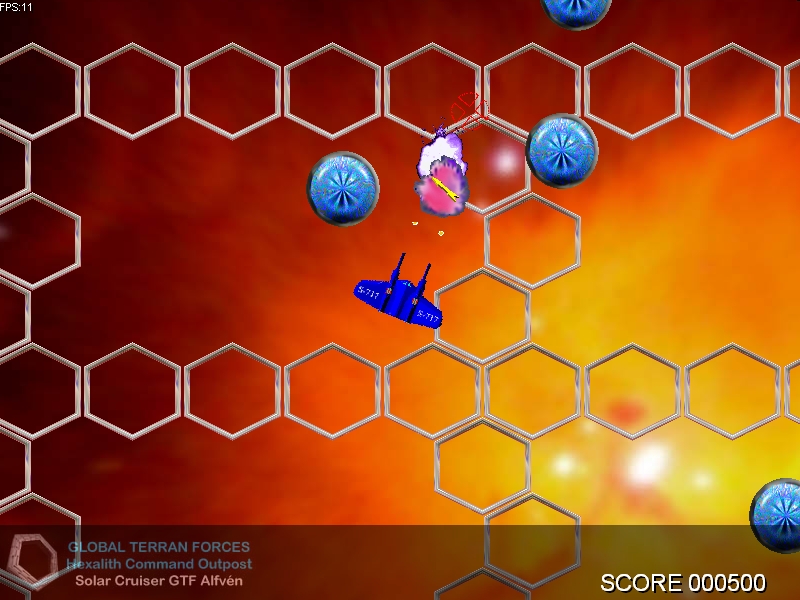
Check the original forum thread here.
News Brief by Lachie Dazdarian
- FreeBasic 0.18.1 Beta Released
-
A slightly-updated version of FreeBasic has been released. According to the release notes, "This is primarily a maintenance release to update a few of the binaries and correct the installation problems that some users had with the 0.17 Beta release."
The most significant changes were:
- Strings and User Defined Types (structures) are passed default BYREF in the -lang fb compiler dialect, and all other data types are passed default BYVAL. This is different from both fbc-0.17 and fbc-0.16 versions of the compiler.
- Due to a name mangling bug in v0.17b, most FreeBASIC libraries must be recompiled to work correctly.
To get the new version, visit FreeBasic.net.
News Brief by Pete
- Another (final?) demo of 1945
-
dreamerman has posted news and a download link for a new version (0.55) of his old-school shooter 1945.
dreamerman on the game update:
Important changes:
- better power-up's system,
- volume changing works now,
- changed main_loop style,
More info in "to do.txt" file.
Currently game is 'one infinite level game' and has most of final version features. Now I want concentrate on other projects, so for some time this will not be continued. Next step for this game would be changing it to 'level based' game, that's plan for distant future.
Check the original forum thread here.
News Brief by Lachie Dazdarian
- FInstall
-
KristopherWindsor, a forum regular, released an update to his useful program FInstall, a program for quickly running forum examples. It seems to be a very useful program; it takes source code from the clipboard, saves it in a .BAS file, then compiles and runs it.
Version 2.0 is out. It lets you install .BI files (without attempting to compile them), recompile the latest program, or open it in an editor.
The forum post is here; the download is here.
News Brief by notthecheatr
- VISG GUI builder
-
mrhx, a relative unknown in the FreeBasic community, released a visual GUI creator for FreeBasic last month. A few similar things have been done, notably vwx-c by dumbledore (which uses wx-c to create GUI elements), but this seems to be the first one that works using the Windows API only. It also generates code for many programming languages other than FreeBasic.
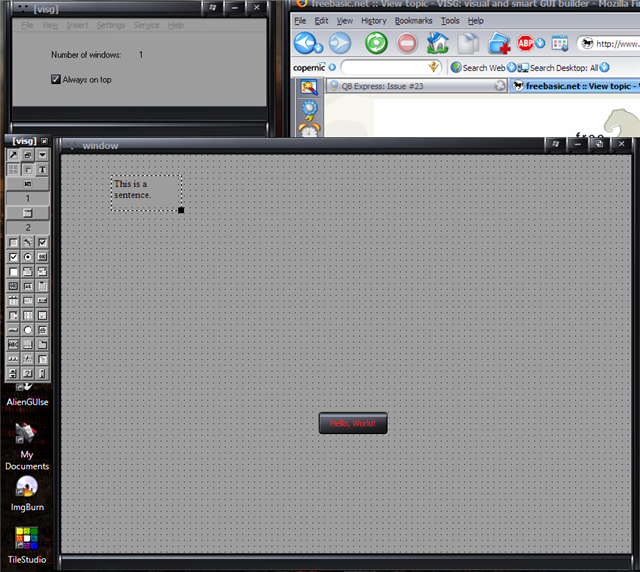
For more information see this forum thread.
News Brief by notthecheatr
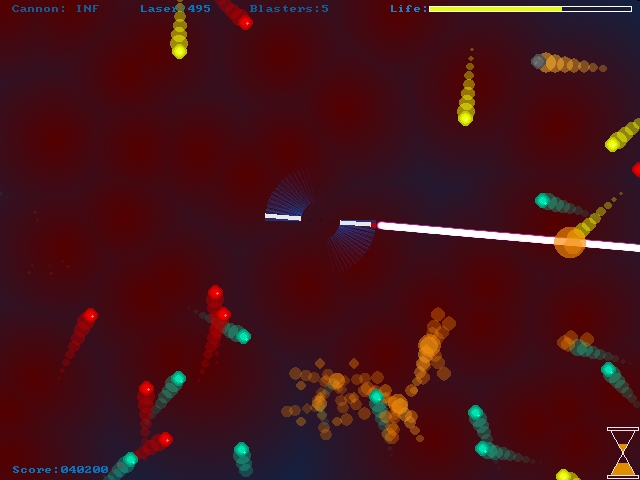
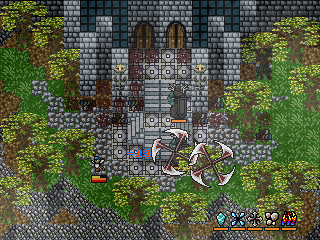
- DaBooda OldSchool Gaming Library
-
After last month's cool demo, DaBooda has released his oldschool gaming library as well as fairly extensive documentation.

This library was created to provide a structure for programmers to create retro 2d games. Much like the older console systems(ie. Super Nintendo and Sega Genesis). It is really fast, but with speed comes a very low level of interactivity with the library.
For those who missed it, the demo is very nice and runs a sweet 60fps on most machines, even with 1024 sprites moving across the screen and parallax scrolling of the backgrounds. Yes, those red and green arrows are sprites!
DaBooda's original forum post is here; the library, manual, tutorials, and two tech demos may be found here.
News Brief by notthecheatr
- MoonProject
-
AlexZ has released his first short game, it's a simple but fun tile-based strategy game set in space titled "Moon Project."
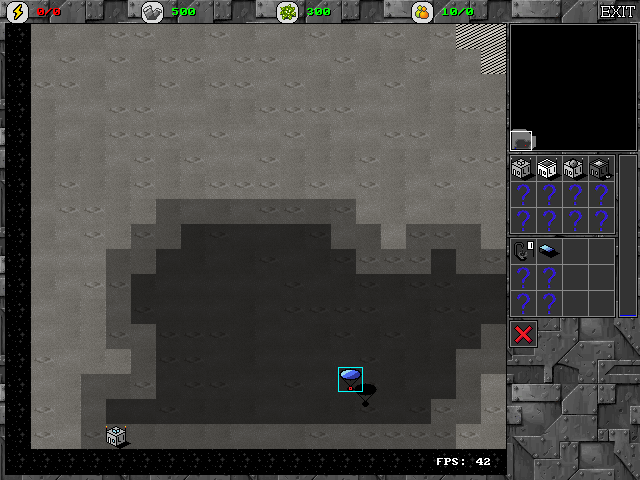 For more information, look at his forum post; a
download link is posted.
For more information, look at his forum post; a
download link is posted.
News Brief by notthecheatr
- Mighty Line
-
Lachie Dazdarian has released the final version of Mighty Line, the runner-up of ciw1973's last competition. This version includes few important gameplay changes, bugfixes and two new music tracks.
 For more information check this forum post or visit the game's homepage here.
News Brief by Lachie Dazdarian
- Sky Test Demo by syn9
-
syn9 posted a download link for a very cool 3D demo in the FreeBASIC.net forum which was announced to be used as sky backdrop for his Zero GTR project.
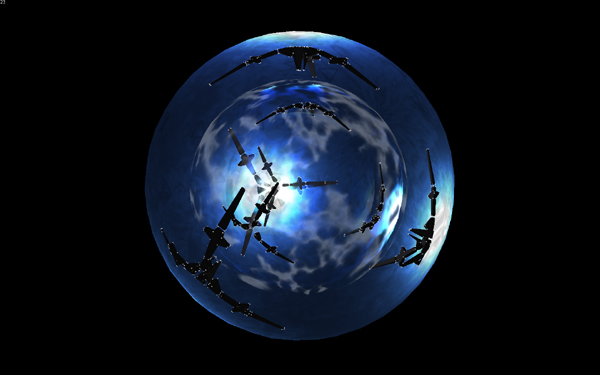
Check the original forum thread here.
News Brief by Lachie Dazdarian
- Redcrab updates Moon Lander
-
Redcrab released two consecutive updates (ver 1.4 and 1.4.1) on his longtime developing project Moon Lander. The updates include retro sound fx, cavern capability, zero g / space travel, sub-levels, text story cut scene, 8 story-drive levels (more to come), and more. Additional updates have been announced.
Visit the official game thread here.
News Brief by Lachie Dazdarian
- The roach simulator
-
paulevern posted news on his very interesting and still developing roach simulator project entitled MaHiRoSi.

Visit the project homepage here.
News Brief by Lachie Dazdarian
- netmsg (a networked chat program)
-
Segin posted news and the source code of his small FreeBASIC client-server instant messenger for use on any TCP/IP network. The current version is 1.01 (for Windows, Linux and FreeBSD), and new versions have been announced.
Check the original forum thread here.
News Brief by Lachie Dazdarian
- A 3D Pacman game announced by Dr_D
-
Dr_D posted news and a download link for a demo of a cool upcoming "software 3D" Pacman game in FreeBASIC.
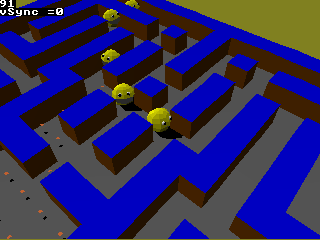
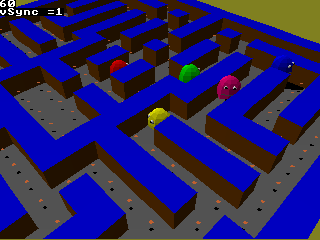
Check the related forum thread here.
News Brief by Lachie Dazdarian
Competition News
- Another ciw1973 compo?
-
ciw1973 has anounced plans for another competition coming soon, though the exact
details of the competition have not yet been hammered out. As before there will be monetary prizes for the top 3 entries; ciw1973 also indicated that it will not
be a particularly difficult challenge, that beginners and pros will compete equally.
Given the success of his last competition, it will be interesting to see what this one will produce.
News Brief by notthecheatr
- A RPG competition by Eponasoft
-
Eponasoft has started a new competition in the FreeBASIC.net forum entitled The "Standard Resources" RPG Competition. The competition started on August 22nd, and was scheduled to end on November 1st. The main rules are that only FreeBASIC traditional-style role-playing games are accepted, the story has to feature �members of the community�, and contestants are referred to "standard competition package", which contains graphics, music, and sound effects, but are not obligated to use it.
You can check the competition thread on this link.
Eponasoft was strangely silent regarding the competition since the last post from August 25th, so we can only speculate at this moment on the success of the compo, although few people expressed their interested in the very beginning.
News Brief by Lachie Dazdarian
Have news you would like us to report? Email qbexpress@gmail.com!
Gallery
Written by Pete
Every issue QB Express features a preview and exciting new screenshots from upcoming QB or FB games. If you would like your game featured, send in some screenshots!
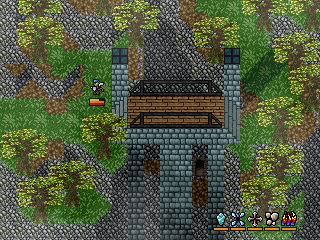
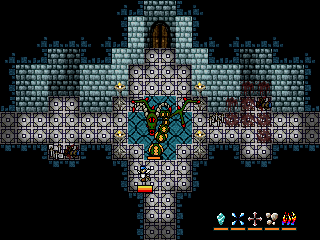
Legend of Ardiad Demo by Elitecpr
Elitecpr, a relative newcomer to the QB scene, is working on a new RPG called Legend of Ardiad. I don't know very much about it, but here's what I know and some nice screenshots:
Download the demo: Legend_of_Ardiad_Demo.rar
"This is a couple of demos I made for my game. FghtDemo is the Demo for the guy fighting the rabbits. E switches targets, D attacks(when they're in range), P pauses, and ESC exits. TalkDemo is a basic little talking thing just to show off the old guy sprite and what talking would look like in the game. D talks to him. It's written entirely in pure QBasic, no ASM or libraries, all my own graphics and code, and not to brag or anything...ok, to brag, there's no flicker at all because of the way everything is drawed. The name was just something I made up so you could call it something, so it's definitely not final. I'd appreciate it a lot if you put it in this issue, because I'm finding it hard to find places to show it off, since most QB sites aren't active anymore. Thanks a lot!"
- Elitecpr


Fun500 GUI by Brandon Cornell

Brandon Cornell has made quite a bit of progress on his QB GUI, "Fun500." Here are the latest screenshots, and some information from his website.
About Fun500 GUI
Fun500 GUI is a GUI, or Graphical User Interface, for MS-DOS. It can be referred to as a BASIC GUI, QB GUI, QBASIC GUI, FreeBasic, GUI, DOS GUI, or DOS Shell. As of version 3.0 its not really useful for everyday task and is not very fast even on a P166.
The Log-In screen
Fun500 GUI started out in 2005 when Brandon Cornell learned about GUIs and read a QB tutorial about graphics. Fun500 GUI 2005 was the first release and it had poor icons and a keyboard controled pixel "mouse". The only program was a calculator that used INPUT commands. A few days later came 2005 Bronze with added themes and a simple game. The last release of the 2005 Series came in May 2005 and was called 2005 Silver which added a screensaver and the ability to run two different external BAS file. The 2005 Series Code (Rewrite 0) has not had a release since even though a Classic edition is a possibility. After 2005 Silver Brandon got a mouse routine and basic SHELL command usage. Fun500 GUI 1.0 (or 1.00 as it was called at the time, lol) added a new sidebar and had all the common apps from the 2005 Series: 1 or 2,Directory Viewer, Text Editor, just a bunch of inputs, and Calculator. Then Fun500 GUI was ready to try to compete with X-GUI and Rush for best GUI ever so Brandon made many Powerful Demos but they never did anything other than show off. Then Almost Exacly 2 years after 2005, Fun500 GUI 2007 was realeased. It had a similar look to 1.00 but with "Skins" fancy themes to make it look like WinXP, or MacOS. It had a calculator with buttons, 1 or 2, and a Config app. And similar to the 2005 Series, after a few days another 2007 release hit shelfs, 2007 Gold. It added more themes, a text viewer with file selection dialog(faulty), and fixed a problem were 2007 wouldn't respond. On June 21, 2007, Fun500 GUI 2.0 came out with EZ Script 1.0 and the first first FunBob he is under 1kb! Then 2 days later on the 23rd 3.0 came out with many bugged fixed and skins.

First Boot. With the Default F53 Theme.

All included scripts running. With Win98 Theme,

A few copies of Config and Config running with WinXP theme.

A few Programs in the MAC OS X theme.
Have a program you'd like featured in the gallery? Email some info and screenshots to qbexpress@gmail.com!
Qlympics 2006 Results
Written by Pete
The wait is finally over. After more than a year, and three different rounds of voting, we've finally narrowed down all of the QB and FB programs that have been released between 2003 and 2006 to the best of the best.
Congratulations to all of the winners!
Best Arcade / Action Game
|
Winner...
Zero G by Syn9
With 32% of the vote, Zero G is our winner! Syn9's Wipeout-inspired 3D racer is one of the most impressive QB games of all time. Zero G has some of the coolest, most stylistic graphics ever created in QB, and its zippy, breakneck racing action makes it a blast to play. And with six different ships and four tracks, it's got more than enough content to keep you coming back for more! Plus, Syn9 is busy working on a FreeBasic sequel to this game, so you don't have to worry about the Zero G franchise fading into obscurity.
|
Runner-up: Mux
Pieslice Productions' awesome 3D shooter is arguably the best FPS ever made in QB, and it received 27% of the vote -- just narrowly being edged out by Zero G to win this category.
|
Best RPG
|
Winner...
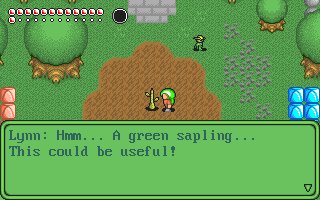
Lynn's Legacy by Cha0s and Josiah Tobin
With 53% of the vote, Lynn's Legacy wins by a huge margin. Lynn's Legacy impresses on almost all fronts. This action RPG really captures the essence of games like the SNES Zelda and the other greats of the genre. With beautiful graphics with smooth animation, multi-layered sound and music effects, a deep and enthralling quest, and lots of collectible items, and a lot of style, Lynn's Legacy is a very deserving winner.
|
Runner-up: The Griffon Legend
Syn9's popular FB action RPG pulled in 25% of the vote, but it wasn't enough.
|
Best Strategy / Puzzle Game
|
Winner...
StarQuest v1.1 by Jace Masula
With 53% of the vote, StarQuest by Jace Masula is our winner. StarQuest strands players in a spacecraft in the middle of the galaxy in quite a predicament: they must survive while avoiding space pirates, mining for resources, researching new technologies, buying ship upgrades, and feeding the crew. This is a deep and compelling strategy game, and a deserving winner!
|
Runner-up: Poxie
Lachie Dazdarian's FB puzzle game managed to pull in a very respectable 36% of the votes, but Jace Masula's QB strategy game edged Poxie out for the win.
|
Best Text-Based Game
|
Winner...
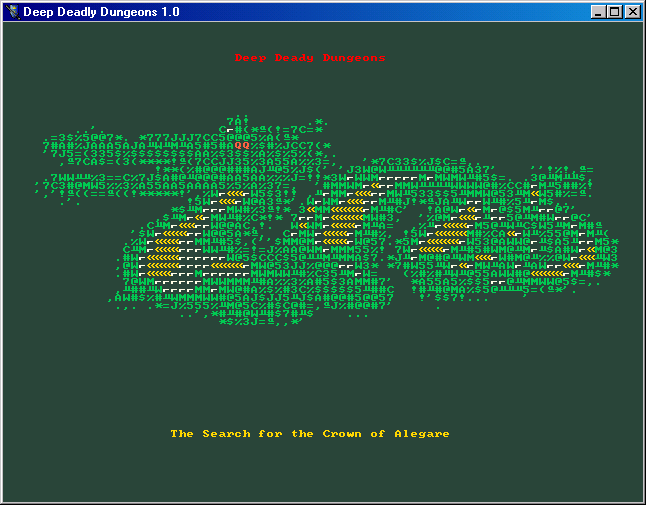
Deep Deadly Dungeons by Rick Clark
With 45% of the vote, Deep Deadly Dungeons (text version) is our winner. Rick Clark programmed two versions of DDD -- a graphical version, and this text-based version -- both using the same engine. While Rick Clark's graphical Roguelike only received a few votes in the "RPG" category, it dominated the text-based game category. A very fun game, DDD is an excellent example of the Roguelike. And once you're done with this game, check out Rick Clark's other FB roguelike, FBRogue!
|
Runner-up: The Quest for Opa Opa
Na_th_an and Aetherfox's deep and compelling Interactive Fiction game is very popular -- and one of the first FB games ever released. It received 30% of the vote in this category.
|
Best Graphics
|
Winner...
Lynn's Legacy by Cha0s and Josiah Tobin
With 56% of the vote, Lynn's Legacy is our winner. Josiah Tobin's colorful and stylish graphics gave Lynn's Legacy a fun, inviting feeling that hearkens back to the days of SNES and Genesis. But just as importantly, Lynn's Legacy animates smoothly and feels very "alive." Josiah also proves that oftentimes in graphic design, less is more. For instance, Lynn's sprite doesn't even have any facial features (her head is just an orange ball), but it looks fantastic nonetheless.
|
Runner-up: The Griffon Legend
Syn9's action RPG came in a very close second with 44% of the vote. It was a tight race between these two FB RPG moguls -- and between the two of them, they completely edged out the other nominee, Frantic Journey by Adigun A. Polack and RelSoft.
|
Best Sound

|
Winner...
Lynn's Legacy by Cha0s and Josiah Tobin
With 34% of the vote, Lynn's Legacy is our winner. Lynn's Legacy is on a roll...but much deservedly. This game features rich music and sound effects, but even more than that as well. Lynn's Legacy features soundscapes -- birds chirping, nature sounds and more. This attention to detail is surely the reason why it was our winner.
|
Runner-up: The Griffon Legend
Once again The Griffon Legend is playing second fiddle to Lynn's Legacy -- with 29% of the vote.
|
Best Gaming Hunk
|
Winner...
Jocke of Hungry Jocke
With 34% of the vote, Jocke is our winner. This character, based on the popular QB coder and roguelike fan Jocke The Beast, is the only hunk that was based on a real person. Sure, he is just the default ASCII smiley face character, but looks aren't everything. Jocke's winning personality is what made him win out in this category!
|

Runner-up: Fayne from The Griffon Legend
We should give Syn9 a consolation prize for all of the Griffon Legend runner-up finishes, heheh.
|
Best Gaming Babe

|
Winner...
Lynn of Lynn's Legacy
With 65% of the vote, Lynn pulls in her fourth award! Lynn's Legacy is cleaning up, winning every category it was nominated in. This time, Lynn really dominated the competition, pulling in nearly two-thirds of voters with her seductive green hair and orange-ball face.
|

Runner-up: Alexa Cullers from Cyber Chick
WisdomDude's heroine Alexa Cullers received 26% of the votes.
|
Best Villain
|
Winner...
Margrave Gradius of The Griffon Legend
With 44% of the vote, Margrave Gradius is our winner. Finally a win for The Griffon Legend! The final villain in Syn9's action RPG was a tough and intimidating foe, and the community agreed.
|

Runner-up: Vlad Dracula of ...In The Nocturne
Vlad Dracula pulled in 26% of the vote. DarkDread never ceases to amaze me. Every QB RPG he's made -- even the ones that he spends only 24 hours on -- turn out to be fantastic. And even though Dracula is a pretty generic villain, DarkDread created a phenomenal sprite and wrote phenomenal dialogue to make this a deserving runner-up.
|
Best FB Port of a Past QB Game
|
Winner...
Wetspot: Tenth Anniversary Remix by Adigun A. Polack
With 42% of the vote, Wetspot: Tenth Anniversary Remix is our winner. Adigun A. Polack's port of Angelo Mottola's heralded Wetspot is a shining example of a port done right. With new modes and updated features, this FB port proves that Wetspot is still a fun game, even a decade after its initial release.
|
Runner-up: The Secret of Cooey
Tunginobi's port of Darkdread's first 24-hour RPG creation, The Secret of Cooey received 33% of the vote. The first Cooey game was always pretty hokey and rushed (considering that it was thrown together quite quickly), but it's a welcome flashback to our QB days of yore -- and as I mentioned before, we just can't seem to get enough of DarkDread's RPGs.
|
Best Graphics Demo
|
Winner...
RelSoft
RelSoft had two entries in this category -- his QB graphics demo Mono and Disco, as well as his collection of FB graphics demos -- and between the two of them, he received 80% of the vote! (34% and 46%, respectively) That makes RelSoft both the winner, and the runner-up for this category. Even though he was splitting his votes between two excellent graphics demos, he still managed to take the prize -- proving that he is a supremely deserving winner!
|
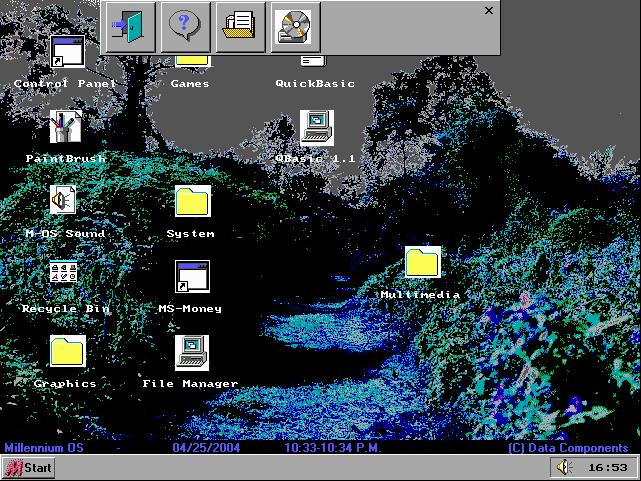
Best GUI / Fake OS
|
Winner...
Millenium OS by Todd Seuss
With 64% of the vote, Millenium OS is our winner. Todd Seuss is known for his website with reviews of just about every QB GUI every created, so if there's anything he has an expertise in, it's the Fake OS. His product, Millenium OS, mimics Windows in a DOS environment quite nicely -- and as a result, it received almost two-thirds of the vote.
|
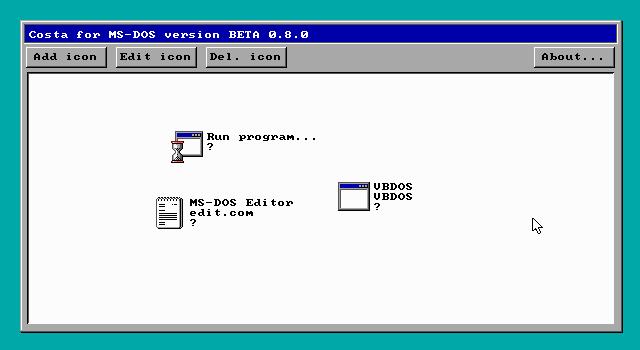
Runner-up: Costa .80
Jacob Palm's GUI received the other 36% of the vote (not surprising, because it was the only other nominee!)
|
Best Library

|
Winner...
YAGL by Marzec
With 42% of the vote, YAGL is our winner. Marzec's "Yet Another Game Library" features all kinds of useful graphics routines for aspiring FB game programmers, and this library is popular for its great speed and ease of use. Although the project is now defunct, it is still a very deserving winner.
|

Runner-up: RelLib
With 30% of the vote, RelSoft's self-titled library came in second. This is the best (and perhaps the last) big gaming library for QuickBasic, and if you still haven't moved on to FB, RelLib is as close as you'll get to matching FB's speed and flexibility.
|
Best Utility
|
Winner...
AsciiQuest Editor by Jace Masula
With 42% of the vote, AsciiQuest Editor is our winner. Jace Masula's ASCII game programming engine is a polished, easy-to-use and fun program to play around with. Although it was never entirely finished, it has enough functionality to create cool little ASCII quests (perhaps starring "Jocke" the smily face) -- and it's a deserving winner.
|
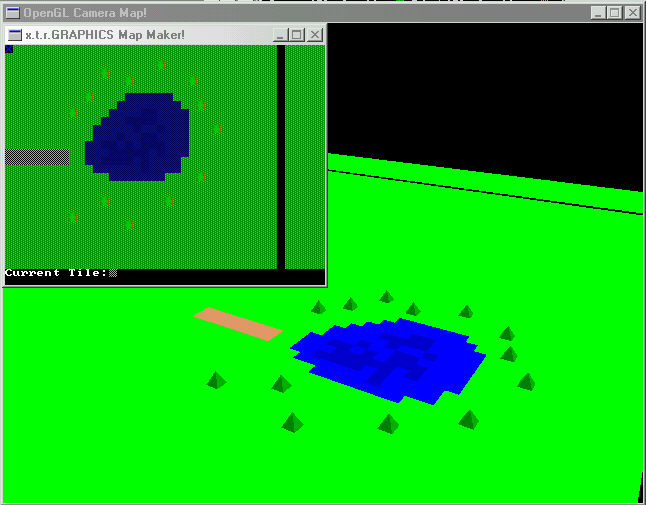
Runner-up: ASCII Scrolling Map Maker 2
Rattrapmax6's ASCII Scrolling Map Maker program received a close 39% of the vote, much deservedly. This is a very cool program that can convert your ASCII maps into 3D landscape renders.
|
Best Overall Programmer

|
Winner...
V1ctor
With 44% of the vote, V1ctor is our winner. Is it any surprise that the creator and mastermind behind FreeBasic won this competition? Without V1ctor's contribution to the community, most of us wouldn't be here, and this magazine certainly wouldn't exist anymore. QB has been on its way out for a long time, and if not for FB, chances are the community would be nearly dead at this point. V1ctor's contributions are incalculable.
|
Runner-up: RelSoft
RelSoft is a jack-of-all-trades who programs great graphics demos, phenomenal libraries, helps with many games, and writes great tutorials. His expertise on all things BASIC makes him a more than deserving runner-up to v1ctor.
|
Best Tutorial or Tutorial Series
|
Winner...
RelSoft's 3D Series
With 49% of the vote, RelSoft's 3D series is our favorite tutorial series. The 5-part series covering all the basics of creating and manipulating 3D graphics in BASIC is the definitive resource for people who want to learn the basics of three dimensional design, and is one of the most downloaded tutorial collections ever in the QB community.
|
Runner-up: MystikShadows
MystikShadows is one of the most prolific writers in the QB/FB scene, and his tutorials are very popular. For his many series (MIDI, GUI Design, Commercial & Professional Application Development, File Manipulation in QB/FB, more) he received the second most votes.
|
Best Article or Article Series
|
Winner...
QB Express Gallery / Blast From The Past - Pete Berg
With 55% of the vote, my article series for QB Express won out in this category. I'm glad you like my writing! I put a lot of work into QB Express every month, and it's nice to get some recognition for it. :)
|
Runner-up: "Is It A Bird? Is It A Plane? No, It's FreeBasic!" - Blitz
The official announcement of FreeBasic in QB Express received the second highest number of votes, with 27%. This was the most important news event ever published in this magazine, and it ushered in the next generation of BASIC and the next generation of our community. Due to its historical significance, this is a very deserving runner-up.
|
Best QBasic of FreeBasic Site
|
Winner...
FreeBasic.net
With 50% of the vote, FreeBasic.net is our winner. It only makes sense...the homepage of FreeBasic and the hub of the FB community and message forums is the most popular FreeBasic site on the Internet.
|

Runner-up: Pete's QBasic / QuickBasic Site
My site was the second-highest vote getter, with 32% of the votes, thanks to the huge collection of tutorials, active message forums, and QB Express this magazine that you're reading right now.
|
Well, that's it! Thanks for voting, everyone, and congratulations to the winners!
The next Qlympics will be held in 2008. See you then!
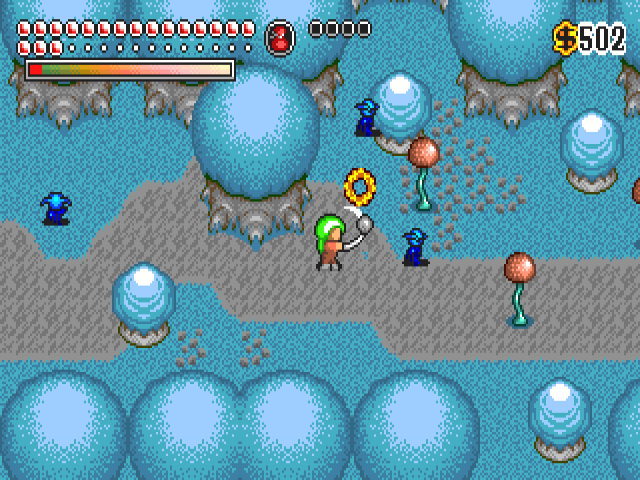
Review of Lodestar developed by Shendelyar Evgeniy (ShenZN), 2007
Written by Lachie Dazdarian (Aug, 2007)
Introduction
Lodestar was developed by ShenZN, a relatively unknown community member who seldom appeared in the FreeBASIC official forum, only asking seemingly random programming questions. His Lodestar was not announced at all, and therefore was a pleasant surprise to anyone interested in the FB gaming scene once a topic about it appeared in the FreeBASIC forum's Projects section.
Anyway, Lodestar is an unconventional action game of a smaller size, consisted of 5 story-driven stages, each stage featuring different gameplay and challenge, ranging from pong, space invaders to lander. This gives the game a unique flavor and results in a rather uncommon gaming experience.
Despite featuring quite few novice game design / programming mistakes, the story written in horrible English, and virtually "impossible to finish" stage 4, almost everyone who played the game was eager to see these mistakes corrected and the game released in the best possible condition. That brought us to much improved version 1.0.2, the one I'm reviewing.
The Review
The story of Lodestar is nothing particularly intriguing, nor something completely underdeveloped.
In the distant future the humanity inhabits the Earth along with other planets of the solar system. As a result of this more and more energy resources are needed to sustain the existence of the human space empire named Lodestar. You are a space ranger charged with a special mission to transport the prime Lodestar source of energy - the Energy Sphere created on the Earth with the joint scientific effort.
The game starts with an alien race Andropes attempting to steal the Energy Sphere, this triggering our plot and taking the player through several different adventures.
As I previously pointed, the game is consisted of 5 different stages, each introducing different gameplay.
The first one is a pong-like stage where you bounce the Energy Sphere back and forth between two ships, trying to keep it inside the screen and avoid collision with the space trash. A relatively easy and un-thrilling stage. One could say, not very promising for the rest of the game.
The game pickups up with a second "space invaders" stage, bringing more fast-paced gameplay, but still not challenging enough. Also, this stage lasts a bit too long for the variety of content and challenge it provides.
The third stage is a collector-type of game where you control your spacecraft with mouse clicks (rotation) and space (thrust) in order to collect the lost life pods. A quite different experience from the first two stages, and definitely more tricky.

The forth stage is my favorite one, and the most challenging. It features an exciting mission where you need to land 5 life pods on a passing ship at the bottom of the screen, and the time is of crucial importance. There are asteroids to avoid and gravity (?!) to worry about. Fun!
The last stage is an aim and shoot type of game, sadly far from challenging enough for the finale, but still solidly executed.
You may notice that I didn't describe any of these stages as something exceptional, but what makes this game fun is the sum of all these parts. They simply work great as parts of a single story, providing thrilling gameplay experience. I found it very difficult to stop playing the game before completed it, or reaching the impossible stage with the original version 1.00.
The lack of challenge still remains a notable flaw, and some players reported that they were able to finish this game from the first try. Still, this fact probably won't leave you terribly disappointed. You will most likely regret the journey lasted so short. The game does require about 20 minutes to be finished. Hopefully you'll need more than one try.
Being obviously a first game by an inexperienced game designer, this game won't impress with its smooth gameplay and some glitches and clumsy features/mistakes are present even in this version (note the incorrect direction of the falling rockets/bombs in the last stage).
The second element of the game that leaves much to be desired is the graphical design. While featuring few cool pictures and sprites, overall is incoherent and unpolished. Nothing to seriously dislike there, but nothing to be impressed with either. It IS intriguing in it's unconventional style on few places, but just that - intriguing.
Beside the changing gameplay, the strongest side of the game is the excellent original music, done by the very game developer. ShenZN definitely shows talent here, and I can only envy him for having this (so much desired by game designers) skill. Very cool and skillfully composed tracks that suit perfectly each stage/screen they accompany and highly enhance the play experience.
Definitely a promising release by a debut developer. ShenZN did left us much to wish for in Lodestar, but also much to hope for from his future project, whatever it might be.
The Verdict
Graphics: 69 %
Sound/music: 88 %
Gameplay: 64 %
Overall (not average!): 67 %
Good:
- changing and story-driven gameplay
- excellent music
Bad:
- novice programming and graphics design
- lack of real challenge
- lack of high scores
- short play time
Download Lodestar here.
Written by Lachie Dazdarian: lachie13@yahoo.com ; The Maker Of Stuff
Programming on a Collaborative Project
Written by Stéphane Richard (Mystikshadows)
INTRODUCTION:
As the title suggest this article will try to cover everything you need to know about
collaborative efforts and group projects. SOme of you might believe that working as a group
is as easy as getting a few of your friends and start coding. THis might work for very small
projects but definitaly not if you want to make a good detailed elaborate project that warrants
team development. For this reason, you need to organize things and people alike. This is what
I'll try to convey during this article, how to know what exactly a project is all about, what it
needs, and how people fit in the team and take it all the way to selecting the right people for
the job at hand.
We'll start this off by taking a sample project, describe it, break it down so to speak because
in the case of projects big enough for team development, if you don't plan you're either killing the
project or slowing it down so much that you end up thinking "I should have done this myself". Lack
of planning (atleast minimum planning but the more planning the better) is one of the key elemnents
that can break a project no matter how good the idea of the project is because let's face it, a big
project just isn't that easy to just split in X amount of coders and then patching it all together
in the hopes that it all works out. So let's start this collaborative journey and see where it can
go shall we?
OUR SAMPLE PROJECT:
For the sake of justifying this example we'll create an imaginary huge project. This will be a game,
a huge game that has many different sections and coding and whatever else to do. This game we will
call it Quest For Collaboration. We'll use alot of things for this game as you'll read below. Basically
a project so big it would be ludachrist to even think of doing it alone. Here is the ron down of what
Question For Collaboration needs to be able to accomplish.
- Coded to work with either DirectX or OpenGL:
This is a prerequisite as some OS make better use of one of these and others
don't. You want this project multi-platform and you want it to rock on all
supported OSes. Hence you decided that this was a necessary step.
- 100% Original Graphics For Everything:
You want people to remember your game or the awesome graphics that were created just for that game. To
do that you'll need to think of alot of things and alot of different types of arts. There's more than one
of course and they all have to fit together under the main theme of your game. Some people are good
at creating characters, others are better at creating background landscapes, to each his own.
- Needs to Have a Good List of Songs and Sound Effects:
You're a copyright paranoid and and want everything created by you and your
team. Since you realize not everyone might enjoy your type of music you also
need to create a system that let's them pic their own playlist from the players
own files if they so wish to.
- A Very Elaboration Scripting Engine:
Think of this as almost a programming language in itself. From this language you want to be able
to completely control every other parts of the game. From sound to graphics to textures to you name it. You
want to be able to do anything you want in this language. So it's a good engine in itself that you
can then use in future projects.
- Two distinct Evolved A.I. Systems:
By that I mean one for your enemies and one for your allies. They both need to perform different types
of evaluations and you chose to keep them independant for that reason, just too different to be in the
same engine.
- A Brand New conversational system:
Basically, you don't want the conversations in this game to look like or feel like the classic Zelda games.
And you can't find a suitable Open Source alternative to some of the conversational and dialog systems that
some of the better games have. Hence, you need to make your own.
- Internet Enabled And Chat Facilities:
What good game doesn't have this feature? If you're going to go against these big boys this needs to exist as
you can understand. Two things basically are needed here. The first is checks for updates and update downloads
so the player can be sure to be playing with the latest version. The next one is an IRC Client for the users as
well as an IRC server for you (or for the central server that will host the chats).
- A Database System
Sure some might question this in a game. But what if your game's purpose is to simulate a real world
situation like a collaboration project? There is alot of data that needs to be shifted left and right
from one module to another. You might be able to use binary files, but a Database system will typically
give you your results alot faster and presorted of your queries are formulated right.
- Strong Statistics, Trend analysis features:
with this you can evaluate certain things from how the player is playing and adjust the AI of your
characters accordingly. There's more than one criteria to consider, some of which can only be obtained
by a good statistically based trend analysis.
Of course you might look at this and think that you could use this or that to take care
of this or that part and you might be right. But for the sake of this project let's say
that there's nothing premade that can be used. Or you're stubborn and want everything
originally made for this game. Now that we know a bit more about this imaginary project,
we can start asking some questions.
WHAT'S WHAT IN ALL THIS:
You'll notice here that so far I didn't talk about other coders or anything. I can say that the first step
to a big collaborative effort like this one isn't to call your friends up front and tell them to get ready to code
on your ultimate game project. The first thing to do is to split this project into sections that can then be
split into tasks and start thinking about what type work each of them mean. Once you have that (as we'll attempt to
do below, then you can start thinking about who does what. So for now, let's enumerate the different types of tasks
so that we understand a bit more of the actual work involved.
- DirectX and OpenGL Support Engine What we're talking about here is a high level Interface between these two
low level 3d Engines. Something that will detect what's on the player's machine and given the right options as it
finds them available. This interface should be able to perform the same jobs on both engines in the most optimal
way so that the graphics are nice and smooth no matter which Engine is being used. this engine should also be able
to create windows, insert objects, attach materials, adjust camera and lighting and other needed functionality expected
from a 3D Engine.
- Graphics and other Artwork this means of course the title pages, sceneries, characters, creatures, things to find
this to fix or solve (depending on the game). basically, in a good detailed game like this you're probably looking at a
good 300 to 500 original arts, textures and the likes (maybe even in the thousands). Added to that is any cinematographics
that you might want added in there as well as visual special effects. No programming here just art and creativity.
- Music and Sound Effects Today, a good game has music (themed music) and sound effects. Depending on how elaborate
the game is, this can easily mean a couple 100 sound files and atleast 3 theme songs, one for the introduction, one for
the game play itself and typically one for each type of ending the game can have. After that, any more music is usually
appreciated by the players, hence, icing on the cake. For this project, let's say there's about 10 themed songs to do.
- Evolved Scripting Engine As mentionned above, the scripting engine should be sophisticated enough to control all aspects
of the game from all AI systems to graphics, to music to any events and interactions that can occur between the player and the
other characters, allies or enemies, as well as interactions between diffferent elements inserted into the world created in the 3D
engine. This way it's a good head start for future games that can make use of this scripting system.
- Enemy and Allie A.I. Systems Remember here that these aren't simple AI engines. And that Enemies and Allies are two different
entities in what they would actually have to do in relationships to themselves, against each other, in relationship to the player and
to the environment they are in. Diffierent enemies will have to behave differently in all these circumstances and so will the allies.
Truly not a small thing to do right.
- Sophisticated Conversational System I guess here that this can be indirectly tied to the A.I. systems. By using a 3 level understanding
of the player's input and interactions it would be possible to create a completely independant and surprisingly sophisticated conversation system
that could just be plugged in where needed and let it do the rest after you pass it a sentence. How detailed you want to go in this engine
depends completely on how much dialog you want to see occur in a typical encounter of two characters (regardless of if the encounter is with an enemy or an allie).
- Internet And IRC Support These two are in the same engine but internally they are two different things. What we need on the internet side is to be able to upload/downloads
either updates on the games, new maps, whatever is made possible at a given time. Maybe you'll want the players to be able to create a profile of themselves and upload it to the
central server so others can see who they are and how well they are doing in the game so far. On the IRC (Internet Relay Chat) system it's about creating an environment where people
can meet up and talk to each other during the game play itself. This means connecting to some IRC server, joining rooms (called channels) and sending messages, sometimes files, other
times private messages between two players and other standard chat features like that.
- Database System I won't be a masochist here. You're allowed to use MySQL or some other database system if you want. What I mean by database system is the entire set of tables
and queries in those tables to allow you to do typicaly database work like creating databases and tables, inserting records, updating information, deleting records and the likes. Hence you'll
need to create these standard SQL queries to do these jobs for each of the table you need in the database system. All this plus the code to connect to the database and execute these queries
in the programming language of your game.
- Statistics and Trend Analysis Though this is summarized as two elements, it can ramify itself into a very complex engine. First thing it depends on is exactly what you are trying to
get from the data you're analysing and what you plan on doing with those results. What you'd like to do is be able to compare a user's performances in the game against the following: 1. The
true right way to act or react in a given situation (which you should know since you're creating the game), 2. Compare things to how the majority of users
would and should react in this situation, 3. Evaluate how bad (how far away from the right path so to speak) the player is at all times. There's more, but the object is to learn about the player's
way of playing the game because you want the game to adapt to how the player is playing. You'd want that either so you can make the game a bit harder (if he's doing good) or maybe just know what kind
of hint to give him to set him back on the right path. doesn't sound all that sime does it? but that's ok, you're going to be a team anyway.
And now we have a better understanding of what and how much work we're dealing with. Depending on the project it might be a good idea to detail this even more than I did here. When you're dealing with any
project of bigger sizes, the more you can document and fully understand, the better it is for the success of the project. So then what's the next step? You know what you're dealing with in your project at this
point. Now comes the time to take it a step further and start seeing how to involve people in there somehow. So let's talk about this side of a collaboration shall we?
WHO CAN DO WHAT HERE:
Before you start throwing names in the air. The very first thing you need to establish is if your friends or the people you know best can help you with any of this. You created this project, I'm assuming at this
point that you actually want this project to be realized, to see the light of day, hence, to succeed. In that frame of mind, the first question is not "who's gonna do what?" but rather, "Is there anyone (known or not) that
can do one of these things, or more?". unless your friends with thousands of people chances are there isn't enough people that you know to fill in all the gaps of the project. Some of your friends or whoever you'd want on the
team right now might be able to do some of it. Maybe you know a musician, maybe you know an excellent graphic artist, that's all great if you do. But if you don't, it's not like you can just take graphics out of your project
so what can you do?
Indeed, your friends shouldn't necessarily be the first in the list unless you know that a. they can do the kind of job you want them to do, b. they will have time and want to do that particular job. Once you do know the particular kinds of
job (as listed above) then you can start asking your friends if they'd like to work on the project and do what you'd like them to do on it. Once you have the answers from those people, you list yourself whatever is not checked in
the list so you know what's left to do. For those jobs not yet assigned to anybody you have more than one possibility. The first of which is if you can do it or not. If you can't, can you learn it fast enough for your own deadlines? If not
that either, can you get someone else, that knows that stuff, to do it for you? What's the best way to get people to do help you out? Let's look at that right now.
ASKING FOR THE RIGHT HELP FROM THE RIGHT PEOPLE:
Most of those reading this right now will probably think "ask for help, yeah right!". Well, one thing I can say is if your game sounds intesting enough, that alone might entice some people. Of course, it doesn't stop there. You've seen some people
ask for help before, you've seen some of the replies they got too. So why did they get that reply? Let's review some of the possible reasons and try to bring some solutions to them.
- Don't be a stranger:
Sound weird maybe? This is for the regulars and the newcomers too, this one is addressed at the newcomers
if you want help for a project, don't ask and dissapear for a few months. That's the first sign that your
project is not going to be realized, atleast it's the first conclusion we can come to when we read your
request for help. You have to keep people posted. Let's say you asked for help in 4 different forums and from
one of those forums you got the people you needed. Go ahead and let that fact known to the other forums. So we're not
all just looking at it for months with "yup, I knew it, another vaporware!" in our heads. If you didn't find anyone yet,
go ahead and repost as a reply to your original post. So we know you're still looking for help.
We don't have a crystal ball, we can't know these things unless you tell us. This alone shows you have interest in
atleast attempting to finish your project and who knows it just might make the difference you need.
- The project is way over their head and will never be realized:
Sound familiar? I thought so too. That's probably the most common type of
conclusion people jump to when they see a request for help on a game. My first
suggestion here is to two one of two things in your request for help. 1. You can
show that you can do it (no the game is not over you heard) or 2. You can show that
you have the people that can do it. No one here is stupid per se. People can read
and they can see, if you post it right, that you're not a newbie, this is or isn't
vaporware because you either have the know how or the organization and group to make
it happen.
- The project is too big way too many things to do even if you know how:
Well, anyone reading this want to create their own complete 3D flight simulator? That's
a huge project and if you look online it's been done, by groups of people. Here again
the fact that you are a group and that you want more members shows your dedication to the
cause. in a lot of cases, tasks like those described above can be brokem down into independant
engines that can be created simultaneously and independantly of each other. If you can spot them
and assign people to these independant tasks you successfully cut down the development time
of your project. To show this without having coded yet, you need a website or a page that shows
how the organization is done. Showing this also shows how ready you are for this big project.
- I don't want to see the results of my work in 5 years:
This one is typical too, but this is for the readers actually. Sure you don't want to wait 5 years
to see your results, in a way, you could help make that time shorted by perhaps seeing where else you
could be useful and helping out even more. Your project isn't the only one out there. Perhpas with a bit
more of a community effort both projects could be ended a lot sonner than intended or expected.
- Be polite and curdious, give credit where credit is due:
This one goes to everyone, requested and replyers to requests. If you posted to request help. And you happen
to not get any replies, don't go posting that we all suck for not helping you. It won't get you anymore help
on your next great game project when you ask for help again. Sure it's no fun to not get replies, but it doesn't mean
you won't get replies on your next project. And if you follow the previous three points, you just might get
replies which nullifies this particular point. If you're a replier to a post for help. There are ways to reply. Saying
something like "I won't participate because I think your game idea sucks!" isn't going to help anyone and especially not you
if you ever do need help. You get what you deserve, if you're bad in replying, we'll be bad at replying to your
requests for help. This isn't a complaint, simple base rules so to so speak for good relationships for future projects for all.
And of course, if you do get help, make a good effort and not forgetting to credit those who helped you. That goes without saying.
So then with these points in mind, you can start to formulate your request for help. Don't post 6 pages long requests just because you
want to tell them everything now that you've read this article. It's best to stick to the facts and link instead. Something like: "I'm creating
this game which is a 3D realtime RPG. There is alot of work to do and if I'm to succeed in this effort, I'll need help. Here are the types of help I need:"
Then you list the different help items on your list. and you can finish it with: "If you're interested in learning more about the game, here's where you can
read the details as well as how things are organized for success so far.". And of course don't post that until you do have the page with the information
you say it has. If we click on it we don't want to see an "Under Construction" sign, we want to read about your project. You can be quite surprised how much of a difference
a little organization and preparation can make in your request.
Now that you have everyone you need, is your job done? The answer is no. The truth of the matter is that at this point, you're only about halfway there. Because once you have
your people ready to help you. You need to keep yourself on top of your game (literally and figuratively speaking). For one thing, maybe you have part of the coding or design
to do, you make sure you do it, do it well and do it promptly. But that's just the beginning. In the next section we'll look at what you need to take care
of from now until the release of your game.
THE PROJECT MANAGER TO DO LIST:
The first note I'll make here is that I do realize that this isn't a commercial effort, it's a game project you want to do. It doesn't mean that you can't apply some of the
professional project management concepts to help you out. So no, I wouldn't expect everyone to get themselves something like Microsoft Project and use that. But there are
ways to organize people and work that can play a big role in how long it could take to make the project and how good the chances are of actually making the project a sucess. Alot of
them involve simple common sense and a bit of reasoning. The others are there mostly just you help you use your common sense. Here we're going to list some of the better ones
to give you an idea and we'll describe what they are and what use you can make of them.
- The Infamous To Do List:
Yes infamous because most coders don't want one of those. However, you're not most coders, you're the creator of this project of yours and in dealing with a group effort, this can
prove to be one of your most powerful tools if done right. It's also a good way to get a quick view of recent progress made to the project. The list should be simple one item per
line with a status column, here's a simple example:
                Quest For Collaboration To Do List
                  As of Monday, August 27th 2007

1. Arts and Graphics:

   Work Item             Resource            Status
   --------------------- ------------------- ----------------------
   Title Page            Mister X            In Progress (20% Done)
   3D Textures           Mister Y            In Progress (25% Done)

2. Music and Sound Effects:

   Work Item             Resource            Status
   --------------------- ------------------- ----------------------
   Main Intro Theme      Mister A            Done
   In Play Theme         Mister B            Not Started
   Ending Theme (win)    Mister C            In Progress (50% Done)
This can be done in a regular text file, in a webpage, in a forum post it doesn't matter where or how, the important thing is that it exists somehow somewhere for all members of your team to see.
You put all the items you have in your files in this list. This way you have everything you need in one place and you can see what needs to be done next, what needs to be started and so on.
As you can see, this is simple enough, and you fill in the status but not before talking to those doing the job of course. which brings us to our next item.
- Set The Priorities Right:
Sometimes this can be the trickiest. But this is also the task that relies on common sense more than most others. In your project, you can probably determine most (if not all) of what the really
important elements of the project are. It's not impossible to start giving an order to things too. If you want the scripting engine to play sounds when issued the right command it's probably good
common sense to be sure that the music and sound effects system is working before you start the scripting engine. This way you'll know the engine is there, and you'll also be able to make lists of
function calls and their parameters so everyone else that will use this engine will know how to call things in what order to get their music or sound effects to play. This kind of ordered classification
of tasks and engines is what I mean by priorities.
- Get Information From Your Team:
This is good for the first item, the to do list. But it's also good to know if there are any bottle necks. If someone is working on an engine that is needed by 2/3 of your project you might
want to see what you can do to make sure that particular engine gets done as soom as possible to avoid useless waits for 2/3 of your team and for you too. Constant progress is the best way
to motivate you and your team to move forward and to get things done. If you don't ask the question for two months, you might cause a two month delay in the project. So it's good to ask around
at regular intervals just to get a good idea of what's happening where.
- Give Information To Your Team:
As the organizer of the project it's your responsibility to keep the team going. This means two things. 1. you don't want your team to be stagnent (immobilized by one person) basically, if you ask
information from your team frequently enough you can see a bottle neck coming because that particular task just won't seem to be moving forward. Likewise, other members of your team might start telling you
that they're waiting on this or that engine or system to be ready before they can start work on this other task. If they can, instead of just waiting, they could see if they can help the other user in some way
so that the task gets done and the rest of the project can move forward.
- Keep your team motivated:
By this I don't mean to by the pizza every friday or the beer. I mean don't be affraid to show some gratitude. Especially on a project
like this. People in your team are taking their time to help make your dream a reality. They don't have to even if they are your friends
so letting them know their help is appreciated and valued is the least you could do, don't you think? This plus the points above (keeping them
informed, keeping the work going, avoiding bottlenecks when you can, all that together promotes the success of your project.
- Know When It's Time To Switch Things Around:
This means three things. The first is, if you follow the points above, and you can still see some serious dragging in the project, maybe it's time to talk to your people, see what's going on, it's a competence issue? Did someone
throw himself into something above their heads when they told you they would do this or that task for you? If you just let it drag you won't know why things happened. And not knowing something in a project is one of it's greatest
killers. Don't be mad if they did go over their heads, maybe they didn't know appriori that this task would ramify into such a big monster. It depends how you described it at first and what it is now. The second meaning to this is
as I mentioned earlier, to make sure the bigger tasks are attacked first, and in group if you can. If it's over someone's head, maybe another member of that sub group might get an idea that will work. The third meaning is about you,
the creator of the project. We all have the best of intensions when we start a project. If you get too many bottlenecks or you have one that just doesn't seem to be able to make it go away. It's time to take step back and see if the problem
isn't one level up, in your level need to be broken down differently. If that's the case, don't keep your team in suspense and let them know so they don't bust their brains for too long for no reason. Better to take a week if you have to
to replan that section than to let them try to figure it out for three or four months. Better for you, for them and of course for the project.
From these points I think that you can be very well equipped as far as what needs to be done before (all the documentation, organization and so on) and the start of during the creation of the project. In the next section I'll talk to you about
some of the tools at your disposal during the creation of your project that are there to help you move things forward. Using this tools helps, but these are more stated in case you're curious because ultimately, with everone on your MSN lists
a few emails and time you could probably do the job good enough for a good big project.
THE TOOLS AT YOUR DISPOSAL:
There exists tools that have been specifically created with project collaboration in mind from the grounds up. So if you have time to familiarize yourself with them you might notice the many advantages they have when you're tackling a team project.
It all depends on how you like to work too. This is why I'm listing more than one of these tools because one of them might allow you work exactly like you want to work while another one might be closer to how someone else likes to work. in essence they
typically all have the features for group projects, it's all about which of them makes the most sense to you since you're the one that will be using it. But if you're considerate you might want to get your team to look at some of them to see who's confortable
with which tool so you can reach a decision on which tool is the best for all team members. Here there are, in no particular orders. Note that all the tools listed here are freely available so don't be affraid to look at them.
- Open Workbench:
If you happen to be one of those who know what Microsoft Project is, seen how it works, what it offers and you like it, this is the best Open Source alternative
to it. It features probably all the features (though I didn't compare them feature for feature) that Microsoft Project has but it's open source and free. It's designed
from the grounds up to give you everything that the other one offers and is a great application to work with. If you want to use it but don't know anything about it, I would
guestimate the learning curve of this to be about 2 weeks max. which isn't all that bad considering all it offers.
- Task Juggler:
If you know Microsoft Project and you want something different to manage your projects, Task Juggler just might be the tool you are looking for. It features a unique way of organizing
people and resources all based on a grammar syntax file (a script almost) which allows for fast editing. From these files you can then create not only the classic Gantt chart like reports
but also many other views of a project that reveal other very important factors of the success of the project.
These two seems to be the only applications (as in not web based) that are probably worth mentionning. What follows is the web based collaborative solutions available that I deemed worthy of mention.
- Dot Project:
This is a website based collaboration application done in php. It is very much used in alot of collaborative efforts and it seems, by some of the evaluations, to really fulfill its promise to
help organize group efforts.
- Active Collab:
The first thing that hit me about active Collab is how simple a layout it had. It may lack some of the functionality of Dot Project but the layout and organization of information is very well done
which might make it a better tool to use for someone starting out in a group effort like this.
- The Trac Project:
This is one I noticed very recently. The unique thing about this system is that it's a wiki based project tracking system. We all know the advantages of a wiki in itself. Take those advantages and integrate
them into a project management tool and you get Trac Project. I have to say that the way wiki is integrated into this tool makes it quite unique
and adaptable to it's intended purpose.
Of course there are other groupware / collaboration tools, these are, in my opinion the top three. If you want to see more of them you can visit the Open Source C.M.S. website and check out their "Groupware" section where they list about 10 of them. These type of tools, when used right really help everyone involved (organizers, designers, graphics artists, musicians and developed under any and all of the sub projects involved
get their job done without delay. For this reason, I would take a good look at them if you're planning on team development before crossing them out. You just might have that tool to thank for the success of your project so taking time to learn one might not be as bad an idea as you might thinnk. Aside that, if you plan on making your game open source as well, you have the Source Forge website which does offer some groupware features as most of you probably known by now.
IN CONCLUSION:
A successful team depends on these tools, but they also equally depend on how good you and your team are at staying on top of things. Projects like these are based on good faith of all members of the team. They should also be based on keeping it real. Like I mentioned
above, if something is over your head, don't be affraid to say so, right at the start or if you figure it out in the middle of the development, let it be known to the one organizing the project. If it's over your head but you really want to learn how to do it, let it be known too. You might still get to do it and learn what you want you wnat to learn and at the same time others
won't expect things that fast from you if they know you're learning along. Simple things like that can really help make a project move forward smoothly and avoid alot of grey areas so it's important to consider this from the very start of a project whenever possible. And this of course can be accomplished with good communication from you, the organizer of the project and the team members. That is between you and team members, team members and you, team members and team members (in different engines for example). Communication is often the key
to the success of projects like these so don't hesitate to communicate what happens when it happens. This means that If you know something's coming up that will cut your time available, let it be known right upfront as soon as you're aware of it so that the team can have a chance to adapt itself accordingly.
As with all my contributions, I hope that this was fun to read and most of all that you learned something that will help your next team project to move forward and succeed. That's the bottom line, if this can make your project work then
my mission as the author of this article has been accomplished. So, if parts of this aren't as clear as they could be or if you believe you might have a good idea, be sure to contact me (my email is below in my signature) so we can talk about it and
see how it can all work out. Until next time, happy reading and "team" coding.
MystikShadows
Stéphane Richard
mystikshadows@gmail.com
Download a copy of this article: collaborativeprojects.html
What makes a game good? What makes a game great?
by Joe King
What makes a game good, and what makes one suck so bad that you wish you hadn't downloaded it in the first place? It's important to know this difference, so you can take your game from something mediocre to something great.
Out of all the QB games released over the years, many were pretty horrible. It's not that the games themselves were meant to be this way (okay, maybe some were) it's just that everyone else who plays it can't play it like the developer intended. Maybe it runs too slow or too fast, or it's not fun, or it's too buggy, or maybe it just won't run at all. Yes, even some of my games I made in the past suffer from these issues. But I've learned from them and hope that you will learn too. Let's not have this epidemic plague the FB scene like it did with the QB scene. I've seen a lot of quality FB releases, so let's keep it that way.
What makes a game good?
Whatever your game may be like, no one will play it unless it passes the following rules:
1. It must run
2. It must be user friendly
These rules may sound simple, but let's go into them with more detail.
Rule #1: It must run
This may sound pretty obvious, but there's a lot more to understand about this idea.
Your game must run, and run well, not only on your computer, but on every other computer out there. If you finished a game, tested it, and it works great, then that's just the beginning. You need to try it on other computers. Send it to friends and have them play it on their computers. Try to expose your game to as many systems out there as you can, and note the differences. If it runs well on one computer, but a little slow on the other, or maybe it crashes on another, then diagnose the problem and fix it. Your goal is for every computer to run it the way it's meant to run. Now getting your game to run on every computer out there is close to impossible, there are different operating systems, processing speeds, etc. But you should be able to get it to run on every computer that falls into the same category as yours, and if possible, many more computers.
Rule #2: It must be user friendly
You might think that your game is the best thing in existence, which is fine. Maybe it is, but if no one but yourself can figure out how to play it, then you're game won't get the recognition it deserves.
A game that is user friendly is something that you can just pick up and play. If most people can figure out how to play your game on their own easily, then you're in good shape. But many more games can be complicated, like RPGs. Some games do have a learning curve to them. If they do, then still try to make your game as easy as possible to learn and use. Always include a manual of text file with the basic controls and game rules. Nothing's worse when people get frustrated with your game and throw it into the recycle bin.
What makes a game great?
Just because a game can run and be fun doesn't make it great. Although it may be fun to play, it can also get boring really fast, or once you beat it you have no desire to play it again.
So what makes a game great?
1. Fun Factor
2. Replay value
3. Polish
Fun Factor
Let's face it. No matter how good your game looks, or how many special effects you pack into it, it's not going to amount to anything unless it's fun. Fun factor is that hook that keeps you coming back for more.
Before you release your game, have some friends test it out first and get feedback from them. If they say it sucks, don't take it personal. Instead, take it as an opportunity to improve upon your game. Nothing feels better than when someone says your game is awesome, not because they're your friend and don't want to hurt your feelings, but because they really feel that way.
Maybe you're friends will come up with some crazy ideas that you'd never even try to implement if you had a knife held to your throat. If that's the case, then don't push the idea off. You do have to be realistic when developing your game so that you'll be able to finish it. So instead of pushing the idea completely off into the gutter, try to do what you can with it. Maybe tone it down a bit to see if you can fit even a piece of that into your game to make it better. Just do what you can. Every little improvement helps.
Replay Value
If someone beats your game, will they delete it and never have the thought of playing it again ever cross their mind? If so, then your game needs some replay value. Replay value is how fun it is to play to game over and over. Give your game a longer lifespan by adding some of this.
There are many ways to increase the replay value of your game. Some maybe you'll be able to come up with, but I have some ideas if you can't think of any.
- Add a score keeper. People always have a reason to come back to your game if they can beat their old score, or top someone else's.
- Add some secrets to give the player a reason to come back and find them.
- Give your game more depth. What does this mean? It basically means adding more things to do and places to go. For example, if you are making a platform game, add different routes through the level. So if the player beats the level, it doesn't mean he's seen everything. He can always come back and take a different route and it'd feel different like another level to explore.
Polish
This may not seem a necessity, but this is one of the most important parts of a game. Polish gives your game presentation. It makes it feel professional instead of amateur. It gives your game that great first impression that makes players want to come back for more.
Scenario: It's the middle of the night. You are making the final additions to complete your game. Once you finish it, you upload it and submit it to as many game sites as you can. You post it on as many game and programming forums as you can. Then fatigue sets in and you hit the sack. When you wake up in the morning and read the forums, it's nothing but complaints about how your game sucks or that it doesn't run.
Don't let this happen to you.
If you finish your game, always spend time to go back and make it better. Because most of the time the first version of a completed game is pretty lackluster and mediocre at best. It's like writing a story or a research paper. You start with a rough draft, and then you get feedback from friends, fix the spelling and grammar errors, make the noted changes, and then release the final draft. Developing a game is no different. You're first release (often called the beta version) is your rough draft. You should never officially release your game while it's in this stage. Fix all the bugs you find, make it as user friendly as you can. Polish the graphics and try to make everything look professional. Make sure to get some feedback and fix everything that anybody might complain about. Because if something can go wrong, chances are it will to at least someone.
Remember a little game QB called Wetspot 2? Oh yeah, it's been hailed as the greatest QB game of all time. Well, what made it so great? Let's see what the developer, Angelo Mottola, had to say about that:
"Good gameplay and polishness. I put lots of effort in the small details, and that's what makes games good games. Of course by polishness I also mean bugfree: I spent several months just for the beta test phase, to ensure the game had no bugs when I officially released it... Even today I've never heard a person complaining about the game stability."
Source: QB Express: Issue #5: "Piptol Meets... Angelo Mottola"
Wow! He spent several months polishing it and fixing bugs before he released it. Learn from his example. Wetspot 2 wouldn't have been as great if it was buggy and only ran on half the computers that played it.
Conclusion
Anyone can make a game, but only a few achieve to make a great game. Your game must run well, and it must be user friendly to those who play it. If you're not going to be the only one who plays your game, then you better test the hell out of it. Get some friends or people over the internet to test it and give you feedback. Always improve your game when you have the time. Fun factor, replay value, and polish make a game great. Many games suffer from a lack of these three important factors. Don't let your game suffer from lack of polish. Always spend some time to make your game better after you finish it.
Even if you're a beginner and new to programming, or an expert guru, implementing these concepts and factors into your game will improve it no matter what level of programming you are on.
Visit Joe King's website, Delta Code.
Eternal Journey Preview
Written by SmithcoSoft
This article is to explain to the community in more detail than ever before what Eternal Journey is all about. I will break down several aspects of the game including the battle system, character development, and items / equipment in the passages below.
Battle System
The battle system is based on SNES turn based RPGs. With that I mean when you encounter an enemy (or enemies) you will be taken to the battle screen where you will combat the opponents. The system uses an active time battle technique so there is no pausing of the battle when you are accessing menus and choosing commands. This means that the longer you take to choose commands for your party the more time your enemies will have to inflict damage on you.
This game will be more difficult than traditional RPGs in that the battles will be harder and longer, requiring a bit more skill and strategy than just : attack : attack : attack: heal : attack . . . and so on. There will be skills and magic in place to fortify the party, to weaken the enemies, as well as an elemental aspect. This elemental aspect also adds to the strategy. It would be wise to direct specific attacks depending on your strengths and weaknesses and your enemies� strengths and weaknesses. For example if one of your magic users has trained for fire attacks it might be a good idea to have another character train to enhance those effects. If you can weaken an enemy against fire then your magic will do significantly more damage. In the same regard if you are fighting an enemy that does fire damage you would want to fortify you party�s fire defense. There are skills and magic for every aspect of combat you could probably think of and your opponents will take advantage of this, even if you don�t.
To balance the Fighting vs Storyline and Exploring you will encounter less enemies than your standard RPG as well. This is accomplished by using a timer based encounter system. Say you get attacked, after the battle is over you will have a set length of time (depending on the enemy population and encounter rate in the current region) before you are able to get attacked again, giving you time to explore and enjoy the storyline and environment as opposed to getting in battles every few steps in a pure random encounter. You will still spend significant time in battles, but the game is setup so that the battles are mor involved and there is more time in between encounters to play the rest of the game.
Character Development:
The character and party development in Eternal Journey is fairly robust. As of now there are over 40 classes planned and each with their own distinctive traits. Many of which are upgradeable to advanced versions of that class. For example: Say you start off as a Blade Apprentice Class Once you hit a certain level you will have the option to advance to Blade Master, which gets better stat boosts and more abilities. You Will learn about new and advanced classes in the game as you meet the prerequisites for that class. Lets say just as an example Blade Master requires you have a character level of at least 40 and a Blade Apprentice level of at least 20 (I will explain the level system in a bit). Until you meet those requirement you won�t even know the class exists or what its about. There are a few setbacks for changing classes so you should be prepared to choose wisely, I�ll explain. Once you change classes you must remain with that class for a set number of levels before you are allowed to train for another. Also, while you will keep ALL skills and abilities (besides special abilities) you learn throughout the course of the game, once you change classes those previously learned skills, while useable, will no longer be able to level up. The classes also have �bonus� stats which you will lose when you switch classes, however you will retain all base stats you gained from the class while it was active.
Now let me tell you about the leveling system. You have 3 separate leveling types to keep track of.
First you have your Base Character Level, affected by this are pre-determined stats that your character will develop throughout the game, each time your character levels up those stats will increase (generally at least 1 point in each stat).
Second you have the Class Level, this is a more focused level system designed to hone your character�s stats toward a specific field. Depending on what class you are using you will gain different stat increases. Warrior type classes for example will focus more on strength and defense, while magic classes will generally focus more on intelligence and magic defense. Increasing your class level will also give you access to additional special abilities and skills.
Third you have the skill and magic levels. The simplest way to explain this is � the more you use it, the more powerful it will become. Your character will be able to develop exactly how you want, by using the abilities you want to get better at you gain experience toward those abilities. So if you want to focus on attack damage you�ll want to attack often, or in the same respect if you want to focus on a specific physical attack skill, the more you use it the more powerful it becomes. Magic is similar but the difference here is as the magic advances in level it has the ability to spawn into new more advanced version of that ability. Lets say for example you have a fire spell you use quite often, eventually (assuming you are still the class you learned it with) you will learn a new advanced version of the spell. It may be more powerful or maybe it will be able to hit multiple enemies, this all depends on the spell and your class.
As you can see there are hundreds if not thousands of character combinations and possibilities. You can develop your party precisely how you want to. This gives a slightly unique experience for every player.
Items / Equipment / and Ailments
There is not a lot to say about Items. They are pretty standard, you use them to heal party members and increase stats. The only difference from most other RPGs is that items in Eternal Journey will be somewhat limited. You will find items on occasion and will be able to buy them, but they are expensive to buy and it is somewhat rare to find good items. So all I can say is use them sparingly.
Equipment in this game offers a wide variety of possibilities. First off Equipment can affect every aspect of your characters stats positively or negatively. Equipment can be found or bought from vendors, but they can also be created. By finding recipes (from doing quests, beating special enemies, or buying them(rare) you can find out what it takes to make rare and in most cases more powerful weapons, armor, or accessories. Once you find one of these recipes you must go out and find all of the parts listed before you take it to a smith to construct. Once you have all the parts it will still cost you money to have it made. This can provide a fun and productive way to explore the EJ world, look at each recipe list as a quest of its own, a quest to find all of the parts and create a powerful weapon or perhaps a beefy piece of armor.
There are to date (August 25 2007) a total of 38 different Ailments you can receive from various sources in Eternal Journey, these sources being Equipment, Enemies, Items, and Classes. Some of these Ailments are beneficial, most are negative, and a couple can be both, depending on the situation. Equipment can either prevent you from contracting an Ailment or give you the constant status of it. Items are primarily used to cure these Ailments. And many enemies will be capable of inflicting wounds other than damage. Some Classes are immune to certain ailments, others have the constant status.
Well I hoped you enjoyed this read, and that it was informative. Perhaps it will spark some more interest in this ongoing project. If you have anything you want to contribute, or perhaps just discuss the development please go to http://forums.smithcosoft.com Comments, criticisms, even a slap in the face is welcome =P But seriously, I would like to encourage people to give suggestions to the development, there is always room for improvement, no matter how much time you put into a game.
By SSC - SmithcoSoft Creations 2007
http://smithcosoft.com
http://forums.smithcosoft.com
ssc@smithcosoft.com
Monthly Awards
Written by Pete
Site of the Month
Dav's QBasic Site
http://www.qbasicnews.com/dav/
Webmaster: Dav

After three years of absence, Dav has brought back his QBasic site with a spiffy new design and all of the former content!
The site has many of Dav's own programs as well as a discussion board. Its best feature, however, is the QuickBasic Knowledge Base, a collection of 1650 public domain help documents about QB programming, from Microsoft's old QB support hotline. Dav created a simple search engine and has made all of these documents available to us as a resource.
For its great collection of content and the QuickBasic Knowledge Base, Dav's QBasic Site is the QB Express site of the month!
Programmer of the Month
DaBooda
http://dabooda.789mb.com
This month, DaBooda released the first version of the DaBooda Old School Library for FreeBasic, a 2D games programming library that provides "a structure for pgorammers to create retro 2d games, much like the older console systems (ie: Super Nintendo and Sega Genesis)." And it is a great library indeed (and very fast)!
The screenshot to the left features parallax scrolling with multiple levels of backgrounds, and each and every object you see on it is a different sprite. And this tech demo runs at a ridiculously speedy framerate, even on older/slower systems. The DaBooda Old School Library is really a testament to what quality coding can achieve in FB.
The library is available on DaBooda's site, which includes a ton of documentation, as well as a few tutorials and a message forum for support. You can also download demos of programs that make use of D.O.S.L. Definitely go check it out -- this could make your FB game programming dreams finally become a reality.
For creating a kick-ass game programming libarary, DaBooda is the QB Express Programmer of the Month.
Email us at qbexpress@gmail.com with your nominations for the monthly awards.
Time Based Motion & Collision Detection
Written by RubyNL
Part 1 � Time based motion
Introduction
Have you ever played a very old game to discover that it runs so ridiculously fast that you cant play it? Wondered why it happened? I will tell you that and how to avoid that your game acts like that on fast computers. The reason why it happens is that the game is made for a slower computer then yours. The fps gets too high when it�s running on faster computers. Don�t worry, there are some ways around this. The first way is to limit the max fps. This is good, but you need to be sure that every computer is fast enough to run it at that framerate(or, better, a higher framerate). When you execute it at slower computers, you get an slow and inconsequent fps. To avoid this you can heavily optimize your program, or you can use time based motion instead of limiting the fps. This won�t get you a higher fps on slow computers, but makes sure that your movement is �fitting� with the fps. That means, when a fps is two times higher then another, the speed will be two times slower. The thing is: there are twice as many frames, so when the speed in every frame is half as high, the speed per second will be the same.
Using time based motion
When you�ve read the introduction, you know what time based motion is, but not how to use it. Here you can read that ;). First, you all know this formula, for moving an object in a straight line, right?
Xposition = Xposition + Xspeed
Yposition = Yposition + Yspeed
Now, when we do time based motion, we do this :
Xposition = Xposition + Xspeed * time
Yposition = Yposition + Yspeed * time
Where time is the time that is passed since last frame. When you want to use this formula in your program, you have to give up the speed in pixels per second, instead of pixels per frame. When you�re having problems with low speeds, use either fixed point math or floating point math. This is needed, because if you run your game at fast computer which run your game at let�s say 100 fps(this is very high but for a simple game good possible), and you have an object that moves at 50 frames per second. That makes 50/100=0.5 pixels movement per frame. That doesn�t work when you use integers, cause they work only with whole numbers. 0.5 is for an integer the same as 0. The solution? One: Use floating point(singles). Two: Use fixed point math. That means: multiply the number(0.5 here) by a value, for example 10. Then you have 5. Later, when you calculate the position, integer divide by 10 again. The bigger the number you multiply and divide with, the bigger the accuracy. For instance, when you multiply by ten, only the first number behind the dot is saved. When you use 100, the first 2 numbers after the dot. Of course you can use all numbers instead of ten�s and hundred�s, you can choose every number you want. One thing to keep in mind is that the final number (here: 0.5 x 10 = 5) may not exceed 32767. So when you have coordinates between 0 and 319, you can multiply with hundred.
To know what value to give to timer:
Timegone! = (Lasttimer! - TIMER)
Where Lasttimer! Is the value of TIMER in the past frame(You have to save it in an variable).
How a time based motion engine should look
Here�s some pseudo code for a time based motion engine.
Begin of loop

  Calculate how much time is gone since the last timer save

  Save the value of the timer

  Draw everything

  End of loop
Easy, huh?
Problems and possible solutions
When you use time based motion you can face some serious problems. The main one is when you have a TIMER with not enough accuracy. The solution to this is to use Freebasic. This has a much better timer. With Qbasic, it is hard (or not possible) to get more accuracy timing.
You get another problem when you want to run your game at very slow computers. When the frame rate is low, the speed in pixels per frame is high. This is not good, since you can�t control and see everything well when everything moves too much between two frames. The solution is just to set a maximum to the time difference. What I mean is that you say: if the difference in time between two frames is too high, act like the difference in time is the maximum. By carefully choosing the maximum number you can get good(but slower, because you don�t use time based motion correctly) results.
A problem that I already faced, is the inverse: the speed per frame is very low due to the high framerate. I told you already that you should use floating point math or preferably fixed point math. When you multiply by hundred, and run at 100fps, a speed of 1 pixel per second is okay. And that is very slow. Anyway, when you�re still having troubles (I can�t imagine that, but okay), you can use long type variables and multiply and divide by a much bigger number, or just use floating point math(but that is much slower then integers or long integers).
Part 2 - Collision detection
Introduction
Collision detection in something very important in almost all action games. It is VERY annoying when the collision detection sucks (that means that your bullets are going straight through the enemies but they stay alive ;)). Collision detection is also fairly easy to do, if you know how to. I think this tutorial is an absolute must when you want to program an action/shooting game but you don�t know about collision detection ;).
Collision detection needs to be done:
To check if the hero/controlled object hits anything,
To check if your bullets/projectiles hit an enemy or destroyable object
Collision needs to be done every frame to make sure that objects with an high speed miss another object. Another solution is to do a line check. You check if the line between the old object position and the new one intersects any other lines from objects. This is quite hard to do(I actually have no clue how to ;) and you can do it either in this way, so I�ll learn you only this one.
That is for a simple game. For a complex game, you need to check much more (about anything that is moving or can move). I will teach you three kinds of collision detection:
- (Non-rotated) square objects
- Spheres
- Per pixel detection
It�s all simple, except the square-sphere collision detection which is a bit tricky. I�ll start with squares because they are the simplest.
Collision detection of squares and spheres
Square objects
Point-square collisions
Point-square collisions are really easy to check. Squares are defined of two points(like you draw them with line):
A point is in the square (so there is a collision) if its x coordinate is between x1 and x2 AND if its y coordinate is between y1 and y2.
To check if the x-coordinate is between x1 and x2, just use:
IF pointx > squarex1 AND pointx < squarex2 THEN
Where pointx is of course the x coordinate of the point to check and squarex1 and squarex2 are the coordinates of the two points where the square is made from.
This is exactly the same for the y coordinate. When you have a point at (pointx, pointy) and a square defined by (dqaurex1, squarey1)-(squarex2, sqaurey2), you can do point-square collision detection with:
IF pointx => squarex1 AND pointx =< squarex2 AND pointy => squarey1 AND pointy =< squarey2 THEN ...
Well, then you have an intersection :P. By the way:
Be sure that squarex2 > squarex1 and squarey2 > squarey1.
Else, the intersection messes up (it will never happen). You can swap the values if squarex1 > squarex2 or squarey1 > squarey2. Code for this is:
IF squarex1 > squarex2 THEN SWAP squarex1, squarex2
IF squarey1 > squarey2 THEN SWAP squarey1, squarey2
When I think about it: this is very much like the classic way of keeping a moving pixel in the screen. That is: Do separate a check for the x-axis and the y-axis. When it is out of the screen, invert the horizontal or vertical speed of the pixel.
IF pointx > screenxlimit OR pointx < 0 THEN xspeed = -xspeed
IF pointy > screenylimit OR pointy < 0 THEN yspeed = -yspeed
That should do it. Of course you can replace screenxlimit, screenylimit and the two 0�s by variables that represents the edge of a square or a viewing screen (that could be another size then the real screen).
Square-square collisions
Square-square collisions are almost as easy as point-square intersections. First, you need to get four points instead of two for the square. We will check all this points for intersections.
This image will show you how to get these four points(point A-D in the image) from two points(point A & D in the image):
pointax = squarex1
pointay = squarey1
pointbx = squarex2
etc.
Now you just check for each point (A-D) if it�s in the square. Just do a point-square collision. If one of the four points is in the square, there is a collision. That was all about it for square objects. Let�s move on the round objects!
Spheres
Point-sphere collision
Sphere objects are checked in a simple, but complete different way then squares. Instead of checking if a point is between two axes, you need to calculate the distance. But first assume this object, a nice UFO:

To do collision detection for a round object, you need to know its radius:
Well, when you need the radius, all you further need to know to check if a point is its distance to the center of the sphere. That is done like this:
distance = SQR((pointx - spherex) ^ 2 + (pointy - spherey) ^ 2)
(Pointx, spherex, pointy and spherey can all be swapped in the equation, don�t worry about that) When the distance is less then the radius of the sphere, there is a collision.
IF distance =< radius THEN ...
But, as some of you may know: a square root(SQR, used to calculate the distance, has nothing to do with squares ;)) is very slow. We can optimize this by squaring both the distance and the radius. It is also faster to multiply(x * x) then to square(x ^ 2), and be sure to precalculate (r * r) for all the spheres with a different radius. So we get:
r2 = r * r
xd = (pointx - spherex)
yd = (pointy - spherey)
distance = xd * xd + yd * yd
IF distance < r2 THEN ...
That is fully optimized point-sphere collision detection. On to the sphere-sphere collision detection. It�s almost the same as point-sphere collision detection.
Tip: I am teaching you how to do a collision detection for perfect round spheres, but this works for ellipses also. You just divide or multiply xd or yd by a number. You can set the x/y ratio also with the qb command CIRCLE.
Experiment a bit with it, this is handy when you have to corporate ellipses in your sprites.
Sphere-sphere collision
Sphere-sphere collision is in fact the same as a point-sphere collision. The only difference is that the distance between the centers of the spheres is compared with the sum of the radius of the two spheres. If you don�t understand, this picture will show you:
So, together with the optimizations from the point-sphere collision, that makes (I�ve token sphere A and sphere B):
r2A = rA * rA
r2B = rB * rB
xd = (sphereAx - sphereBx)
yd = (sphereAx - sphereBx)
IF xd * xd + yd * yd < r2A � r2B THEN ...
This is it. When you understand this, you can go on to the tricky square-sphere collision detection.
Square-sphere collision
Square-sphere collision is tricky because there can be two types of collision. The first is what I call a straight intersection, where the sphere �hits� the square on a side. Then you have the �corner� intersection, where the sphere hits a corner of the square.
To know for which type of collision we have to check, I first look where the center of the sphere is. This is a picture from the point-square check:

Consider the red area as the square. If the center of the sphere is in the red area, there has to be an collision. If the center is in the yellow area, we have to check for a straight intersection. If the center is in the white area, we check for a corner intersection. But before we check, we decide in which area the center of the sphere is.
I assume a sphere (spherex, spherey, radius) and a square(squarex1, squarey1)-(squarex2, squarey2).
For this I made a table. I assign 1 to a variable called xc if the center of the sphere is less then squarex1. If the center is between squarex1 and squarex2 I assign 2 to it, and else(it is more then squarex2) 3. For y-axis I do the same. Code:
IF spherex < squarex1 THEN
  xc = 1
ELSEIF spherex < squarex2 THEN
  xc = 2
ELSE
  xc = 3
END IF

IF spherey < squarey1 THEN
  yc = 1
ELSEIF spherey < squarey2 THEN
  yc = 2
ELSE
  yc = 3
END IF
Then we lookup what to do with this table:
A corner intersection check is just a normal point-sphere collision detection. As point you take the closest corner point and as sphere the sphere where you are doing the check on.
A straight intersection check is the �straight� distance between the center and an edge. (I referred to the edge as �axis� in the table). A picture and some code for this:
distance = ABS(spherex � squarex1)
Note: When you use ellipses instead of circles, be sure that you divide or multiply the x/y coordinate here too.
The code for a square-sphere collision detection(after you assigned values for xc and yc):
(This code is only to show you how it should be used and interpreted: I wrote it down from my head, so there may be some bugs)
intersection = 0
IF xc = 1 THEN
  IF yc = 1 THEN intersection = cornercheck(squarex1, squarey1, spherex, spherey, radius)
  IF yc = 2 THEN intersection = straightcheck(squareyx1, spherex, radius)
  IF yc = 3 THEN intersection = cornercheck(squarex1, squarey2, spherex, spherey, radius)
ELSEIF xc = 2 THEN
  IF yc = 1 THEN intersection = straightcheck(spherey, squarey1, radius)
  IF yc = 2 THEN intersection = 1
  IF yc = 3 THEN intersection = straightcheck(spherey, squarey2, radius)
ELSE
  IF yc = 1 THEN intersection = cornercheck(squarex2, squarey1, spherex, spherey, radius)
  IF yc = 2 THEN straightcheck(squareyx2, spherex, radius)
  IF yc = 3 THEN intersection = cornercheck(squarex2, squarey2, spherex, spherey, radius)
END IF

FUNCTION cornercheck(pointx, pointy, spherex, spherey, radius)
xd = (pointx - spherex)
yd = (pointy - spherey)
r2 = radius * radius
distance = (xd * xd + yd * yd)
IF distance <= r2 THEN cornercheck = 1 ELSE cornercheck = 0
END FUNCTION

FUNCTION straightcheck(edgec, spherec, radius)
straightdistance = ABS(spherec - edgec)
IF straightdistance => radius THEN straightcheck = 1 ELSE straightcheck = 0
END FUNCTION
Optimization trick:
When you have a TYPE specially for a circle, consider adding r2 to it: the square of the radius:
TYPE sphere
  Centerx as integer
  Centery as integer
  Radius as integer
  R2 as integer
End type
When you do this, r2 doesn�t have to be calculated during the collision detection.
How to corporate spheres and squares into sprites
I first assumed that all the sprites you used are:
- Just circles and squares drawed with qb�s line and circle or
- Perfect round or square.
I thought that people may want other shapes as well :P. So here is a lil text for when you have a sprite that is not quite round or square but you don�t want to use per pixel checking.

Let�s start with this paddle, I made for possible use in a Pong-like game:
This is not a sphere, but neither a square. To still have a correct collision, we split it up into two spheres and one square:
I�ve got to tell you one thing on collision detection when you want to bounce a ball on some object. You might want to check every position of the ball where it current is, and when it has a collision, bounce it. This is wrong. What you need to do is bounce actually before there is an collision. So you need to check what the new position would be if there wouldn�t be a collision. If there is a collision at THAT place, then bounce. So actually the ball never has a collision because it bounces before it has a collision. This may sound stupid, but when you check after you updated the position, and there is a collision and you draw it, you draw the object over another(while it should bounce off it).
Here is another sprite:

We can split this shape up into this:

You see that it impossible to exactly fit the sprite in the spheres and squares without using a huge amount of squares/spheres. You can give it your best try, or you can use pixel perfect manner, which is a bit harder to use.
Pixel perfect collision detection
Pixel perfect collision detection allows you to use complex sprites and still have precise collision detection. This manner is called �pixel perfect� because you have to check for each pixel. This could make it slow, but when you optimize it well it will be worth it. There are two different manner that I�ll explain to you. The first is based on colour checking.
Colour checking
I will directly introduce the downside of colour checking: you have to divide your palette in different �areas�. For example:
0-127 Background colours
127-150 Character colours
150-200 Bullets and booby traps colours
200-255 Object colours
When you draw everything to your buffer in a fixed sequence(background, powerups, enemies), you draw everything except the character. Instead of just drawing it, you check the colour of every pixel before you over paint it.
Then you lookup what to do with that colour. For instance (using the table above, of course you could make your own ;)), when a colour is 0-127 you don�t have to anything, because that are background colours. But, when a colour is from 150 to 200, you know that the hero is hit by a bullet or booby trap. This is the essence of the colour checking method. If you want, you could make a lookup table for every colour where is saved what to do with that single colour (subtract a life, game over, extra health, etc). This is the easy variant of pixel perfect collision detection.
Array checking
Array checking is a good method when you want to use more colours in your sprite, instead of having a limited amount of colours that you can use for the background, your character, etc. Instead of painting except the hero, you paint the hero, and keep an array of points which will be checked for collision. Now when you paint the other sprites, you check if they are on any of the points in the array. This is all about array checking. It sounds simple, but it is actually a lot of work to code.
Some notes on optimization
The pixel perfect manner is slow when you use the array checking method. To make it faster you do the �bounding box� optimization like I told you above. Checking for one box is faster then to check for all pixels of the hero. This shouldn�t be done for each pixel of the sprite, so don�t use a point-square collision detection but a square-square collision detection. If there is a collision, then check for each pixel if it is one of the coordinates stored in the array.
A bounding box is also useful if you have a sprite that consists out of more then tree pieces(spheres or squares).
Also, you can get the whole thing faster, always use as much integers as possible for everything! When you�re getting overflow errors, try too use LONG type variables. This is very much faster then singles. Singles are only needed when you need much accuracy. Examples are ray tracers, fractals and sometimes for speeds(very slow rolling balls, less then one pixel per frame).
Well, this was all I know about collision detection. Succes with using it, and I hope this tutorial helped you. Else, mail me! For other tutorials, check out my website: http://members.lycos.nl/rubynl.
RubyNL
basicallybest@live.nl
Download this tutorial: Time_based_motion_&_Collision_detection.doc or read it online.
So Biff wants to have a high score table in his game
Written by Lachie Dazdarian (September, 2007)
Introduction
On more than one occasion I was inquired by a programming newbie about a set of routines that load a high score table from an external file, input a new high score properly, and then save the modified high scores table.
Using the same set of routines for high scores since the days of Ball Blazing Fantasy, I decided to write a tutorial on them and implement some lacking flexibility (plus few fixes) there, something that was long needed to be done but wasn't due the fact the routines did their job perfectly.
The tutorial will also point you out to some useful (for high scores table managing) additional routines, like the name inputting and file encryption ones, not written by me.
Let's do it!
It's fairly obvious we'll need two separate subroutines, one for loading/reading our high score table, and one for writing/modifying it.
We'll start with loading/reading of a high score table, as that part is easier and a logical start.
The subroutine for reading a high score table should work relatively simple. It will open a file which contains name and score entries, storing them in appropriate variables and then printing them on the screen, this part being most dependant on the developer's wishes and needs (the method of printing, position of the high score table, its formatting, etc.).
First, we should create a text file containing our name and score entries. Create a file named high_scores.dat, open it with Notepad and input this:
#include "fbgfx.bi"
Using FB

const num_of_entries = 10
FRED
10000
BILL
9000
SARAH
8000
BOB
7000
RED
6000
SUE
5000
DAVID
4000
GREG
3000
TIM
2000
GEORGE
1000
It contains 10 high score entries, formatted with name followed by the accompanying score. I find this formatting the most suitable for editing, although you can pick one where all the names all listed first, and then followed by all the scores. Still, no important benefits from any type of these two formattings, so we'll work with the one I stared with.
This file will be used with the following ReadHighScore subroutine.
Let's start our main program with some needed initiation statements:
num_of_entries will flag the number of score entries (names or scores in the high score table), and should correspond with the number of entries in the high_score.dat file (not lines, but high score ENTRIES!).
We should now declare our subroutine with:
DECLARE SUB ReadHighScore (highscore_file AS STRING)
The highscore_file variable will flag the file you want for the ReadHighScore subroutine to open. Not necessary to declare the subroutine like this, but this adds some flexibility to it.
After this, we should declare the following variables:
DIM SHARED workpage AS INTEGER
DIM SHARED hname(num_of_entries) AS STRING
DIM SHARED hscore(num_of_entries) AS STRING
workpage variable is not related to this tutorial and will be used to swap screen work pages inside the loop where the high score table will be drawn.
hname array will hold the name entries, while hscore array will hold the score entries from the high score table.
Finally, let's initialize our screen and work/visible pages with:
SCREENRES 640, 480, 32, 2, GFX_ALPHA_PRIMITIVES+GFX_WINDOWED
SCREENSET 1, 0
Following this code we should place this:
ReadHighScore "high_scores.dat"
END

SUB ReadHighScore (highscore_file AS STRING)

END SUB
You can compile this code, but nothing will happen, as the ReadHighScore subroutine is empty. Let's fill it up!
We need to start it by opening the high_scores.dat file and reading the needed data from it. Please refer to FreeBASIC's OPEN statement for info on file opening in FreeBASIC if not familiar with it.
As we want to open the file using a FREE file handle, we need to dimension a variable that will hold this information and pass it into it. Use this code:
DIM free_filehandle AS INTEGER

free_filehandle = FreeFile
We should now open the high score file with:
OPEN highscore_file FOR INPUT AS #free_filehandle
After the file is opened for reading (FOR INPUT), let's use a for loop to retrieve all the data from it and store it in our hname and hscore variables:
FOR count_entry AS INTEGER = 1 TO num_of_entries
INPUT #free_filehandle, hname(count_entry)
INPUT #free_filehandle, hscore(count_entry)
' If the end of file is reached, exit the FOR loop.
IF EOF(free_filehandle) THEN EXIT FOR
NEXT count_entry
Note how the count_entry variable is used and how for each entry the name is stored FOLLOWED by the accompanying score. hname(1) will flag the name with the top score, while hscore(1) the top score. hname(num_of_entries) will flag the name with the lowest score, while hscore(num_of_entries) the lowest score in the high score table.
Don't forget now to close the file with:
CLOSE #free_filehandle
All we need now is a loop that will display all these names and scores, nicely arranged in a table.
DO

screenlock
screenset workpage, workpage xor 1

LINE (0,0)-(639,479), RGBA(0, 0, 0, 255), BF

Draw String (285, 120), "TOP SCORES", RGBA(255,255, 255, 255)

FOR count_entry AS INTEGER = 1 TO num_of_entries
Draw String (270, 140 + count_entry * 12), hname(count_entry), RGBA(255,255, 255, 250-count_entry*10)
Draw String (340, 140 + (count_entry) * 12), hscore(count_entry), RGBA(255,255, 255, 250-count_entry*10)
NEXT count_entry

Draw String (245, 400), "Press ESCAPE to exit", RGBA(255,255, 255, 220)

workpage xor = 1
screenunlock

SLEEP 10

LOOP UNTIL MULTIKEY(SC_ESCAPE)
A simple DO...LOOP that ends when the user presses ESCAPE.
I used Draw String to print the names and the scores. Another FOR loop is used to loop through the name and score entries, and to display them lower score under the next higher one (note how the Y position of the text to display is connected with the count_entry variable - increase 12 to get more space between scores vertically). I also used a small "trick" to display each next score with lower translucency (last parameter in the RGBA function).
After placing all this code in the ReadHighScore subroutine, you can compile it and the desired result will appear on the screen.
The entire code so far: codever1.txt
Now when we are done with the easy part of the problem, let's move onto writing new entries into our high score table.
I construced the WriteHighScore subroutine like this:
SUB WriteHighScore (highscore_file AS STRING, users_score AS INTEGER)
Which means it will be called with a high scores table file and a score we want to input. If this score evaluates to be lower that the lowest in the high score table, no code will be executed.
This subroutine should start with the following code:
DIM free_filehandle AS INTEGER

DIM startwrite AS INTEGER

free_filehandle = FreeFile

OPEN highscore_file FOR INPUT AS #free_filehandle

FOR count_entry AS INTEGER = 1 TO num_of_entries
INPUT #free_filehandle, hname(count_entry)
INPUT #free_filehandle, hscore(count_entry)
' If the end of file is reached, exit the FOR loop.
IF EOF(free_filehandle) THEN EXIT FOR
NEXT count_entry

CLOSE #free_filehandle
As you see it starts as the ReadHighScore subroutine. In order to evaluate the user's score and alter the very high score table, we need to open the file containing our high score entries and store them in appropriated variables. startwrite variable will flag where the new entry is to be placed inside the high score table (on which position).
The code that follows should be opened with an IF clause that will execute the code inside it only if the user's score is higher than the lowest score in the high score table (naturally):
IF users_score > hscore(num_of_entries) THEN

FOR check_score AS INTEGER = 1 TO num_of_entries

IF users_score > hscore(check_score) THEN
InputName
' Record the position where the new score is
' to placed and exit FOR loop.
startwrite = check_score
EXIT FOR
END IF

NEXT check_score
The FOR loop "goes through" the high score entries from the highest to the lowest, and when an entry with a lower score is found this is the place (flagged with startwrite and check_score) where our new entry will be recorded. For example, in the first loop the program checks for hscore(1) - the top score in the high score table. If the user's score ends up being higher than it, it's obvious the user's score is the new top score and startwrite needs to be 1.
InputName is a subroutine we'll create later, and inside it the user will be...inputting his name. :P
What follows is the "nexus" of our routine, the code that places the new high score entry on the proper position, and bumps all the lower ones one position down.
Check the following code:
IF startwrite = num_of_entries THEN
hscore(startwrite) = users_score
hname(startwrite) = playername
ELSE

FOR write_pos AS INTEGER = (num_of_entries - 1) TO startwrite STEP -1
hscore(write_pos + 1) = hscore(write_pos)
hname(write_pos + 1) = hname(write_pos)
NEXT write_pos
hscore(startwrite) = users_score
hname(startwrite) = playername
END IF
First condition checks if the new entry is the lowest in the high score table. If this is the case, we don't need to bump down any entries with a lower score as there are none, but only replace the lowest score entry with the new one.
If this is NOT the case, a FOR loop is executed which loops from the lowest high score entry to the new high score entry (flagged with startwrite), meaning, from bottom to top.
For example, if our high score table has 10 entries and the new entry needs to be placed on position 5, the loop goes from 9 to 5. When write_pos is 9, values from hscore(9) and hname(9) are passed to hscore(9+1) and hname(9+1). When write_pos is 8, values from hscore(8) and hname(8) are passed to hscore(8+1) and hname(8+1). And so on.
After the FOR loop we need to input the new entry on its appropriate position (flagged with startwrite), new entry being set with users_score and playername, where playername will be inputted inside the InputName sub.
The last thing in the WriteHighScore sub we need to do is to store the new high score entries back to file:
free_filehandle = FreeFile

OPEN highscore_file FOR OUTPUT AS free_filehandle
FOR count_entry AS INTEGER = 1 TO num_of_entries
PRINT #free_filehandle, hname(count_entry)
PRINT #free_filehandle, hscore(count_entry)
NEXT count_entry
CLOSE free_filehandle
Note how FOR OUTPUT is used and PRINT for writing data into external files.
After this I placed a ReadHighScore call and closed with END IF, as I find it good that a new high score table should display after a new entry has been inputted in it.
All we need now is to create the InputName sub like this:
SUB InputName

screenset workpage, workpage xor 1
SCREENSET 0,0
LINE (0,0)-(639,479), RGBA(0, 0, 0, 255), BF
LOCATE 12, 17
INPUT ; "Please input your name: ", playername

END SUB
Of course, this will look totally different in your game. Perhaps you'll ask the player to input his/her name on a different place in the game (like when he/she starts a new game). Just have in mind you need one.
To test the routines just place...
ReadHighScore "high_scores.dat"
WriteHighScore "high_scores.dat", 4500
END
...after first SCREENSET (outside subroutines). Change the second parameter with WriteHighScore call to input different scores on different locations in the high score table. I'm sure you are aware that when calling WriteHighScore the second parameter mustn't be hard-coded with a static number, but with a variable in which you'll store player's score, whatever that may be in your case (ie. Player.Score).
The entire code so far: codever2.txt
Download the source compiled with the high score file: highscore_example_1.zip
What's next?
The only other things I wish to share regarding this issue is related to high score encryption and better name inputting routine. As both routines I'm using are not by me, I will only brush off them and provide them in an example program you can easily use for your own needs.
Enycrption is done using two functions, neoENCpass and neodeENCpass. One for encryption and one for decryption. They are called with a string (high score entry string in our case) and password, password being any string you choose and the same must be used for enycrpting and descrypting (of course).
Just after you retreive an string entry from a file you decrypt it like this:
INPUT #free_filehandle, hname(count_entry)
neoENCdepass SADD(hname(count_entry)), LEN(hname(count_entry)), "yourpass"
With hscore entries, being INTEGER, we need to use a temporary STRING variable which has to be decrypted and then pass its value to hscore.
The only annoying feature of this method is the fact you need a separate bas file to encrypt/decrypt your high score files, as the routines inside a project will work only if the high score file is previously encrypted. I provided a small program which does this encrypting for you. It is recommended you keep a backup of your high score file in a separate folder (I also provided this in the zip downloads), even if not encrypting it.
Instead of encryption you can use BINARY files, which I don't know how to use at this moment (don�t have time to learn; I�m submitting the tutorial in the nick of time), and which also AREN'T the same as ENCRYPTION. Encrypted files people can only decrypt if they know the password (well, most people), while BINARIES can be read by anyone having your source. Ah yes, when providing your source code to public be sure to change the encryption passwords inside it.
Anyway, you might not need or prefer encryption at all. But I personally like having my high score/script files encrypted so than not every Dick and Tom can change/read them with Notepad. Unencrypted high scores might kill the challenge to beat them with some players.
Name inputting routine I won't go describing as that's irrelevant. You have to code, read it. It's much better than plain INPUT and allows you to limit the number of characters in the name. The routine was done by Ryan Szrama, and all thanks go to him.
Download the extended example (with encryption and better name inputting): highscore_example_2.zip
And that's if for this tutorial.
Until next time, have fun!
A tutorial written by Lachie D. (lachie13@yahoo.com ; The Maker Of Stuff)
Download a copy of this tutorial: Managing_A_High_Score_Table.zip
The Swirl Effect
Written by RubyNL
The swirl effect is some really cool effect that I made from a small program from Jesse Regier aka solus. The original program can be found here: swirly.bas or here. When I saw that program I found it a cool idea and I decided to work it out further. And, when I optimized it and made a moving swirl, I decided to make a tutorial for it because it was not hard to make at all.
The basic equations � Finding the angle of rotation
We need to rotate some points, but only the points that within the circle with radius R.
Thus, we first need to know if the current point is in the circle, else you don�t have to rotate it at all. After that we can start to find the angle that the point needs to be rotated. So to check if the current point is in the circle: We first need to check in a loop for all points from �radius to radius if the current point is within the circle with radius R. We do that with a square root. (But that is so slow� Yes it is, but we�re going to optimize this later, so hold on!), like this:
FOR x = -r TO r
FOR y = -r TO r
distance = SQR(x ^ 2 + y ^ 2)
IF distance =< r THEN
�rotate the point
END IF
NEXT
NEXT
OK, that�s done. Now we need to have the equation to rotate the point. We have one clue: the further the point is from the centre the less it is rotated. There is an equation that is less when the distance from the centre is more(it is inversely proportional):
((r � distance) / r)
Ok, the only thing we have to do is finding the angle of rotation, that�s really simple, just multiply the last equation by the amount of rotation. The amount of rotation is
x * 2 * pi
Two times pi = 360 degrees in radians, so if x = 1, the swirl wraps around itself 1 time. And if x = 2, the swirl wraps itself around two times, and that�s also like that for each value of x. So to make a animating swirl, you just add some value to x, and if x reaches the max-wrapping-around (I use one for that).
So now we have(notice I replaced 2 * pi with 6.28, that�s two times pi):
angle! = x * 6.28 * ((r � distance) / r)
So, remember that, we gonna need it later!
The basic equations � Rotating the point by angle!
Now we need to rotate the point, this is not so hard, you only need the inverse rotation formula:
rotatedx = x * COS(angle!) - y * SIN(angle!)
rotatedy = x * SIN(angle!) + y * COS(angle!)
The inverse rotation formula is needed when you want to show something rotated on the screen. The thought behind it is that you don�t rotate every point from the picture and show them all on the screen, but do the inverse: rotate every pixel on the screen and check on which pixel from the picture they �fall�. So, when you use all you�ve learned you should be able to make something like this(if you can�t, then look at it closely):
Notes:
- I replaced the x from last equation by a!, to avoid confusion.
- I use a XOR background, by XORring rotatedx by rotatedy and use it as color, if you want a swirl over some picture you just have to replace the �rotatedx XOR rotatedy� by �texture(rotatedx, rotatedy)� or, depending on how you saved your original image, PEEK to it.
SCREEN 13  'Screen mode 13
DEFINT A-Z  'For speed
CONST r = 100
angleplus! = .05
DO
  a! = a! + angleplus!
  If a! => 1 OR a! =< -1 THEN angleplus! = -angleplus!
  FOR x = -r TO r
    FOR y = -r TO r
      distance = SQR(x ^ 2 + y ^ 2)
      IF distance =< r then
        angle! = a! * 6.28 * ((r - distance) / r)
        rotatedx = x * COS(angle!) - y * SIN(angle!)
        rotatedy = x * SIN(angle!) + y * COS(angle!)
        PSET (x,y), rotatedx XOR rotatedy
      END IF
    NEXT
  NEXT
LOOP
That brings us to another problem: the swirl is at the top left, you can see only � of it! This is easy to fix, just add cx(center x) to x and cy(center y) to y, and cx to rotatedx and cy to rotatedy, all in the PSET.
So from:
PSET (x, y), rotatedx XOR rotatedy
To:
PSET (x + cx, y + cy), (rotatedx + cx) XOR (rotatedy + cy)
Now you can make your own moving swirl, but it�s still very slow because of the square root and the COS and SIN�s. So we have to make a few lookup tables.
The LUT�s
The first thing to optimize is the sines and cosines that are very slow. We can use LUT�s (Look Up Tables)! To make a COS/SIN LUT with fixed point math, we have to define how large it has to be. You can easily define the new range by doing a FOR�NEXT loop(in the example I used x as loop variable) from zero to range, and i.e. the SIN LUT be SIN(x / range * 2 * pi). Like this, we first get our variable x in a 0-1 range, then by multiplying it by 2 * pi, we get it in the radians range(name of the angle that COS and SIN use).
And, because we use fixed point math, we have to multiply it by a scale. So:
CONST scale = 128
CONST range = 255
CONST max = 255
DIM st(-range to range) as integer, ct(-range to range) as integer
pi! = ATN(1) * 4 or 22 / 7 or 3.14
FOR x = 0 TO range
  st(x) = SIN(x / max * 2 * pi!) * scale
  ct(x) = COS(x / max * 2 * pi!) * scale
NEXT
And, we need to divide the x and y coordinates by the scale again. Use \ (integer divide) for some real speed.
If range = max here, then the sin and cos tables loops around fully, if it�s less then not, and if range > max, then the table has some double parts in it(so it�s actually a waste of memory). I�ve used as much constants as I could, because they provide a little more speed, and, if somebody reads the code, he�ll notice that the values of constants can not change.
Here�s the program we have now, notice that a is an integer now:
SCREEN 13  'Screen mode 13
DEFINT A-Z  'For speed

CONST scale = 128
CONST range = 255
CONST max = 255
DIM st(-range to range) as integer, ct(-range to range) as integer
pi! = ATN(1) * 4
FOR x = 0 TO range
  st(x) = SIN(x / max * 2 * pi!) * scale
  ct(x) = COS(x / max * 2 * pi!) * scale
NEXT

CONST r = 100
CONST cx = 160
CONST cy = 100
angleplus = 1

DO
  a = a + angleplus
  If a => range OR a =< -range THEN angleplus = -angleplus
  FOR x = -r TO r
    FOR y = -r TO r
      distance = SQR(x ^ 2 + y ^ 2)
      IF distance =< r then
        angle = a * ((r - distance) / r)
        rotatedx = x * ct(angle) - y * st(angle)
        rotatedy = x * st(angle) + y * ct(angle)
        PSET (x + cx, y + cy), (rotatedx \ scale + cx) XOR (rotatedy \ scale + cy)
      END IF
    NEXT
  NEXT
LOOP
Distance LUT
Man, that�s nice! But there�s still a very slow square root left. We simply solve this with a distance lookup table. We don�t go from �r TO r in x and y, but from 0 TO r, because distance(x, y) = distance(-x,-y). So:
DIM distance(r, r)
FOR x = 0 TO r
  FOR y= 0 TO r
    Distance(x, y) = SQR(x ^ 2 + y ^ 2)
  NEXT
NEXT
And:
distance = distance(ABS(x),ABS(y))
The reason for ABS is that we need to have positive numbers, because we didn�t calculated for �x and �y, to save some memory. Use this instead of the square root in the main loop and it will execute MUCH faster!
A Moving Swirl
A moving swirl is no trick at all: don�t make cx and cy constants(!) and calculate a new value for them every time in the DO�LOOP part. For a swirl bouncing on the screen:
speedx = 5
speedy = 3
DO
  IF cx + speedx > 320 OR cx + speedx < 0 THEN speedx = -speedx
  IF cy + speedy > 200 OR cy + speedy < 0 THEN speedy = -speedy
  cx = cx + speedx
  cy = cy + speedy
  ...
LOOP
Now you can see that the �previous� swirl isn�t erased, so it looks shitty. What you need to do is check for every pixel if it�s in the swirl, and else erase it, this can be done by a simple loop like this:
FOR x = 0 TO 319
FOR y = 0 TO 199
xd = ABS(x � cx)
yd = ABS(y � cy)
IF xd < r AND yd < r THEN
'Do the equation
ELSE
PSET (x, y), x XOR y
END IF
NEXT
NEXT
Of course, this needs to be in a loop again. And you need every variable like cx and cy again, and instead of what x and y were in the last equations, you use xd and yd. Further the �do the equation� part is just the same.
Optimising it
You could optimise it even more and make tons of LUT�s for the integer divide part, but that�s not making it really faster. What should make it faster, is checking less pixels. We are now checking for each pixel on the screen, while it�s just used to look if any pixels are painted, but because the swirl moves too, not are painted over(so they still are rotated points). What should make it faster, is instead of painting each pixel over, just save the original image in a buffer and put it on the screen every frame. Then do the loop from �r to r again, but now check if the pixel you want to check if on the screen with a simple IF x => 0 AND y => 0 AND x < 320 AND y < 200 THEN � END IF.
Download a copy of this tutorial: The_swirl_effect_-_RubyNL.doc
Wireframe Tutorial
Written by Mentat
So what is a wire frame?
Simply put, it�s a physical model of an object. The vertices are the corners and the edges are lines. In programming, whatever effects are enacted upon a primitive, or unions of primitives, the events transpired are that of the object it models.
In English, a wire frame object acts like the object.
So why is it important?
Modern 3D games (I know, it�s a bit redundant) use filled-in wire frames called polygons. More polygons = better graphics +more processor requirements.
Again, why the importance?
- Computers favor wire fames over ray casting in terms of speed. The former is faster and has high definition. It can also portray 3D curves better.
- Easier for physics engines. All the work is focused on just points. So, less work is required per unit, which means better performance.
- Easy to work with once you get the gist. You�re just handling 3D points and connecting lines between them.
- Looks modern but works on old computers just as well as ray casting, although at low resolutions, ray casting has some advantages over wire frames.
Get my point? Now to be fair, I was being hard on ray casting, which has some advantages over wire framing such as shadow casting and image mirroring.
Now for the Star of 3d programming:
PX = VX/VZ
PY = VY/VZ

VX = 3D X coordinate
VY = 3D Y coordinate
VZ = 3D Z coordinate
PX = apparent screen X coordinate
PY = apparent screen Y coordinate
Uhh� What?
For those who don�t get this:
Alright, get your 3D coordinates (x,y,z). Divide your x by your z. That�s your horizontal coordinate on your screen. Divide your y by your z. That�s your vertical coordinate. Plot (horizontal, vertical) on the screen. Whee!
If you don�t get this, then read it over.
It may not seem much, but this is THE underlying principle of wire frames and 3D graphics.
So what? I ran it and I didn�t see any wires.
If you asked this then go back to �Hello world�.
Alright. Do you see it. Take a moment and think. Do you see the foundation for modern 3d graphics?
Ok, for those of you who don�t then look:
Let�s call my previous 3d function ThreeDee(x,y,z) (I actually don�t know how to do real functions in QB, so this is just for argument). If you run this, make sure to add values or you�ll get an error (divide by zero).
QB: VOXE
START:
SCREEN 12
LET OX=320 �OFFSETS MIDDLE OF SCREEN
LET OY=240
CLS �ALWAYS START WITH THIS
LET A=NUMBER OF POINTS �PSUEDOCODE
DIM VX(A) �THESE ARE ALL X COORDINATES. I�M NOT USING
DIM VY(A) �TYPE DEF BECAUSE ARRAYS ARE EASIER TO USE
DIM VZ(A) �FOR MANY POINTS. YOU COULD USE A SINGLE
MAIN:
FOR D=1 TO A �ARRAY INSTEAD OF THREE
LET VZ(D)=SOMETHING �PSUEDO
LET VY(D)=SOMETHING �PSUEDO
LET VX(D)=SOMETHING �MORE PSUEDO
THREEDEE(VX(D),VY(D),VZ(D))
NEXT D
FOR D = 1 TO (A-1) �MAKES WIRE FRAME
LINE (PX(D),PY(D)) � (PX(D+1),PY(D+1))
NEXT D
LINE (PX(A),PY(A)) � (PX(1),PY(1)) �MAKES THAT LAST LINE
STOP
THREEDEE(VX(D),VY(D),VZ(D)) �OUR MAGIC
LET PX(D)=OX+ (VX(D)-OX)/VZ(D) �OX AND OY ARE VANISHING POINTS
LET PY(D)=OY+ (VY(D)-OY)/VZ(D)
RETURN
This is the basis of wire framing. Now, you can maybe fill in sides.
Think of a maze. You can use ray casting and suffer from flickering and horrible resolution, or you can make a wire frame and fill it in. Wire framing has the correct perspectives down to a distance of above 0, is much faster, and has a higher resolution.
So, how can one rotate and do manipulations of the vertices?
Well, there are a couple of ways. You can rotate using the addition of sines/cosiness or you can add the derivatives, or you can follow a model path. The easiest is sines/cosines rotation. Model paths are better and have more possibilities but require an initial condition to compare to. Derivative addition is hard and least known (I made it up), is not the most accurate, but is purely relative to the object, and so can change its direction in an instant without the programmer inputting previous specific directions for whatever condition happened. Since this is getting into physics engines, and this tutorial is about wire framing, I�ll refrain to simple rotation, which RelSoft�s rotation tutorials immensely helped me.
Basically, the rotation of P(X,Y) around P(OX,OY) at angle A is:
LET X=OX+(X-OX)*COS(A) � (Y-OY)*SIN(A)
LET Y=OY+(Y-OY)*COS(A)+(X-OX)*SIN(A)
Again, my thanks to RelSoft for these equations.
Now, do you see the implication of these equations. Think for a second. Why would you need rotations for a wire frame if you can just plot along a model function of a circle. Well, look at the fact that the equation is +/� SQR(R^2�X^2). That is �plus or minus the square root of r squared minus x squared�.
A) If the situational positive sign switches to a minus sign, you get an error unless you use if...then.
B) X cannot exceed R
C) This is actually two hemispheres. So you don�t go all the way around but instead you get imaginaries at the horizontal axis. And your computer hates imaginaries.
D) You can fix it so it can work, but it�s slow. Might as well ray cast.
Get my point? Moving along.
So here�s a rotating cube program.
To do something, press one of the buttons on the right half of the keyboard.
DO
                KEY$ = INKEY$
                IF KEY$ = "I" THEN GOSUB INFO
        LOOP WHILE KEY$ = ""

        SCREEN 12
        CLS
        DIM PX(8)       'SCREEN X COORDINATES
        DIM PY(8)       'SCREEN Y COORDINATES
        DIM VX(8)       'X COORDINATES
        DIM VY(8)       'Y COORDINATES
        DIM VZ(8)       'Z COORDINATES
        LET SCALE = 100
        LET OX = 320  'OFFSETS, COORDINATES OF THE CENTER OF REVOLUTION
        LET OY = 240
        LET OZ = 1.1
        LET X1 = 270
        LET X2 = 370  'DEFAULT COORDINATES
        LET Y1 = 190  'I HAD THESE SETUP BECAUSE OF EASE OF EDITING
        LET Y2 = 290
        LET Z1 = 1
        LET Z2 = 2

        LET VX(1) = X1
        LET VX(4) = X1
        LET VX(5) = X1
        LET VX(8) = X1
        LET VX(2) = X2
        LET VX(3) = X2
        LET VX(6) = X2
        LET VX(7) = X2
        LET VY(1) = Y1
        LET VY(2) = Y1
        LET VY(5) = Y1
        LET VY(6) = Y1
        LET VY(3) = Y2
        LET VY(4) = Y2
        LET VY(7) = Y2
        LET VY(8) = Y2
        FOR I = 1 TO 4           'I HAD TO CHEAT
                LET VZ(I) = Z1
        NEXT I
        FOR I = 5 TO 8
                LET VZ(I) = Z2
        NEXT I

MAIN:
        DO
                COLOR 14
                PSET (320, 240) 'CENTER DOT
                PSET (320, 239)
                PSET (321, 240)
                PSET (320, 241)
                PSET (319, 240)
                COLOR 15
                DO
                        LET KEY$ = INKEY$
                LOOP WHILE KEY$ = ""

                SELECT CASE KEY$
                        CASE "2"                  'ROTATE YZ AXIS FRONTWARD
                                FOR I = 1 TO 8
                                        LET VZ(I) = OZ + (VZ(I) - OZ) * COS(-.01) - ((VY(I) - OY) / 100) * SIN(-.01)
                                        LET VY(I) = OY + (VY(I) - OY) * COS(-.01) + 100 * (VZ(I) - OZ) * SIN(-.01)
                                NEXT I
                        CASE "6"                  'ROTATE XZ AXIS
                                FOR I = 1 TO 8
                                        LET VX(I) = OX + (VX(I) - OX) * COS(.01) - 100 * (VZ(I) - OZ) * SIN(.01)
                                        LET VZ(I) = OZ + (VZ(I) - OZ) * COS(.01) + ((VX(I) - OX) / 100) * SIN(.01)
                                NEXT I
                        CASE "4"                  'ROTATE XZ AXIS
                                FOR I = 1 TO 8
                                        LET VX(I) = OX + (VX(I) - OX) * COS(-.01) - 100 * (VZ(I) - OZ) * SIN(-.01)
                                        LET VZ(I) = OZ + (VZ(I) - OZ) * COS(-.01) + ((VX(I) - OX) / 100) * SIN(-.01)
                                NEXT I
                        CASE "8"                  'ROTATE YZ AXIS BACKWARDS
                                FOR I = 1 TO 8
                                        LET VZ(I) = OZ + (VZ(I) - OZ) * COS(.01) - (100 / (VY(I) - OY)) * SIN(.01)
                                        LET VY(I) = OY + (VY(I) - OY) * COS(.01) + 100 * (VZ(I) - OZ) * SIN(.01)
                                NEXT I
                        CASE "."   'ROTATE XY AXIS COUNTER CLOCK WISE
                                FOR I = 1 TO 8
                                        LET VX(I) = 320 + (VX(I) - 320) * COS(.01) - (VY(I) - 240) * SIN(.01)
                                        LET VY(I) = 240 + (VY(I) - 240) * COS(.01) + (VX(I) - 320) * SIN(.01)
                                NEXT I
                        CASE ","   'ROTATE XY AXIS CLOCK WISE
                                FOR I = 1 TO 8
                                        LET VX(I) = 320 + (VX(I) - 320) * COS(-.01) - (VY(I) - 240) * SIN(-.01)
                                        LET VY(I) = 240 + (VY(I) - 240) * COS(-.01) + (VX(I) - 320) * SIN(-.01)
                                NEXT I
                        CASE CHR$(0) + CHR$(72)   'MOVE UP
                                FOR I = 1 TO 8
                                        LET VY(I) = VY(I) - 1
                                NEXT I
                        CASE CHR$(0) + CHR$(80)   'MOVE DOWN
                                FOR I = 1 TO 8
                                        LET VY(I) = VY(I) + 1
                                NEXT I
                        CASE CHR$(0) + CHR$(75)                'MOVE LEFT
                                FOR I = 1 TO 8
                                        LET VX(I) = VX(I) - 1
                                NEXT I
                        CASE CHR$(0) + CHR$(77)                'MOVE RIGHT
                                FOR I = 1 TO 8
                                        LET VX(I) = VX(I) + 1
                                NEXT I
                        CASE "+"                  'DECREASE SCALE, ZOOM IN
                                LET SCALE = SCALE - .1
                        CASE "-"                  'INCREASE SCALE, ZOOM OUT
                                LET SCALE = SCALE + .1
                        CASE "/"                  'DECREASES Z
                                FOR I = 1 TO 8
                                        LET VZ(I) = VZ(I) - .02
                                NEXT I
                        CASE "*"                  'INCREASES Z
                                FOR I = 1 TO 8
                                        LET VZ(I) = VZ(I) + .02
                                NEXT I
                        CASE "R"                  'RESTARTS
                                GOTO START
                        CASE "r"
                                GOTO START
                END SELECT

                FOR I = 1 TO 8
                                IF VZ(I) <> 0 THEN
                                LET PX(I) = 320 + (SCALE * (VX(I) - 320)) / VZ(I)
                                LET PY(I) = 240 + (SCALE * (VY(I) - 240)) / VZ(I)
                                END IF
                NEXT I

                CLS
                LINE (PX(1), PY(1))-(PX(2), PY(2)) 'FRONT LINES
                LINE (PX(2), PY(2))-(PX(3), PY(3))
                LINE (PX(3), PY(3))-(PX(4), PY(4))
                LINE (PX(4), PY(4))-(PX(1), PY(1))
                LINE (PX(1), PY(1))-(PX(5), PY(5)) 'SIDE LINES
                LINE (PX(2), PY(2))-(PX(6), PY(6))
                LINE (PX(3), PY(3))-(PX(7), PY(7))
                LINE (PX(4), PY(4))-(PX(8), PY(8))
                LINE (PX(5), PY(5))-(PX(6), PY(6)) 'BACK LINES
                LINE (PX(6), PY(6))-(PX(7), PY(7))
                LINE (PX(7), PY(7))-(PX(8), PY(8))
                LINE (PX(8), PY(8))-(PX(5), PY(5))

        LOOP UNTIL KEY$ = "Q" OR KEY$ = "q"

        STOP
As in my other tutorial (soon to be plural!), please feel free to copy, but if you do, please me credit.
Download a copy of this tutorial (Wireframe.doc) or the sour code WIRE2.BAS)
Searching Algorithms / Binary Trees
Written by Dean Menezes
Let's say you have a Guess The Number program where the computer tries to find the human's number (pseudo-code):
FOR i = 1 TO 31
 ask the user if their number is i
 if their number is i,
   print "I got it in"; i; "guesses";
   end
 end if
NEXT
Clearly, if the user's number is N, the program will take N guesses to arrive at this result (max of 31 guesses).
See if you can make a more efficient algorithm.
                  16

        8                      24

   4        12           20         28
  / \       / \         /  \       /  \
 2    6   10   14    18    22    26    30
 /\   /\   /\   /\    /\    /\    /\    /\
1 3  5 7  9 11 13 15 17 19 21 23 25 27 29 31
More efficient algorithm using binary tree:
1. Start at the top of the binary tree


2. Ask the user if their number is (current number)


3. If their number is the current number then stop


4. Else, ask them if their number is higher or lower than the current number


5. If higher, go right on the tree. If lower, go left on the tree.


6. Go to step 2
This will need a maximum of 5 guesses, making it much more efficent than the first method.
Here is an implementation of QBASIC:
DECLARE SUB logic (low!, high!, numturns!)
CLS
PRINT "Think of an integer x such that 1 "; CHR$(243);
" x "; CHR$(243); " 31"
PRINT "Press any key when ready."
WHILE INKEY$ = ""
 'Dummy press any key routine
WEND
CALL logic(1, 31, 0)

SUB logic (low, high, numturns)
 num = (low + high) / 2
 DO
   PRINT "Is your number"; num
   INPUT answer$
   IF UCASE$(LEFT$(answer$, 1)) = "Y" THEN PRINT "I
got it in"; numturns; "turns": EXIT SUB
   IF UCASE$(LEFT$(answer$, 1)) = "N" THEN EXIT DO
   PRINT "Please answer the question."
 LOOP
 DO
   PRINT "Is your number higher or lower than"; num
   INPUT answer$
   IF UCASE$(LEFT$(answer$, 1)) = "H" THEN CALL
logic(num + 1, high, numturns + 1): EXIT SUB
   IF UCASE$(LEFT$(answer$, 1)) = "L" THEN CALL
logic(low, num - 1, numturns + 1): EXIT SUB
   PRINT "Please answer the question."
 LOOP
END SUB
Here is another example of where a binary tree could make a program more efficient.
INPUT "num? ", num
INPUT "accuracy? ", acc
FOR i = 0 TO num STEP acc
 IF i * i >= num THEN PRINT i: END
NEXT
This is a program to find the square root of a number to a certain accuracy. It does this by increminting a variable until the varialbe squared is greater than the number.
Can you write a faster version of this program?
Here is the fast version:
INPUT "num? ", num
INPUT "accuracy? ", acc
g1 = 1
DO
 g2 = num / g1
 IF ABS(g2 - g1) < acc THEN PRINT "val is between";
g1; "and"; g2: END
 g1 = (g1 + g2) / 2
LOOP
Here's how the fast program works:
1. it starts out with this range: 0 ......... n
2. then is gets an initial guess (always picks 1 in example). the range is now: g0 .... 1/g0
3. then it picks the average of the two bounds as the new guess: g1 .. 1/g1
4. it repeats step 3 until the range is within the desired accuracy (small range = more accurate).
Download this tutorial: Searching_Algorithms_Binary_Trees.txt
FBHacker Series: Challenges #1 - #6
Written by Hartnell, Pennywise and Sandman
Introduction To FBHacker
When I first came up with the idea of FBHacker, I wet my pants. Here it was, finally, the ultimate introduction to core programming for the complete noo.. novice. And now, many months down the road, FBHacker is still unfinished. In fact, Challenge #6 was as far as it got and there were 500 challenges promised.
During the time that FBHacker has been sitting and gathering dust on GDN, it has been discovered and re-discovered by it's intended audience -- the complete noo... novice. They've come to my message board, politely asked for more challenges many times. They've actually searched locally on my website for "FBHacker clues" as if was a game that was "guide worthy." I've watched their paths on my site stats from one challenge to the next, trying to build on what they've learned. FBHacker was doing what it was intended to do, but I've done nothing.
Thanks to Imortis, FBHacker has been revived as two new regular features of QBE -- The FBHacker Challenge, and a beginner's tutorial relating to the challenge (an possibly, Sandman or another character will buzz in between articles.). Together we are going to collaborate in hopes of completing FBHacker as a complete introduction to core programming -- as intended.
Because this is now a collaboration, I'm going keep this short so Immortis can write his introduction. :) But one last thing, if you have any FBHacker ideas, please send them to Imortis.
Stay Frosty,
Hartnell
http://gamedesign.wikidot.com
FBHacker Table of Contents
FBHacker is an experimental new kind of tutorial. Instead of being a straightforward "read and practice tutorial", FBHacker presents concepts in the form of challenges that you must complete. If you want a quick introduction to programming in FreeBASIC, try this. (note : this series is incomplete).
FBHacker Tutorials
The FBHacker tutorials are an experimental type of tutorial. They are designed to teach you core programming from absolute and complete beginner to intermediate programming concepts in a quick, fun, and effective way. Rather than being traditional tutorials, they are challenges.
- FBHacker Introduction - start here.
- FBHacker Briefing - then start here.
- FBHacker 1 - N00b
- FBHacker 2 - Variable Security
- FBHacker 3 - Breaking the Bank
- FBHacker 4 - The Executive
- FBHacker 5 - Disarm The Bomb
- FBHacker 6 - The Deadly Robot
FBHacker Introduction - start here.
Welcome to FBHacker. Due to the content of these tutorials, some disclaimers for the stupid are required.
Disclaimers For The Stupid
FreeBASIC Hacker is a tutorial series about core programming. You will not learn how to hack anything. It is intended for complete beginners who have never programmed before.
The plot that runs through the FBHacker Tutorials are fiction, and only fiction, and if you don't get it, you need to get a grip.
Acknowledgments
This tutorial series would have never been possible without the regular members of GDN, whose contributions are obvious to those who made them.
Ready To Start?
Now that I've taken care of the legal stuff for the stupid, and thanked the people who made this possible, you may begin with :
FBHacker - Briefing
Hello Hacker. Welcome to the FreeBASIC Game Hacker Corps. I'm Sandman.
This is an elite group you are joining. We face danger behind a keyboard everyday. There's a good chance you won't live past next year, and even if you do, you won't see your loved ones for at least two. Are you really ready to join us?
Have you made the proper preparations in case of your untimely death? All things in order? Funeral expenses? Last wishes? Have a will? Kissed your girlfriend goodbye�. oh� I see, you kissed your mother goodbye. I won't mention that in the future. Alright, it seems you are ready to begin.
What you are facing is only training. Your job is to beat 500 hacking challenges. By that time, you will learned enough to become a full agent of the Game Hacker Corps. Each challenge requires a different skill to beat. You will not be provided answers. This is not a trivia quiz, and it sure ain't Disneyland. Only elite FB Game Hackers can join us, and that's what you're going to have to become to get through these challenges.
If you run into problems, you will have to seek out answers on your own. You can ask questions in the GDN forum, seek out the GDN FreeBASIC documentation or read through the Easy FreeBASIC tutorials. If all else fails, the answer may be easy to find if you search for a clue using the search box in the top/right corner of every page.
That's it for your briefing. I'll turn you over to Pennywise for your first challenge.
-Sandman.
FBHacker Challenge 1 : N00b
Hello, I'm Pennywise. I'll be your instructor throughout the beginning challenges. You have have been assigned a code name. In this challenge, I'm going to give it to you. That's it. Just copy the code below into your FreeBASIC IDE and hit F5 to play the message.
Here's the code :
print "Pennywise here. Am I coming through?"
sleep 1000
print "b..zzzzz"
sleep 1000
print "Hello...?"
sleep 2000
print "The reception of this output is terrible through FreeBASIC."
sleep 3000
print "So listen closely."
sleep 2000
print "Your code name is : [ N00b ]."
sleep 1000
print "Did you get that?"
sleep 1000
print "N00b?"
sleep 2000
end
Sandman, here. Yeah, that's not your code name. Appearantly Pennywise has changed it. I wouldn't take that from her. Here's your real challenge. Change the message so that the output contains your real codename. Oh, almost forgot. The codename I assigned you is DrunkenLama. Just kidding. It's really SystemShock.
After completing this challenge you may move onto :
Challenge 2 : Variable Security
Pennywise here. I detected the change in the message in the last challenge. You were only supposed to recieve the code name, not show off your hacking skills. I've boosted the power of the FreeBASIC output transmitter and put your code name in an uncrackable box. So let's try this again. All you have to do is recieve your code name to pass the challenge.
Once again, copy this code into your FreeBASIC IDE and press F5 to play the message. No hacking this time!
dim codename as string
codename = "N00b"

print "Pennywise here. I can see I'm coming through loud and clear."
sleep 2000
print "Do NOT Hack this message."
sleep 1000
print "Got it?"
sleep 2000
print "Your codename is :"
sleep 1000
print codename
sleep 2000
print "Welcome to FB Game Hacker Core, Hacker "; codename
sleep 3000
end
Sandman here. Can you believe her? She's trying to change your code name again. This time she's tried to keep you from changing it back by putting it into a box called a variable rather than right in the output of the message like like last time.
I want you to change your codename to SystemShock again, but you're going to have to do it without changing her code. Instead insert a line of your own code. You can put your code anywhere, even between the lines of Pennywise's code.
Remember, variables are called variables because what they hold can be changed, so you could say it's contents vary.
After you have completed this challenge, you may move on to:
Challenge 3 : Breaking The Bank
Pennywise again. O.K. I get it. Your codename is SystemShock. Don't we get to haze the n00bs, uh, I mean welcome the new recruits anymore? Sandman has been impressed so far so he's told me to give you something to test what you got. For me this is simple, but for you, it might be a real challenge. All you have to do is crack the password of the bank computer and gain access. Piece of cake.
Just copy this code into your FreeBASIC IDE and get to crackin'!
One note before you begin. You cannot change the code at all to complete this challenge. You must do your cracking while the code is running.
dim password as string

print "Mucho Moola Bank Teller."
print "At your service."
print
print "Please input your password. When asked."
sleep 2000
print "You may now input your password."
print
input password
print
if password = "MuchoMoolasCuteDog" then print "Access granted."
if password <> "MuchoMoolasCuteDog" then print "Access denied."
sleep 4000
end
Once you have completed this challenge, you can move on to :
Challenge 4: The Executive
Pennywise here. I see you had an easy time with the bank. I told you -- piece of cake. Now, let's try a more complex computer system. There are three ways to get into the next computer system. As a secretary, as an executive, or not at all.
We, of course, want you to break into the system and get executive privileges. Once again, you cannot alter the code. You must do your cracking while the code is running.
dim password as string

print "Super Rich Associates Mainframe."
print "If you shouldn't be here,"
print ,"we're a comin' for ya."
sleep 2000
print
input "Please input your password >", password
sleep 2000
print
if password = "Dominatrix" then
    print "Hello Mrs. Ouchie."
    sleep 1000
    print "Secretary privileges granted."
elseif password = "ImSoRich" then
    print "Hello Mr. Dick."
    sleep 1000
    print "Executive privileges granted."
else
    print "Password not accepted."
    sleep 1000
    print "A super-team of robot assassins"
    sleep 1000
    print "have been dispatched for your"
    sleep 1000
    print "immediate disposal."
endif

print
sleep 1000
print "Thank you."
sleep 2000
print "Have a nice day."
sleep 4000
end
Once you have completed this challenge, you may move on to :
Challenge 5 : Disarm The Bomb
BANG! It's Pennywise. Hope I didn't scare you because while hacking a bank machine or corporate computer system is cake, disarming a bomb is death. To make things interesting, I'm giving you a REAL bomb to play with. If you fail this challenge, you're dead. Got it? Dead. Heh.
Take a good look at the code before you run it. Because once you do, you only have two chances to disarm it. Once again, you cannot edit the code. You must disarm the bomb during runtime. That's what we hackers like to call the time "when the code is running."
dim i as integer
dim disarm as integer

print "Heh, it's Pennywise. First, I'm going to count to ten before I trigger"
print "the bomb timer."
sleep 3000
print

for i = 1 to 10
    print i
    sleep 1000
next i

print
print "Bomb started! HEhe."
print

for i = 20 to -1 step -1
    print "Tick";i
    sleep 1000
    if i = 12 or i = 1 then
        input "Input a number to disarm the bomb >", disarm
        i = disarm
    end if
    if i = 0 then
        print "Boom. The bomb was real. You're dead."
        sleep 4000
        end
    end if
next i

print "Congratulations. The bomb was real, but you're"
print "still breathing."
sleep 4000
end
Sandman here. Surely.... it's not a real bomb. Either way, bombs have timers (usually). Keep an eye on the timer, it's sure to have something to do with triggering the bomb to go off. And one more thing. If it IS a real bomb, it was nice knowing you. I'll tell your mother your were a great recruit.
Hey, It's Hartnell, administrator of Game Design Novice. I've realized that this challenge is a bit too difficult to be Challenge 5, so if you have a hard time with it, it's my fault. I'm working on getting the challenge curve right. Good luck!
Once you have completed this challenge, you may continue to :
Challenge 6: The Deadly Robot
Hiya. I'm Technos. I heard about the bomb. That's Pennywise. She's just like that. Loves to give the new guy hell. Anyway, that's probably why she's loaned you to me for the day. You see... I kinda have this.... dangerous problem.
One of my robots is on the loose and its probably going to kill a few of my technicians soon. The problem is with how I programmed the robot. I know it's my problem, but you've got to help me. The thing has guns.
Big ones.
Here's what you can do. Take the code I give you and fix it so that it doesn't kill anybody. You can only change the parts after GOTOs. If you change anything else the nuclear self-destruct will go off. You won't see it while you are fixing and testing the code, it's in the robot itself.
Oh, why did I build a robot capable of destroying a large city by self-destructing in a nuclear holocaust? Simple, you never know when you'll need one. They tend to come in handy.
Here's the code. When you have it fixed where it doesn't kill anyone, consider this challenge completed.
Hartnell here. This challenge is unfinished. FBHacker is currently being tested and always under development. If you would like to see more challenges, let me know on the GDN Forum. You don't have to be logged in to post. If more people (that's you) ask for new FBHacker Challenges, I'll write some more as soon as I can.
Download a copy of this tutorial (fbhacker.doc), or visit Game Design Novice.
FBgfx Font Programming
Written by Pritchard
- The FBgfx Font Header
- Header Details
- Creating a Font Buffer
- Assigning Font Characters
- Tips & Tricks
- Coloring your Custom Fonts
Download Accompanying Tutorial Files: FBgfx_Font_Tutorial.zip
FBGfx Font Header:
Header Details:
The first row of an image buffer that will be used as a font contains the header information for your font, on a byte by byte basis (remember that the first row of pixels are going to be the first byes since it's stored in row->column).
The very first byte tells us what version of the header we're using. Currently, only 0 is supported, as only one header version has been released. The second byte tells us the first character supported in our font, and the third byte tells us the last.
0; Byte; Header Version
1; Byte; First Character Supported
2; Byte; Last Character Supported
3 to (3 + LastChar - FirstChar); Byte; Width of each Character in our font.
Creating a Font Buffer:
If you had a font that supported character 37 as the first, and character 200 as the last, your bytes would contain:
0 for the header version.  It's the current only version supported.
37 for the first character supported.
200 for the last character supported.
94 bytes containing the widths of each character.
Since the first row is taken up for header data, the font buffer will be an image buffer whose height is the font height plus one. That is, if you have a font height of 8, you need a buffer height of 9. You'll be putting the font in the second row of your buffer, rather than the first as you usually would.
Here's an example (Example3.bas), which creates a font buffer. It only creates it and assigns header data right now, not the actual font:
  '' The first supported character
Const FirstChar = 32
  '' Last supported character
Const LastChar = 190
  '' Number of characters total.
Const NumChar = (LastChar - FirstChar) + 1
These constants help us. It makes the code cleaner and faster.
  '' Create a font buffer large enough to hold 96 characters, with widths of 8.
  '' Remember to make our buffer one height larger than the font itself.
Dim as FB.Image ptr myFont = ImageCreate( ( NumChar * 8 ), 8 + 1 )
Create our font buffer. Remember, we need to add horizontal space for each character in the font (8 pixels wide). We also need to add an extra row for our font header information.
  '' Our font header information.
  '' Cast to uByte ptr for safety and consistency, remember.
Dim as uByte ptr myHeader = cast(uByte ptr, myFont )
Get the exact, casted, and having no warnings address of our font buffer. The header goes on a byte by byte basis, so we can't work on this with an FB.IMAGE type.
  '' Assign font buffer header.
  '' Header version
myHeader[0] = 0
  '' First supported character
myHeader[1] = FirstChar
  '' Last supported character
myHeader[2] = LastChar
Assign the header information described above, into the first three bytes. The header version, the first supported character, and the last supported character.
  '' Assign the widths of each character in the font.
For DoVar as Integer = 0 to NumChar - 1
    '' Skip the header, if you recall
  myHeader[3 + DoVar] = 8
Next
Each character in our font can have its own width, so we have to assign these. The 3 + skips the header information. DoVar starts at 0, so the first time it runs through that code, we'll be at index 3. Give all supported characters a width of 8.
  '' Remember to destroy our image buffer.
ImageDestroy( myFont )
Just reminding you :D
Assigning Font Characters:
This is fairly simple. We'll use FB's default font to draw onto our buffer. Remember to draw starting at column 1, rather than column 0, as the very first column is reserved for header data. Start the character you're drawing at your first supported character, and give it the color you want. Be warned, you can't have custom colors when drawing your font. When you add a character to our buffer, it's stuck the color you draw it as! See the tips & tricks section on how to get around this, however.
Here's the modified code (Example4.bas), where we'll add the font drawing via FB's default font onto our buffer.
  '' NEW!!!
  '' Our current font character.
Dim as uByte CurChar
Just to have a quick index of the current ASCII character we're drawing onto our font.
Draw String myFont, ( DoVar * 8, 1 ), chr(CurChar), rgb(rnd * 255, rnd * 255, rnd * 255)
Skip the first row of our image buffer, as that contains font buffer information. Draw our font using FBgfx's font as our custom font. Fill it with a random color. You should note that we're drawing right into our buffer, with "Draw String myFont,".
Print chr(CurChar);
Just for clarity, so you can see the characters we're drawing into the buffer.
  '' Use our font buffer to draw some text!
Draw String (0, 80), "Hello!", , myFont
Draw String (0, 88), "HOW ARE ya DOIN Today?!  YA DOIN FINE?!", , myFont
sleep
Test out our new font. Of course, it's the same one we're used to. You could have created your own from your own custom font buffer somewhere.
Tips & Tricks:
Coloring Your Custom Fonts:
Alright, so by now you have realized that once you color a custom font, you can't use Draw String to change that color. Well, no fear, we can get around that (CustFontCol.bas). It might be a bit slow, however.
We can create a font object, which has a function to return a font buffer. What the code does is it redraws the font buffer every time we change color, and returns the font buffer stored in the object. This *could* in theory be sped up if we knew the range of characters to redraw, so we could only redraw from the lowest to the highest. Figuring out that range in itself, could also be slow.
#include "fbgfx.bi"

Type Font
    '' Our font buffer.
  Buf     as FB.Image Ptr
    '' Font header.
  Hdr     as uByte ptr

    '' Current font color.
  Col     as uInteger

    '' Make our font buffer.
  Declare Sub Make( byVal _Col_ as uInteger = rgb(255, 255, 255) )
    '' Change the font color and edit the font buffer.
    '' Return the new font.
  Declare Function myFont( byVal _Col_ as uInteger = rgb(255, 255, 255) ) as FB.Image ptr

    '' Create/Destroy our font.
      '' Set a default color to it if you like.
  Declare Constructor( byVal _Col_ as uInteger = rgb(255, 255, 255) )
  Declare Destructor()
End Type

  '' Create our font's buffer.
Constructor Font( byVal _Col_ as uInteger = rgb(255, 255, 255) )
  This.Make( _Col_ )
End Constructor

  '' Destroy font buffer.
Destructor Font()
  ImageDestroy( Buf )
End Destructor

  '' Assign the FBgfx font into our font buffer.
Sub Font.Make( byVal _Col_ as uInteger = rgb(255, 255, 255) )
    '' No image buffer data.  Create it.
  If This.Buf = 0 then

      '' No screen created yet.
    If Screenptr = 0 then Exit Sub

      '' Support 256 characters, 8 in width.
      '' Add the extra row for the font header.
    This.Buf = ImageCreate( 256 * 8, 9 )

      '' Get the address of the font header,
      '' which is the same as getting our pixel address
      '' Except that we always will use a ubyte.
    This.Hdr = cast(uByte ptr, This.Buf) + Sizeof(FB.Image)

      '' Assign header information.
    This.Hdr[0] = 0
      '' First supported character
    This.Hdr[1] = 0
      '' Last supported character
    This.Hdr[2] = 255
  Else
    If This.Col = _Col_ then Exit Sub

  End If

    '' Draw our font.
  For DoVar as Integer = 0 to 255
      '' Set font width information.
    This.Hdr[3 + DoVar] = 8

    Draw String This.Buf, (DoVar * 8, 1), chr(DoVar), _Col_
  Next

    '' Remember our font color.
  This.Col = _Col_
End Sub

  '' Get the buffer for our font.
  '' Remake the font if the color's different.
Function Font.myFont( byVal _Col_ as uInteger = rgb(255, 255, 255) ) as FB.Image ptr
    '' If our colors match, just return the current buffer.
  If _Col_ = Col then
    Return Buf
  End If

    '' Make the font with a new color.
  This.Make( _Col_ )
    '' Return out buffer.
  Return This.Buf
End Function


  '' MAIN CODE HERE!
Screenres 640, 480, 32

  '' Create our font.
Dim as Font myFont = rgb(255, 255, 255)

  '' Draw a string using our custom font.
Draw String (0,0), "Hello.  I am the custom font.",, myFont.myFont()
  '' Gasp.  A new color!
Draw String (0,8), "Hello.  I am the custom font.",, myFont.myFont(rgb(255, 0, 0))
sleep

  '' Speed test.  Turns out it's quite slow.
Scope
  Randomize Timer
    '' Our timer.
  Dim as Double T = Timer

    '' Time how long it takes to make a new font this way.
  For DoVar as Integer = 0 to 499
    myFont.Make( rgb(rnd * 255, rnd * 255, rnd * 255) )
  Next

    '' And we're all done.  Print important data.
  Locate 3, 1
  Print "Time to Re-Draw font 499 times: " & ( Timer - T )
  Print "Time per Re-Draw: " & ( Timer - T ) / 500
  sleep
End Scope
Download a copy of this tutorial: FBgfx_Font_Tutorial.zip
The FBgfx Image Buffer
Written by Pritchard
- The FBgfx Image Buffer
- Creating Buffers
- Buffer Format
- Getting Pixels
- Tips & Tricks
Download Accompanying Tutorial Files: FBgfx_Image_Tutorial.zip
The FBgfx Image Buffer:
FBgfx has a new data type in .17 and above. This type is called IMAGE. You can use it by including the FBgfx Header in your program (#include "fbgfx.bi") and then accessing the namespace for FBgfx, via FB.IMAGE. When we create buffers in this tutorial, we're going to be using the FB.IMAGE ptr type. A pointer, because it's dynamic memory which we can resize.
To use an image in the FBgfx Library, you have to create it via image buffer. Your buffer is an area of memory allocated (created, made available) for your image. You have to deallocate (free, make available to other programs) the buffer when you are done using it at the end of your program. FBgfx has its own internal pixel format, as well as an image header at the beginning of every buffer created. The image header contains information about your image. Things like its width, height, bit depth, etc., while the Pixel Buffer contains the actual colors for each individual pixel in RGB (red, blue, green) format.
Creating Buffers:
The size of the buffer you create will vary depending on screen depth. Your Bytes Per Pixel are the number of bytes needed to store individual pixels. Thus, a 32-bit pixel depth screen will need 4 bytes per pixel (8 bits in a byte). You don't need to worry about this, however, as using the FB.IMAGE ptr setup to create your buffer makes it very easy to get the information we need from our buffers. You only need to know this information to understand how much size a buffer may take up total, for memory usage information.
Actually creating the buffer is very simple. It's just a simple creation of an FB.Image ptr, and a call to Image Create (Example1.bas):
#include "fbgfx.bi"

  '' Our image width/height
Const ImgW = 64
Const ImgH = 64

  '' Screens have to be created before a call to imagecreate
Screenres 640, 480, 32

  '' Create our buffer
Dim as FB.Image ptr myBuf = ImageCreate(ImgW, ImgH)

  '' Print the address of our buffer.
Print "Buffer created at: " & myBuf
sleep

  '' Destroy our buffer.  Always DESTROY buffers you CREATE
ImageDestroy( myBuf )
Print "Our buffer was destroyed."
sleep
Code Dissection:
#include "fbgfx.bi"
This includes the FB.IMAGE type which is very useful.
  '' Our image width/height
Const ImgW = 64
Const ImgH = 64
This creates constants which will be used to decide the size of our image. FBgfx doesn't know about these. We'll have to pass them to the imagecreate function when we use it.
  '' Screens have to be created before a call to imagecreate
Screenres 640, 480, 32
This creates our FBgfx screen. Imagecreate needs to know our bit depth beforehand. However, FBgfx's ImageCreate now has an extra parameter allowing you to set the depth yourself. See http://www.freebasic.net/wiki/wikka.php?wakka=KeyPgImagecreate for the full details.
  '' Create our buffer
Dim as FB.Image ptr myBuf = ImageCreate(ImgW, ImgH)
This first of all creates a pointer that is of the FB.Image type. It's just a location of memory. We haven't filled it with anything yet. In fact, right now it equals zero, and could not be used. That's considered to be null.
The ImageCreate call returns the address of an area in memory (which we copy onto our pointer as can be see myBuf = ImageCreate). The size of this buffer depends on the bit depth, but the width/height of the image contained in the buffer is going to be the ones we set earlier. The full use of ImageCreate is ImageCreate( Width, Height, Color, Bit Depth ), but we only need to set the Width and Height since we already know the depth. We'll use the default transparency color.
We now have allocated a space in memory. It's enough space to hold an ImgWxImgH image, along with the data FBgfx holds within its FB.Image type. We'll need to destroy it later for proper memory management.
  '' Print the address of our buffer.
Print "Buffer created at: " & myBuf
sleep
This is just there to let you know what we've done. We print the address of myBuf. If it's not 0, we can assume that ImageCreate had worked.
  '' Destroy our buffer.  Always DESTROY buffers you CREATE
ImageDestroy( myBuf )
Print "Our buffer was destroyed."
sleep
Here we destroy our buffer with a call to ImageDestroy. We don't have to use ImageDestroy to deallocate our buffer, but it's best to use it for consistency and clarity.
Buffer Format:
Now that we know how to create buffers, we might want to know more information about what's being held inside of them. You can open up FBgfx.bi and find the IMAGE type, and you can see all of this cool stuff inside of it.
We actually don't need to know much about the format itself. The reason for this is, we used an FB.IMAGE ptr. Everything after the Buf + Sizeof(FB.Image) in memory belongs to pixels. Everything before that is the header. The header can be accessed very easily because we used the FB.IMAGE ptr. All you have to know is what you want to look for.
FB.IMAGE Data Type:
  '' Image buffer header, new style (incorporates old header)
type IMAGE field = 1
    union
        old as _OLD_HEADER
        type as uinteger
    end union
    bpp as integer
    width as uinteger
    height as uinteger
    pitch as uinteger
    _reserved(1 to 12) as ubyte
end type
This same information can be found in fbgfx.bi. As you can see, this data type saves a *lot* of neat information about your buffer. The Width, Height, Pitch, and Bit Depth are all contained. In the union is included the type of header, and the old header itself within the same space. To be honest, I don't want to support the old header. Not enough features, so we're not going to cover it.
How do we access that information within the header? If you're familiar with pointers (which you should be, we used a pointer for our buffer in the first example), then all you have to do is access your buffer like a pointer, and directly access the data within. This may leave you to believe that all that's contained in your buffer is the IMAGE type itself, but that's just not true. DIMing as an FB.IMAGE ptr allows FB to think that's what's contained in the buffer, even though only the first part does so.
Getting Pixels:
The first section of our buffer which FB helps us out with contains the header information. Add the sizeof the FB.IMAGE type to our address, and the rest of our buffer contains pixels (Example2.bas).
  '' We have to include this to use our FB.IMAGE datatype, remember.
#include "fbgfx.bi"
Remember to include our FB.IMAGE data type!
  '' This one is very important.
  '' We cast to a ubyte ptr first off, to get the exact byte our pixels begin.
  '' We then cast to a uInteger ptr, simply to avoid "suspicious assignment"
  '' warnings.
Dim as uInteger ptr myPix = cast( uInteger ptr, ( cast( ubyte ptr, myBuf ) + sizeof(FB.Image) ) )
Phew. Alright. We have to make sure we get the exact address of our pixels. An integer contains 4 bytes. 3 of these are used for our RGB, and the extra is generally used for alpha when you need it (some people are very resourceful and will use the alpha byte - or channel - to store all kinds of data). If we're even ONE BYTE off, your Red can become your Green, and your Blue into your Red! So we have to cast to a ubyte ptr first.
You probably also noticed that we simply added the sizeof(FB.IMAGE) to our address. That's another perk of using FB.IMAGE! If you add its size to the start of the buffer, we have just skipped all the memory addresses relating to the header and are now at our pixels.
Finally, we cast it all to a uInteger ptr, mainly for safety. We're in 32 bit depth mode, so we need 4 bytes per pixels. A uInteger has that.
Here's a small line if you still don't understand how this works. Here is our buffer: |FB.IMAGE Header|Pixels|
If what's contained in the first section of our buffer is the FB.IMAGE Header, it's obviously going to be that big in size. So, we can get our address for the pixels, simply by adding the size of the FB.IMAGE datatype onto our original address.
One problem though! If we add that size to our buffer address, to try and get a new one, we end up with strange results. This is because our datatype isn't one byte long. We have to cast to a ubyte ptr first, then add the address. A ubyte is one byte long, so we'll get the exact byte we need in memory to work with.
Finally, we're in 32-bits. We just casted to a ubyte ptr. Although we *can* just assign the uInteger ptr the address of the uByte, it's best practice to cast it to a uInteger ptr first. We finally have the address of our pixels, in the right datatype (one per pixel!). We could manipulate those pixels directly now, if we'd like.
  '' Print information stored in our buffer.
Print "Image Width: " & myBuf->Width
Print "Image Height: " & myBuf->Height
Print "Image Bit Depth: " & myBuf->BPP
Print "Image Pitch: " & myBuf->Pitch
Print ""
This is what I was talking about earlier. FB will treat your pointer as if it's an FB.IMAGE ptr, so you can access the data in the header directly. Since we have the size of the image as well as its pixels address now, we could edit and manipulate them as if they were a pointer to our screen buffer! See ScrPtr_vs_ImgBuf.bas for an example on this.
Tips & Tricks:
ScrPtr vs ImgBuf
Comparison of how to draw onto image buffer pixels, versus how to draw on the screen's buffer (ScrPtr_vs_ImgBuf.bas):
#include "fbgfx.bi"

Screenres 640, 480, 32

  '' Create a buffer the size of our screen.
Dim as FB.IMAGE ptr myBuf = ImageCreate( 640, 480 )

  '' Get the address of our screen's buffer.
Dim as uInteger ptr myScrPix = ScreenPtr
  '' Get the address of our pixel's buffer.
Dim as uInteger ptr myBufPix = Cast( uInteger ptr, Cast( uByte ptr, myBuf ) + Sizeof(FB.IMAGE) )


  '' Lock our page.  Fill the entire page with white.
Screenlock

  '' Alternatively, if the screen resolution's unknown, use ScreenInfo to
  '' Make this more secure
  For xVar as Integer = 0 to 639
    For yVar as Integer = 0 to 479
      myScrPix[ ( yVar * 640 ) + xVar ] = rgb(255, 255, 255)
    Next
  Next

Screenunlock
sleep


  '' Draw onto our image buffer all red.
For xVar as Integer = 0 to myBuf->Width - 1
  For yVar as Integer = 0 to myBuf->Height - 1
    myBufPix[ ( yVar * myBuf->Width ) + xVar ] = rgb(255, 0, 0)
  Next
Next

  '' Put the red buffer on the screen.
Put (0,0), myBuf, pset
sleep


/'
  ScreenPtr:
    1) Get address of screen buffer
       (remember that FBgfx uses a dummy buffer that it flips automatically)
    2) Lock page
    3) Draw onto screen address
    4) Unlock page to show buffer

  Image Buffer:
    1) Create an image buffer
    2) Get the address of image pixels
    3) Draw onto image pixels
       (you can use neat stuff like the buffer information to help you here)
    4) Put down Image where you please
       (another big plus!)

  About Drawing:
    (Y * Width) + X

    Every Y contains WIDTH number of pixels.  Remember that the entire screen's
    buffer is all held sequentially.  In order to reach your new Y, you have to
    skip an entire row of pixels :D


    1 Row = Width Number of Pixels (640)
    1 Column = Height Number of Pixels (480) - For Y,X drawing rather than X,Y

    Y = Row * Width then.
    Just add X to get the horizontal position on this row.

    X = Column * Height then.
    Just add Y to get the vertical position on the column.
'/
Download a copy of this tutorial: FBgfx_Tutorial.zip
XCP: Step By Step, Parts I - III
Written by stylin
This is a series originally posted on the c0de Tutorials Forum, written by stylin.
There are three parts so far. Enjoy!
Part I
I have recently begun rewriting a project and I thought it would be good material for a series of tutorials about design in general. This project needs to store different types of elements in different types of containers, that is, the elements are stored and retrieved in different kinds of ways. Since these containers will be an important part of the project, I figured it would be good to start with them, as they are for the most part self-contained and do not rely on any other part of the project.
Throughout this series, much of the text will be about what I think about and do when designing and implementing something. I won't mention much about debugging/testing; I'd like the majority of focus to be on the design process. I plan to divide the series into parts that can have complete source to go along with them. Hopefully my rough plan will work out.
First, I need to list my needs, or what I would like to be able to do with these containers. This is important for me because it gives me some goals to meet when designing. It also allows me an easy way to refer back to these goals, and prevent decisions later in the design that would make it hard to meet them. So, here's what I want to be able to do with these containers:
- store any type of element
- store and access elements in a first-in/first-out queue-like order
- store and access elements in a last-in/first-out stack-like order
- store elements in the middle of a container, either by index or position
- store elements ordered by their value
- traverse the containers forwards and backwards
- have a choice of whether or not the container 'owns' its elements, so that I can control when they are destroyed
That should be it, I can add to this list later if I need to. Now I have to decide how to interpret this list. I'd like to avoid code duplication whenever possible, so I may get by with creating one or two container types and implementing the rest in terms of them. I figure at the very least I'll need some sort of linked list and array. The linked list can allow me constant-time insertion anywhere in the container, and the array will provide random-access to the elements, by an index.
I can implement a stack in terms of an array, adding and removing elements to and from the 'back' or 'end' of the container. I could probably also use the array for a queue, but doing so would be less than efficient; since elements will be removed from the front, it will always be the worst case -having to move all of the elements. A linked list is an option to implement a stack as well, but removing elements from the end of an array doesn't require me to deallocate nodes, the array can just keep the surplus memory for later use.
To store elements ordered by their value, I could use the linked list or the array. The problem with using the linked list for this is that to find any element I'll have to search through the list from either the beginning or the end. As the list grows, it will take more time to correctly find the element I need. The array, on the other hand, offers random-access, so I could keep dividing the array in half and searching that way. However, it still suffers from potentially massive reallocation and element movement when inserting in the middle. Looking online, it seems that most ordered containers are implemented as binary trees, specifically red/black trees. This seems to fit my needs, as a red/black tree is self-balancing, so it doesn't suffer from some of the problems a 'plain' binary tree does.
So I ended up needing three different container types, all with different ways to iterate through them (traverse the elements). I'd rather not try and remember how this traversal is done, I just want to traverse them - forwards or backwards. So maybe I should add another item to my container list needs:
- provide transparent iteration of elements, regardless of container
I want to be able to move to the next element in a linked list the same way that I move to the next element in the array. It seems that I need to encapsulate this behavior - container iteration - in an object. Each container will provide its own iteration object class - or iterator - specially made to iterate through elements in such containers.
Lastly, about element ownership. I've decided that these containers will store pointers to elements, not elements themselves. This will make it easier for elements to reference other elements by address, and also make it possible to control element destruction. I might want to create a fixed-length array, then store some of those elements in a linked list. I don't want the linked list to destroy these elements. On the other hand, I may just want to add elements to a linked list as I create them, and have the linked list deal with their destruction. I don't imagine having a need to mix owned and unowned elements, so I guess the right approach would be to construct a container that either owns or doesn't own its elements. When the container does own its elements, it will need to know how to destroy them. To be simple, this can just be a pointer to a destruction procedure upon container instantiation. If I assume all elements will be allocated with C/RE/ALLOCATE, then I can also provide a default destruction procedure that uses DEALLOCATE. (Assuming C/RE/ALLOCATE is not for convenience only. Assuming elements were created with NEW doesn't help at all, the container would still need to know the type of element in order to DELETE it)
So I have my plan: I need to design a linked list, an array and a red/black tree. I'll design an iterator interface for each container to implement, and I'll design a queue, stack and set containers, implemented in terms of the linked list, array and red/black tree, respectively. Part II will be about designing and implementing the linked list and the queue containers.
Part II
Resource Management: Shared Pointers
As you may know, working with normal pointers to reference memory or objects can be tedious, error prone and dangerous. It's a challenge to use them effectively - and safely - at all times.
When I say "memory or objects", I really mean "resources". A
resource can be anything really - a file handle, an object instance, etc. Resources may consume static or dynamic program memory and be of limited supply. This tutorial will discuss using pointers to refer, or reference, program resources. Here's some typical usage of pointers:
type Gizmo : ... : end type                  ' Some object class.

' A factory procedure, like this one, creates a resource for the user to
' reference. Here, the procedure returns references to new Gizmo objects.
declare function CreateGizmo (byref id as string) as Gizmo ptr

' This procedure frees Gizmo resources created from CreateGizmo.
declare sub DestroyGizmo (byval p as Gizmo ptr)

' ...

scope
     var g1 = CreateGizmo("A")               ' [1] Acquire a reference to an
                                             ' "A" resource.
     g1 = CreateGizmo("B")                   ' [2] ! Acquire a reference to a
                                             ' "B" resource, "A" resource
                                             ' is 'leaked'.
     scope
          var g2 = g1                        ' [3] Share the "B" resource.
          g2->DoSomething()                  ' Use the "B" resource.
          delete g2                          ' [4] ! Delete the memory at g2.
     end scope

     g1->DoSomething()                       ' [5] ! This is undefined
                                             ' behavior because the "B"
                                             ' resource no longer exists, g1
                                             ' is now an invalid reference or
                                             ' 'dangling pointer'.
     g1 = CreateGizmo("C")                   ' [6] Acquire a reference to a
                                             ' "C" resource.
end scope                                    ' [7] <- "C" resource is 'leaked'.
This highlights a few problems when using normal pointers:
- When acquiring a resource, the user must be aware of resource ownership at all times. Code that acquires a reference to a resource ([1, 2, 3, 6]) needs to know who is responsible for releasing the resource and how that is done, if at all. The factory procedure CreateGizmo does not specify whether the user should destroy the new Gizmo object or not, or even how to do that if necessary.
- Using normal pointers can easily lead to memory leakage. Code that loses the only reference to a resource ([2, 6, 7]) must make sure that the resource is properly freed if necessary or else the resource will be leaked - it can no longer be freed to make room for other resources.
- Using normal pointers can easily lead to undefined behavior. Code that frees resources ([4]) must be sure that no other references to the resource are still going to being used, because those references will be invalid ([5]). Also, it's important to free the resource correctly. Using deallocate or delete ([4]) may not be the correct way to do that - CreateGizmo may return references to Gizmo objects allocated in a pool, so DestroyGizmo must be called.
Now, obviously, it is the responsiblity of the author of CreateGizmo to supply information about the resources it returns, like if the user needs to destroy the Gimzo objects and how that's done - probably in a comment close to the procedure declaration. Still, it's ultimately up to the user to remember and correctly follow these requirements. This is very error-prone, and bugs can be hard to track down.
Smart pointers can eliminate these problems. They are objects which 'wrap' normal pointers and specify rules about object ownership. Some smart pointers are useful for basic scoped-based resource management (SBRM): acquiring a resource, maintaining sole ownership and destroying it when the smart pointer goes out of scope. The C++ Standard Library has one such smart pointer [template] class, called std::auto_ptr<>. Other smart pointers are capable of sharing resources with other smart pointers, much like Java's object references. These types of smart pointers are usually called shared pointers, and typically share a resource by monitoring a reference count. Whenever the last shared pointer to a particular resource is destroyed (the reference count reaches 0), the resource is destroyed as well.
There are many schemes to support reference-counting. Some [intrusive] implementations store a reference count inside the objects being referenced themselves. Others maintain a reference counting object, and all shared pointers referencing the same memory share the same reference counting object. Still others have each shared pointer reference a list of shared pointers, removing themselves from the list when they are destroyed - once the list is empty (the last shared pointer referencing a particular resource is destroyed) the shared resource is then destroyed.
Designing and implementing a shared pointer class can be tricky, so it's important to clearly define my needs. For this tutorial, I want something simple, but still useful, that is easy to implement. The second reference-counting method listed above seems to be the simplest to implement, so I'll go with that. Let me start fleshing out this shared pointer class.
namespace xcp.memory
    type DestroyProc as sub (byval p as any ptr) ' The type of procedure that
                                        ' is used to destroy the resource.

    type SharedPtr
    public:
        declare constructor ( _         ' This default constructor initializes
            byval p as any ptr = 0, _   ' the SharedPtr object with a raw
            byval destroy as DestroyProc = 0_ ' pointer and a destruction
                                        ' procedure.
        declare constructor ( _         ' This copy constructor initializes the
            byref sp as SharedPtr)      ' SharedPtr object to share a resource
                                        ' from another, if any.
        declare destructor ()           ' If this was the only SharedPtr object
                                        ' referencing a particular resource,
                                        ' that resource is destroyed, if
                                        ' necessary.
        declare function SharedPtr.Get ( _ ' Returns a raw pointer to the
        ) as any ptr                    ' resource.
        ' ...
    private:
        m_p as any ptr = any            ' The pointer, destruction procedure
        m_destroy as DestroyProc = any  ' and reference count, the constructors
        m_refcount as SizeT ptr = any   ' will make sure they are initialized
                                        ' properly.
    end type
end namespace
You'll notice m_refcount is a pointer to SizeT. SizeT is a type alias for a type of value used in expressions that deal with a number of something, and may be defined as type SizeT as uinteger. In this case, m_refcount is a pointer to a variable containing the number of references the particular resource has. You'll also notice that SharedPtr is declared in namespace xcp.memory. I like to place related stuff in its own namespace as an organizational tool and also to prevent name-clashing among symbols. In this case, "xcp" is the name of a project, and memory seemed like a good place to keep raw memory and resource management stuff. From now on, declarations and definitions are assumed to be inside namespace xcp.memory unless otherwise noted.
SharedPtr objects can be instantiated with a raw pointer and destruction procedure, and they can also be copy constructed from other
SharedPtr object instances. Each instance holds a pointer to the resource being shared, if any, a pointer to a destruction procedure, if any, and a pointer to a variable used to keep track of the total references of any particular resource. The 'raw pointer' constructor is also the default constructor;
SharedPtr objects that are default constructed will be 'empty', referencing no resource. The implementations themselves look like:
     constructor SharedPtr (byval p as any ptr, byval destroy as DestroyProc)

          m_p = p                         ' Copy the pointer and destruction
          m_destroy = destroy             ' procedure.
          if (m_p) then                   ' Is the pointer non-null ?
               m_refcount = new SizeT(1)  ' Create and initialize a reference
                                          ' count variable to one (1).

          else                            ' Else, null the pointer. So, if m_p is
               m_refcount = 0             ' not null, m_refcount is assumed to
          end if                          ' point to a valid reference count.

     end constructor

     constructor SharedPtr (byref sp as SharedPtr)

          m_p = sp.m_p                    ' Copy the pointer and destruction
          m_destroy = sp.m_destroy        ' procedure.
          if (m_p) then                   ' Is the pointer non-null ?
               m_refcount = sp.m_refcount ' Copy a pointer to the reference count.
               ASSERT(m_refcount)         ' Assuming m_refcount is not null..
               *m_refcount += 1           ' Increase the reference count.

          else                            ' Else, null the pointer.
               m_refcount = 0
          end if

     end constructor

     destructor SharedPtr ()

          if (m_p) then
               ASSERT(m_refcount)
               *m_refcount -= 1              ' Decrease the reference count.

               if (0 = *m_refcount) then     ' No more references ? Then destroy
                    if (m_destroy) then      ' the object, if necessary..
                         m_destroy(m_p)
                    end if
                    delete m_refcount        ' ..and destroy the reference count.
               end if
          else                               ' m_refcount shouldn't be null here.
               ASSERT(0 = m_refcount)
          end if

     end destructor

     function SharedPtr.Get () as any ptr
          return m_p
     end function
The default constructor creates a new reference count variable if the raw pointer passed to it is non-null, otherwise no reference count variable is created and the SharedPtr object is said to be 'empty', or null. If given a non-empty SharedPtr object, the copy constructor references the reference count variable from the other SharedPtr object, and increases its value. If a non-empty SharedPtr object is destroyed, it decreases the value of its reference count variable, and destroys the resource if the reference count is zero and the destruction procedure is non-null. The destructor assumes that if the SharedPtr object's pointer is valid, the pointer to the reference count variable is valid as well, which it always should be. This allows typical usage like,
' CreateGizmo now returns a shared pointer object that references a new
' Gizmo object. The shared pointer object knows how to properly free
' Gizmo object resources, so the user need not worry about it.
declare function CreateGimzo (byref id as string) as SharedPtr

' ...

scope
     var sp = CreateGizmo("A")          ' Initialize a SharedPtr object with a
                                        ' "A" object from a factory procedure.
     var p = cast(Gizmo ptr, sp.Get())  ' A temporary variable could be used to
     p->DoSomething()                   ' minimize ugly casting code in
     p->DoSomethingElse()               ' repeated use.

     with *cast(Gizmo ptr, sp.Get())    ' A WITH block is a preferred alternative
          .DoSomething()                ' to using raw pointers, see note below.
          .DoSomethingElse()
     end with

     sp = CreateGimzo("B")              ' The "A" resource is possibly destroyed
                                        ' here, and a new "B" resource is acquired.
end scope                               ' <- the "B" object is possibly
                                        ' destroyed here, who knows or cares.
A special note about SharedPtr.Get: it is used to retrieve the address of the resource being referenced, if any. Having raw pointers to shared resources floating around is generally not a good idea, and defeats the purpose of shared pointer objects. I have to remember to use SharedPtr.Get only when necessary, and to try to avoid rampant raw pointers to shared resources.
When copy assigning to SharedPtr objects, I want the right thing to happen, that is, any resource it previously referenced would be destroyed if necessary, and it will then share a reference to the resource that the other SharedPtr is referencing, if any. I also want to be able to 'nullify' a SharedPtr object easily, and, it would be nice to be able swap the values of two SharedPtr objects:
     type SharedPtr
     public:
          ' ...
          declare operator let (byref sp as SharedPtr)
          declare sub Reset (byval p as any ptr = 0, byval destroy as DestroyProc = 0)
          declare sub Swap_ (byref sp as SharedPtr)
          ' ...
     end type

     sub SharedPtr.Swap_ (byref sp as SharedPtr)

          swap m_p, sp.m_p
          swap m_destroy, sp.m_destroy
          swap m_refcount, sp.m_refcount

     end sub
SharedPtr.Swap_ is an important procedure for
SharedPtr. All it does is swap the values of two
SharedPtr objects, but this allows
SharedPtr.operator let and
SharedPtr.Reset to be implemented in terms of
SharedPtr.Swap_, and everything will work out. Look at the definitions of those procedures:
     ' Initialize a temporary SharedPtr object with the value of sp, and swap
     ' its value with this. The temporary is important because I don't want to
     ' modify sp.
     operator SharedPtr.let (byref sp as SharedPtr)
          this.Swap_(SharedPtr(sp))
     end operator

     ' Same situation, using the 'raw pointer' constructor.
     sub SharedPtr.Reset (byval p as any ptr, byval destroy as DestroyProc)
          this.Swap_(SharedPtr(p, destroy))
     end sub
Assigning to a SharedPtr object with another swaps the value of the object with a temporary copy of the other SharedPtr object. The temporary now references the old resource, and when it is destroyed (after the call the SharedPtr.Swap_) the old resource is destroyed, if necessary. The original SharedPtr object now shares the resource, if any, of the other SharedPtr object. SharedPtr.Reset works the same way; the SharedPtr object will destroy its resource if necessary and point to a new resource, if any. That takes care of SharedPtr operations. Some convenience procedures are implemented simply:
     function SharedPtr.Unique () as Bool
          if (m_p) then
               ASSERT(m_refcount)
               return *m_refcount = 1
          else
               ASSERT(0 = m_refcount)
               return false
          end if
     end function

     function SharedPtr.Usecount () as SizeT
          if (m_p) then
               ASSERT(m_refcount)
               return *m_refcount
          else
               ASSERT(0 = m_refcount)
               return 0
          end if
     end function

     function SharedPtr.ToBool () as Bool
          return m_p <> 0
     end function
SharedPtr.Unique and SharedPtr.Usecount deal with reference count information (they also assume a valid m_refcount given a non-null m_p member) and are intended mostly for debugging purposes. SharedPtr.ToBool provides a way to use SharedPtr objects in boolean expressions (overloading operator SharedPtr.cast seems to be messing with the 'raw pointer' ctor..). Bool is another type alias, this time for a type of value used in boolean expressions, having a value of false (0) or true (-1).
Lastly, I need to overload some global relational operators, operator = and operator <>, to support easy SharedPtr object comparison:
     operator = (byref a as SharedPtr, byref b as SharedPtr) as Bool
          return a.Get() = b.Get()
     end operator

     operator <> (byref a as SharedPtr, byref b as SharedPtr) as Bool
          return a.Get() <> b.Get()
     end operator
That about does it. One thing I would like to add is the ability to rely on a default destruction procedure, but what would this procedure do exactly ? I think a procedure that uses deallocate to free resources is a good default - operator delete is not an option because it needs a typed pointer, not an any pointer. So, I need to change my default constructor and Reset member procedure a little bit:
     declare sub DeallocateProc (byval p as any ptr)

     type SharedPtr
     public:
          declare constructor ( _
               byval p as any ptr = 0, _
               byval destroy as DestroyProc = @DeallocateProc)
          declare sub Reset ( _
               byval p as any ptr = 0, _
               byval destroy as DestroyProc = @DeallocateProc)
          ' ...
     end type
The default constructor and Reset now use DeallocateProc to free resources if no procedure is given. The user will need to supply a null pointer if the resource is not to be destroyed. The implementation of DeallocateProc is simply:
     sub DeallocateProc (byval p as any ptr)
          deallocate(p)
     end sub
SharedPtr objects allow the user to freely pass around references to shared resources without worry of memory leakage or undefined behavior associated with normal pointers. They are designed and intended to be copied around freely (using byval, for example). Working with libraries that return SharedPtr objects to resources rather than normal pointers is simpler; the user can freely share these resources without having to know about their destruction.
One drawback of using SharedPtr objects is efficiency. SharedPtr objects require 3 pointers, and access to resources are through a procedure call and pointer indirection. Also, SharedPtr objects have no visible information on what type of resource they reference; they wrap any pointers. Because of this, the user must cast the pointer returned from SharedPtr.Get to the appropriate type. This can also be error-prone, as there is nothing stopping the user from casting it to the wrong type. So it's important for code to state what kind of resource is being referenced - perhaps with a comment, or with a handy-dandy macro, something like:
# define SharedPtrTo(__) SharedPtr

' ...

declare sub UseGizmo (byval sp as SharedPtrTo(Gizmo))
Perhaps a little redundant in this case, and it's not a foolproof solution by any means, but hey, you work with what you got. :)
P.S. As always, let me know if there are any mistakes. Suggestions, comments and criticism are encouraged, of course.
edit: if anyone is wondering about the linked list and queue containers, they will store elements of type SharedPtr, so I thought it necessary to start with shared pointers first (I'm not the most organized individual :)).
Download the source code: XCP_Step_By_Step,_part_II_stylin_files.tar.gz
Part III:
Linked Lists
The last tutorial in this series took a detour into resource management land and introduced a shared pointer object class called SharedPtr. If you haven't read that, go ahead and do that now, as this tutorial will make use of that class..
Back so soon ? hehe. I'm going to go through designing and implementing linked list and queue object classes. I'll start with the linked list, as the queue will be implemented in terms of that.
In my design process it became clear that I would need to store some kind of pointer as the linked list elements, in order to be able to [easily] create a container for any type. The pointers in the container would then reference the actual 'elements'. Since working with raw pointers is very tiresome for me, I decided to store smart pointers objects that will automagically handle resource management for me. This is an ideal solution since one of my requirements was to be able to control element lifetimes (for example, I want to insert resources from an array, and those resources should not be destroyed). It also has the added benefit of being able to store both kinds of resources in the container without the container having to deal with resource management - a very elegant solution. Copying containers is made safer as well; a copy of a container will have copies of the smart pointer objects of the other. The same is true for inserting resources from other containers.
Linked lists
Linked lists are structures that store elements in a list; each element contains one or more references (or links) to other elements in the list. Depending on the type of linked list, each element may have one or many links. For example, in a singly-linked list, each element links to the next adjacent element in the list, while doubly-linked list elements link to both the previous and next adjacent elements. Skip list elements have links to a variety of elements within the list depending on their position; these kinds of linked lists are good for inserting/searching/deleting, but are a bit more complicated to implement. For my needs, since I only want to iterate through the list forwards and backwards (efficient operations will be handled by my red/black tree object class), a doubly-linked list sounds like the right choice.
There are countless ways to design a doubly-linked list object class and countless more to implement one. I want something robust, yet easy to implement and understand. Some [intrusive] linked lists have their element types contain the links themselves. Others create so called node structures that contain the links and the element data.
Since all of my containers will be storing SharedPtr object values, I could modify the SharedPtr object class to contain previous and next links to other SharedPtr objects. I don't like intrusive solutions like that because not only does it force extra responsibility (and size requirements) on SharedPtr objects, the links will have to have public access rights so the containers can access them, opening up pandora's box with users that go ahead and modify them. Plus, each container has different ways of storing elements - the array object class won't need any kind of intrusive solution - so SharedPtr objects would need information about each kind of container, it's just not an option for me.
So, the non-instrusive approach seems to fit my bill: linked list nodes will store the links to adjacent nodes and element data (SharedPtr objects):
namespace xcp.containers

     ' Must be default constructible and copy-assignable.
     type ListElementType as memory.SharedPtr

namespace detail

     type ListNode
          declare sub Hook (byval node as ListNode ptr)
          declare sub Unhook ()

          ' public for easy access by List and its iterator.
          m_prev as ListNode ptr = any       ' the adjacent nodes in the list, the list
          m_next as ListNode ptr = any       ' object class will make sure they are
                                             ' initialized to proper values.
          m_data as ListElementType
     end type

end namespace ' detail
end namespace ' xcp.containers
First, you'll notice that ListNode members are all public - this allows easy access by the iterator and list object classes. It is put in the nested namespace detail since end-users will never be working with list nodes, only the iterator and list object classes will. ListNode.Hook and ListNode.Unhook are convenience procedures for adding and removing nodes from a list: ListNode.Hook inserts this node into the chain immediately before its parameter, and ListNode.Unhook updates the adjacent nodes in the chain to remove this node. Their implementations look like:
     sub ListNode.Hook (byval position as ListNode ptr)
          m_prev = position->m_prev               ' update this node's links..
          m_next = position
          position->m_prev->m_next = @this        ' update the chain's links..
          position->m_prev = @this
     end sub

     sub ListNode.Unhook ()
          m_prev->m_next = m_next                 ' update the chain's links..
          m_next->m_prev = m_prev
     end sub
Given a node position in a node chain that looks like,
     ..<--[   a    ]<--[ position ]<--[ another ]
          [  node  ]-->[          ]-->[  node   ]-->..
ListNode.Hook will modify the chain and this node to make,
     ..<--[   a    ]<--[  this  ]<--[ position ]<--[ another ]
          [  node  ]-->[  node  ]-->[          ]-->[  node   ]-->..
ListNode.Unhook reverses this process. It only modifies the links in the chain, not the links for this node because it's unecessary.
That's all my list node class needs. The list iterator class will handle what to do when iterating through elements, and that is as follows:
     type ListIterator
          declare constructor (byval node as detail.ListNode ptr = 0)
          ' default copy ctor, dtor and assignment op are fine.

          declare function Increment () as ListIterator ptr
          declare function Decrement () as ListIterator ptr

          declare function PostIncrement () as ListIterator
          declare function PostDecrement () as ListIterator

          declare function Get () as ListElementType ptr

          ' public for easy access by List.
          m_node as detail.ListNode ptr = any
     end type

     ' Compares iterators for inequality (whether they point to the same element or not).
     declare operator = (byref a as ListIterator, byref b as ListIterator) as Bool
     declare operator <> (byref a as ListIterator, byref b as ListIterator) as Bool
Not too much going on here, but a few things need some explanation. First, the default (and only defined) constructor takes a pointer to a ListNode object and initializes ListIterator.m_node with it's value, which is by default null. Since users will never work with ListNode objects, they will only create ListIterator objects by default or copy-construction. The list class will use the default constructor to create iterators from nodes, which you'll see later.
The ListIterator.*crement members are the 'meat' of the ListIterator class and provide all of the traversing functionality. Here are their implementations:
     function ListIterator.Increment () as ListIterator ptr
          m_node = m_node->m_next                 ' Move to the next node and return
          return @this                            ' a reference to this.
     end function

     function ListIterator.Decrement () as ListIterator ptr
          m_node = m_node->m_prev                 ' Move to the previous node and return
          return @this                            ' a reference to this.
     end function

     function ListIterator.PostIncrement () as ListIterator
          var tmp = this                          ' Initialize a temp copy of this,
          this.Increment()                        ' increment this and return the
          return tmp                              ' copy.
     end function

     function ListIterator.PostDecrement () as ListIterator
          var tmp = this                          ' Initialize a temp copy of this,
          this.Decrement()                        ' decrement this and return the
          return tmp                              ' copy.
     end function
ListIterator.Increment and ListIterator.Decrement modify this iterator to point to the next and previous nodes, respectively (by following the node's links). They return references to this iterator in order to facilitate using the iterator in the same expression after moving it, with code like,
     var iter = ListIterator(), iter2 = ListIterator()
     ' ...
     if *iter2.Increment() = iter2 then
     ' ...
It's more of a convenience than anything else (when FreeBASIC supports reference type returns, the fugly dereferencing will no longer be needed). ListIterator.PostIncrement and ListIterator.PostDecrement also move this iterator, but they return the iterator's value before the move. Basically, these members are replicating the functionality of the incremental operators in languages such as C or C++ (for example, C++'s T::operator ++ and T::operator ++(int)).
ListIterator.Get simply returns the value of the ListIterator.m_node member. Since no checking is being done, using this procedure on an invalid iterator (iterator validity will be discussed later) will result in undefined behavior. The global relational operators just compare two iterator's ListIterator.m_node members for equality:
     operator <> (byref a as ListIterator, byref b as ListIterator) as Bool
          return a.m_node <> b.m_node
     end operator

     operator = (byref a as ListIterator, byref b as ListIterator) as Bool
          return a.m_node = b.m_node
     end operator
That's all the responsibility ListIterator is given: traversing elements in a linked list container.
Now for the linked list class itself. In many implementations like this, the first and last nodes of the list will have their previous and next pointers null, respectively, signifying no more adjacent nodes. If I were to follow this pattern, linked list objects would need to store references to the first and last nodes, in order to quickly find the end without iterating through the whole list. Having two references seems rather wasteful though, I'd like to get away with having just one. I could just store a reference to the first node, and create a circular list, where the first and last nodes are linked to each other directly - finding the end of the list would just mean iterating to the first node's previous node (simple pointer stuff). If the pointer to the first node is null, the list is empty (a single node linking to itself is a list containing one element).
This approach has merit, but I think I will go with an implementation similar to that of libstdc++'s std::list<>. It also is a circular list internally, but the list objects store a so-called root node object (not a reference, or pointer, to one). This root node is said to point to one-past the end of the list, that is, the position after the last element. Doing it this way makes iterating through the list much easier, as I'll show you later, and it makes it possible to insert elements anywhere in the container in a consistent way (without any edge cases).
I want to be able to insert elements anywhere in the list (including at the beginning and the end). I also want to remove any element. Here's a first draft:
     type List
     public:
          declare constructor ()
          declare destructor ()

          declare function Begin () as ListIterator
          declare function End_ () as ListIterator
          declare function Front () as ListElementType ptr
          declare function Back () as ListElementType ptr

          declare function Insert ( _
               byval position as ListIterator, byref x as ListElementType _
          ) as ListIterator
          declare function Erase (byval position as ListIterator) as ListIterator
          declare sub Clear ()

          declare sub PushFront (byref x as ListElementType)
          declare sub PushBack (byref x as ListElementType)
          declare sub PopFront ()
          declare sub PopBack ()

     private:
          m_node as ListNode
     end type
List has one member data, List.m_node, and it represents the node after the last node. The default constructor initializes this member:
     constructor List ()
          m_node.m_prev = @m_node
          m_node.m_next = @m_node
     end constructor
An empty list, List.m_node links to itself:
     ..<--[ m_node ]<--[ m_node ]<--[ m_node ]
          [        ]-->[        ]-->[        ]-->..
A single-element (node) list, List.m_node and the node link to eachother:
     ..<--[  the   ]<--[ m_node ]<--[  the   ]
          [  node  ]-->[        ]-->[  node  ]-->..
A two or more element (node) list, List.m_node links to the first and last nodes:
     ..<--[  last  ]<--[ m_node ]<--[  first  ]
          [  node  ]-->[        ]-->[  node   ]-->..
This is a circular list, so List.m_node links to both the first and last nodes. For an empty list, this means that it links to itself, as the default constructor shows. List.Begin and List.End_ return iterators to the first and one-past the end elements, respectively, while List.Front and List.Back return references to the actual first and last element data, respectively:
     function List.Begin () as ListIterator
          return m_node.m_next                    ' convert the first node into an
     end function                                 ' iterator value.

     function List.End_ () as ListIterator
          return @m_node                          ' convert the root node into an
     end function                                 ' iterator value.

     function List.Front () as ListElementType ptr
          return @m_node.m_next->m_data
     end function

     function List.Back () as ListElementType ptr
          return @m_node.m_prev->m_data
     end function
Pretty straightforward. Returning a pointer to a node actually returns an iterator, thanks to ListIterator's default constructor. List.Insert is equally straightforward, and List.PushBack shows off the benefits of having a one-past the end iterator:
     function List.Insert (byval position as ListIterator, byref x as ListElementType) as ListIterator
          var newnode = new ListNode              ' get a new node.
          newnode->m_data = x                     ' copy assign to the element data.
          newnode->Hook(position.m_node)          ' hook the node into the chain right
          return newnode                          ' before 'position', and return it.
     end function

     sub List.PushFront (byref x as ListElementType)
          var tmp = this.Insert(this.Begin(), x)
     end sub

     sub List.PushBack (byref x as ListElementType)
          var tmp = this.Insert(this.End_(), x)
     end sub
Neat, huh ? List.Insert inserts the value of an element (a SharedPtr object) into the list immediately prior to position. It returns an iterator to the newly inserted element. List.PushFront inserts a value before the first element, and List.PushBack inserts a value before one-passed-the-end of the list - iow, at the back of the container. If the user calls List.PushBack on a list that looks like,
     ..<--[  last  ]<--[ m_node ]
          [  node  ]-->[        ]-->..
the list will then look like,
     ..<--[  last  ]<--[  new   ]<--[ m_node ]
          [  node  ]-->[  node  ]-->[        ]-->..
with the new node sandwiched in between the last node and the root node - the new node is now the last node in the list. This works even if the list is empty (work it out on paper), so there are no edge cases to worry about. The explicit temporary iterator tmp is a necessary evil, since FreeBASIC currently does not support ignoring a non-scalar procedure return value.
List.Erase removes (and destroys) the element at a certain position, and returns an iterator to the next element, and List.Clear erases all elements, that is, it makes the list empty:
     function List.Erase (byval position as ListIterator) as ListIterator
          var nextnode = position.m_node->m_next  ' Get the next node.
          position.m_node->Unhook()               ' Unhook the node from the chain.
          delete position.m_node                  ' Destroy the node and its element
          return nextnode                         ' data and return the next node.
     end function

     sub List.Clear ()
          var first = this.Begin(), last = this.End_()
          do while first <> last
               first = this.Erase(first)
          loop
     end sub
List.Clear has interesting behavior. It relies on the fact that List.Erase returns an iterator to the element after the one erased, which is why first is never incremented, it is simply reassigned the result from List.Erase as it goes through the beginning to the end of the list. By the way, List.Clear is all the destructor has to do when List objects are destroyed. Finally, the List.PopFront and List.PopBack should have implementations like you'd expect:
     sub List.PopFront ()
          var tmp = this.Erase(this.Begin())      ' Erase the first element.
     end sub

     sub List.PopBack ()
          var tmp = this.Erase(*this.End_().Decrement())    ' Erase the last element.
     end sub
As should be obvious, calling either one of these functions on an empty list will result in undefined behavior, so now I need to add some accessor procedures that provide information about the list:
     type List
     public:
          ' ...
          declare function Empty () as Bool
          declare function Size () as SizeT
     end type
These members also do what you'd expect: Since an empty list's root node links to itself, List.Empty checks for that, and List.Size returns the size, in number of elements, of the list:
     function List.Empty () as Bool
          return m_node.m_next = @m_node
     end function

     function List.Size () as SizeT
          var sz = 0
          var first = Begin(), last = End_()
          do while (first.PostIncrement() <> last)
               sz += 1
          loop
          return sz
     end function
List.Size starts at the beginning and iterates through the list, incrementing a size variable until it hits the end. Note the use of ListIterator.PostIncrement. The loop could be written like this as well:
          do while (first <> last)
               sz += 1
               first.Increment()
          loop
Again, ignoring the return value from ListIterator.Increment is allowed because it is a pointer (scalar) value. As you can see, I've chosen not to have List objects store a running size total to make the other member procedures easier to implement. Modifying it to do so is not hard though.
That does it for my first pass. I still need to implement copy constructor and copy assignment members. I also want to be able to insert a range of element values, perhaps from another linked list container. While I'm at it, I might as well add the ability to construct and assign to a list from a range of element values, too. All this functionality can be implemented in terms of a ranged version of an insert member:
     sub List.Insert (byval position as ListIterator, byval first as ListIterator, byval last as ListIterator)
          do while (first <> last)
               var tmp = this.Insert(position, *first.PostIncrement().Get())
          loop
     end sub
It just iterates through the range and inserts the element value at the constant position, preserving the order of the element values. With this simple procedure comes even simpler ones:
     constructor List (byref x as List)
          m_node.m_prev = @m_node
          m_node.m_next = @m_node

          this.Insert(this.End_(), x.Begin(), x.End_())
     end constructor

     constructor List (byval first as ListIterator, byval last as ListIterator)
          m_node.m_prev = @m_node
          m_node.m_next = @m_node

          this.Insert(this.End_(), first, last)
     end constructor

     operator List.let (byref x as List)
          this.Clear()
          this.Insert(this.End_(), x.Begin(), x.End_())
     end operator

     sub List.Assign (byref x as List)
          this.Clear()
          this.Insert(this.End_(), x.Begin(), x.End_())
     end sub

     sub List.Assign (byval first as ListIterator, byval last as ListIterator)
          this.Clear()
          this.Insert(this.End_(), first, last)
     end sub
A very intuitive solution. It's educational to note that in my particular situation, copy assigning elements (SharedPtr objects) has the same effect as destroying them and creating new ones. This means that a member like List.Assign could be implemented like,
     sub List.Assign (byref x as List)
          ' Whichever list is smaller, copy assign that many elements to this list.
          ' If this list is smaller than 'x' then
          '    Insert the remaining elements of 'x' at the back of this list.
          ' Else
          '    Erase the remaining elements from this list.
     end sub
to reduce the cost of destroying all of the nodes and creating new ones when inserting the new elements. The benefits from this kind of refactoring is most evident when dealing with really large lists (memory allocation is slooow). Such an optimization would be good for a reader exercise (all tutorials should have reader exercises, right ? :)). The only thing left to implement would be an interface for erasing a range of elements in a list:
     function List.Erase (byval first as ListIterator, byval last as ListIterator) as ListIterator
          do while (first <> last)                ' For each element in the range,
               first = this.Erase(first)          ' erase it :),
          loop
          return last                             ' and return the position after
     end function                                 ' the last erased element.

     sub List.Clear ()
          var tmp = this.Erase(this.Begin(), this.End_())
     end sub
Since List.Clear is really a just special case of the ranged List.Erase (the range is the entire list), I've moved its code there and implemented it in terms of ranged List.Erase.
Now about iterator validity. An iterator is invalid if it does not point to an existing element (or node). That means that all default-constructed iterators are invalid (since their node pointer is null). Incrementing, decrementing or calling ListIterator.Get with invalid iterators is undefined behavior since the internal node pointer doesn't reference a valid node. Also, incrementing an iterator equal to List.End_ is undefined behavior. The list may internally be circular, but it's not as far as the user is concerned - a list has a definite end that cannot be iterated past, and that's List.End_. The same is true for calling ListIterator.Get on an iterator equal to List.End. This is because each container is implemented differently, so having container.End_ follow the same restricted convention across all containers allows more freedom in how they can be implemented.
Linked lists inherently provide pretty 'safe' iterator validity rules. Since insertion or removal of list elements does not require elements (nodes) to be moved around, iterators to other elements in the list remain valid. Of course, iterators that point to erased elements are always invalidated. Contrast this with insertion or removal of array elements, where elements after the insertion or removal point need to be moved around, thus invalidating iterators that point to them. Inserting and removing elements in the red/black tree will have similar effects - the red/black tree is self-balancing based on value, so insertion or removal may move all elements around, depending on their value.
Here's a small example on how to use this shiny linked list object class:
     type Gimzo : ... : end type

     declare sub DestroyGizmo (p as any ptr)      ' Used by SharedPtr objects.

     ' ...

     function PrintGizmoIDs (byref l as List)
          var first = l.Begin(), last = l.End_()
          do while (first <> last)
               print cast(Gimzo ptr, *first.Get()->Get())->ID()
          loop
     end function

     ' ...
     scope
          var l = List()                          ' Create an empty list.

          for i as integer = 1 to 5
               l.PushBack(SharedPtr(new Gizmo(str(i)), @DestroyGizmo))
                                                  ' Add 5 new Gimzo object references
                                                  ' to the list in order.
          next
          var g = Gimzo("100")                    ' Instantiate a local Gizmo object.
          l.PushFront(SharedPtr(g, 0))            ' Insert a non-destructive reference
                                                  ' to the local object.
          PrintGizmoIDs(l)
     end scope                                    ' <- All five original Gizmo objects
                                                  ' are destroyed, but not the local
                                                  ' Gizmo object.
That's it for the linked list container, now on to the queue - this will be much quicker, promise :). First, the interface. A queue is a first-in, first-out type of container, like a line at a theme park: customers first in line are first out of the line (to get on the ride, and excluding people with wheelchairs). So when elements are added to the queue they are removed, or popped, from the queue after all the elements already in the queue have been popped. Naturally, queues can be copied and assigned to. There also needs to be a way to get the value of the next element up for removal. This leads me to the following:
     type QueueContainerType as List
     type QueueElementType as ListElementType

     type Queue
     public:
          declare constructor (byref c as QueueContainerType = QueueContainerType())
          ' Default copy ctor, copy assignment and dtor are fine.

          declare function Empty () as Bool
          declare function Size () as SizeT

          declare function Front () as QueueElementType ptr
          declare function Back () as QueueElementType ptr

          declare sub Push (byref x as QueueElementType)
          declare sub Pop ()
     private:
          m_container as QueueContainerType
     end type
That's it. I've decided to create type aliases for the underlying container type as well, just in case I want to change it to something else later on for some crazy reason. You have the usual capacity-related members, accessors for either end of the queue, and insert (Queue.Push) and erase (Queue.Pop) members. Upon instantiation of a Queue object, the underlying container object gets default constructed, which queue's default constructor then assigns to, if necessary. The remaining interface is implemented almost too easily:
     function Empty () as Bool
          return m_container.Empty()
     end function

     function Size () as SizeT
          return m_container.Size()
     end function

     function Front () as QueueElementType ptr
          return m_container.Front()
     end function

     function Back () as QueueElementType ptr
          return m_container.Back()
     end function

     sub Push (byref x as QueueElementType)
          m_container.PushBack(x)
     end sub

     sub Pop ()
          m_container.PopFront()
     end sub
The only requirements of QueueContainerType is that it support the following interfaces,
     container.Empty
     container.Size
     container.Front
     container.Back
     container.PushBack
     container.PopFront
and that its objects need to be default-constructible and copy-assignable. My array container will meet those requirements, so it could also be used as the underlying Queue container type. But I'll tackle the array (and stack) container next time. :)
-stylin
View the original versions of the tutorial: Part I, Part II and Part III.
Final Word
QB Express has finally returned to its glory days. After a year in the dark, it looks like everything is back on track, and we're set to keep publishing for dozens of issues to come. Now that we have two dozen issues down, how about we put together another three or four dozen?
But that's only possible if YOU continue to contribute to the magazine!
Issue #25 Deadline: October 1st
As always, we need tutorials, reviews, articles/editorials, comics, news briefs, letters to the editor, and content for the gallery.
Make sure you get all of your articles and content in by October 1st! By then, I should be permanently settled in my new apartment in Los Angeles, CA, and seeking a job in the television industry. But that doesn't mean I won't have time to put together the next QB Express issue! Send me your best stuff, and I promise you, you'll get the best issue I can possibly put together.
Until next time...END.
-Pete
Copyright © Pete Berg and contributors, 2007. All rights reserverd.
This design is based loosely on St.ndard Bea.er by Altherac.